Note: The information contained in this topic pertains to the green screen portion of the IntelliDealer system and will be updated periodically. If you do not have access to green screen, contact your system administrator for more information. As best practice VitalEdge recommends using the IntelliDealer version of any of following tables whenever possible.
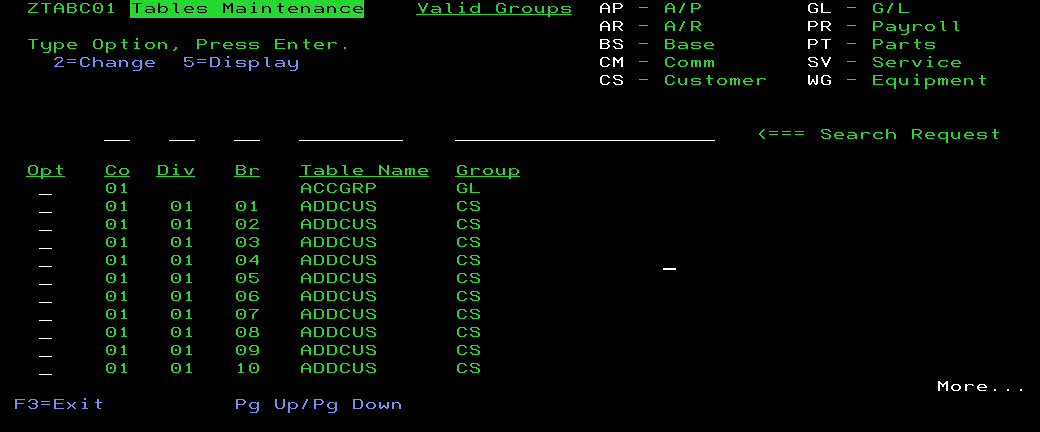
The following tables allow you customize the performance and operation of the IntelliDealer system. To access the tables, use the WRKPFWVAL command from anywhere within the green screen application to access the Tables Maintenance screen. The WRKPFWVAL program is protected by menu option security.
These fields typically appear in each table:
- COMPANY #—The company number that the selected record applies to.
- DIVISION #—The division number that the selected record applies to.
- BRANCH #—The branch number that the selected record applies to.
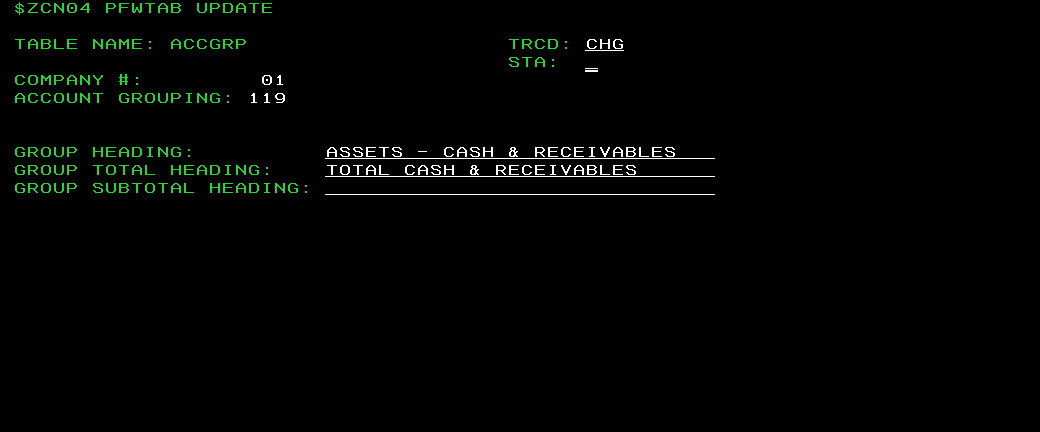
ACCGRP table
The ACCGRP table allows you to group Balance Sheet accounts into categories according to the first three digits of the account number. This grouping is reflected on your financial statements.
The CC1STACCT table should also be considered when setting up this table. The titles set up in ACCGRP will print each time there is a change in the first three digits of the account number. The titles set up in CC1STACCT print when there is a change in the first digit of the account number. Please refer to the CC1STACCT table for more information.The following fields appear on the ACCGRP table:
| Field | Description |
|---|---|
| Account Grouping | Enter the first three digits of the last account number that falls in this group. For example, the account grouping might be “123”. All account numbers which start with values smaller than 123 (e.g. 100, 110, 121) and larger than the previous account grouping number will be included in the account grouping 123. |
| Group Heading | Enter the title which will appear at the start of this group of accounts. Up to 30 characters are available. |
| Group Total Heading | Enter the text that will appear on a total line after this group of accounts. This line will describe the total for the group. A maximum of 30 characters is allowed. |
| Group Subtotal Heading | If a subtotal is desired, enter the subtotal text. A subtotal is the total of all accounts up to this point. For example, group 123 may have a total and group 150 may have a total: a subtotal will be the grand total of the accounts in those two groups. Up to 30 characters can be used for this description. If no subtotal is desired, leave this field blank. |
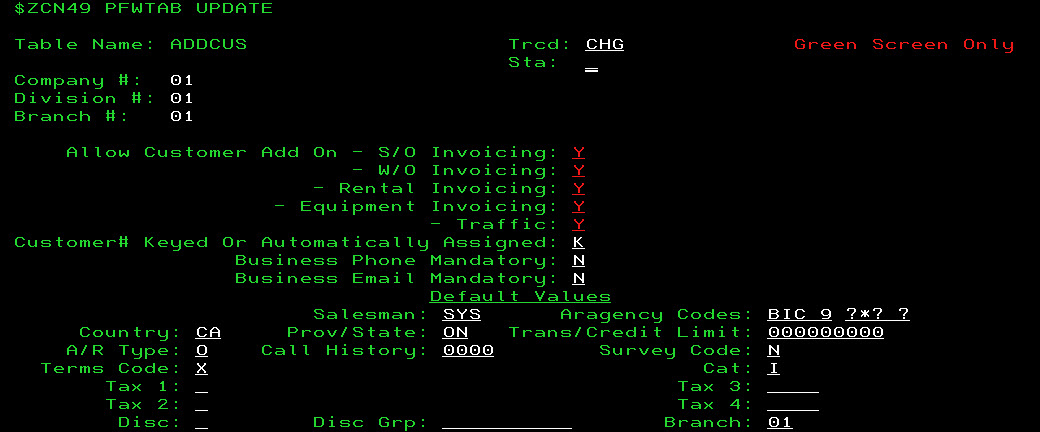
ADDCUS table
The ADDCUS table allows you to configure how Customer Profiles are added to your system, as well as the defaults that will automatically be loaded to a profile when a new customer profile is added in IntelliDealer.
The following fields appear on the ADDCUS table:
| Field | Description |
|---|---|
| Allow Customer Add On (Y/N) | Allows you to select which modules users will be able (Y) or unable (N) to quick-add customer profiles from in IntelliDealer; either S/O Invoicing (Sales Orders), W/O Invoicing (Work Orders), Rental Invoicing, Equipment Invoicing, or Traffic. The user who quick-adds the customer profile does not have the ability to determine the A/R type or Terms code (cash, charge, etc.) for the customer. Normally, the administration office periodically generates a report on all quick-added customer records and adjusts them as needed. |
| Customer # Keyed or Automatically Assigned (K/A) | Allows you to select whether quick-added customer profiles will have user-generated customer numbers (K) or system-generated customer numbers (A). System-generated numbers consist of the five-character search typed in by the user (usually the last name of the customer) plus a number. For example, SMITH001, SMITH002, etc. |
| Default Values | Allows you to configure the default values entered into each field when quick-adding a customer profile from any of the modules listed in the Allow Customer Add On field noted above. For details, see the table below. |
The following Default Values are configurable on the ADDCUS table:
| Value | Description |
|---|---|
| Salesman | Reports can be extracted on all customers defined with a specific salesman code. VitalEdge recommends using the salesman number “SYS” in this field, so that all quick-added customer records can be reported on and changed as necessary. |
| Aragency Codes | Specify the cash code which should be used as a default for quick-added customer records. Leave this field blank to indicate that quick-added customers are limited to cash only, or specify up to five valid default A/R agency codes to allow quick-added customers to an A/R agency. The first cash code in the list become the default cash code in the CMASAA file. If you leave the first character blank, the customer’s agency code defaults to cash, even if there are other codes on the list. As of IntelliDealer Insight, a second portion has been added to this field to default the Card Number associated to a cash code when quick-adding a customer profile to the system.For example, if the value in the first portion of the field is BI and the value in the second portion of the field is ?*, whenever a new customer is added to the system, the A/R agency codes B and I are added to the A/R Agency tab of the Customer Profile with ? and * as their respective card numbers. As a result of this change, all cash codes listed in the first portion of the Aragency Codes field must have an associated card number listed in the second portion of the field. * Do Not Save Card Number After Request - This means that when invoicing the customer, the user is prompted to enter the card number. After it is entered, it is not stored anywhere in the system and the prompt appears each time the card number is required. ? Save Card# After Request - This means that when invoicing the customer, the user is prompted to enter the card number. After it is entered there are three possible scenarios: a) For agencies coded as Payment Card Interface (with MERCHMGR in the ARAGENCY table under Agency Name) where the device is not an MX880, the system will save just the last four digits of the card on the profile (ie. XXXXXXXXXXXXX2222). b) For agencies coded as Payment Card Interface (with MERCHMGR in the ARAGENCY table under Agency Name) where the device is an MX880, nothing is saved c) For all other agencies, the card number keyed replaces the ? for that agency code on the A/R Agency tab of the customer profile and not prompt again User-defined codes can be used in this field. Please refer to the tables ARAGENCY and CASHTAB for further information on cash codes. |
| Province/ State | Two character codes representing states are predefined in the system. Codes 01 through 09 are used to denote Canadian provinces. Please consult VitalEdge for the appropriate code for your state or province. |
| Call History | Controls the number of calls that will be stored on the system. Any calls that exceed this value are purged at the end of the month provided that they are 2 years and older. |
| Trans/ Credit Limit | The default credit limit and transaction limit for the default A/R Agency code. For example, a credit limit and transaction limit of 999999 can be assigned when a customer is added in order to prevent the authorization prompt screen from appearing. |
| A/R Type (O/B/T) | Allows you to select the default A/R type used for new customers added to the system; either Open item (O), Balance forward (B), or True balance forward (T).
|
| Survey Code (Y/N) | This field is used by dealers using the strategy feed back interface. It indicates whether dealers participate in submitting the customer survey code information to the appropriate vendor. If you do not use the interface you can still use the code for internal purposes. |
| Terms Code | A terms code of “X” is recommended if you wish to limit quick-added customers to a cash only basis. Some sites allow their new customers to charge items to an in-house account immediately, in which case this field would be left blank. Whether new customers are limited to cash only is a matter of company policy. |
| Cat (Category) (I/B/N) | Specify the customer category which should be used as a default for quick-added customer records. The valid options are: (I) to denote an Individual, (B) to denote a Business, or (N) which indicates an Internal Customer. |
| Tax 1 (1-9/ A-Z) | If you are using Tax 1 in your organization and quick-added customers are subject to this tax, enter the code of the tax which should be defined on quick-added customer records. Valid codes which can be defined in the TAX1table (or on the Tax 1 screen in IntelliDealer) are numbers 1 through 9. Any letter(s) can also be defined in the TAX1 table to denote that no tax applies. The Tax 1 field can be left blank. If Tax 1 does not apply or is not being used, the letter “X” is usually used in this field to indicate the exemption. |
| Tax 3 | If you are using Tax 3 in your organization and quick-added customers are subject to this tax, enter the code of the tax which should be defined on quick-added customer records. Valid codes are defined in the TAX3 table (or the Tax 3 screen in IntelliDealer). |
| Tax 2 (1-9/ A-Z) | If you are using Tax 2 in your organization and quick-added customers are subject to this tax, enter the code of the tax which should be defined on quick-added customer records. Valid codes which can be defined in the TAX2 table (or on the Tax 2 screen in IntelliDealer)are numbers 1 through 9. Any letter(s) can also be defined in the TAX2 table to denote that no tax applies. The Tax 2 field can be left blank. If Tax 2 does not apply or is not being used, the letter “X” is usually used in this field to indicate the exemption. |
| Tax 4 | If you are using Tax 4 in your organization and quick-added customers are subject to this tax, enter the code of the tax which should be defined on quick-added customer records. Valid codes are defined in the TAX4 table (or the Tax 4 screen in IntelliDealer). |
| Disc (Discount) (1-9/ A-Z) | Enter the discount code which should be defined for quick-added customers. Numbers 1 through 9 represent valid discount codes as defined in the DISCOUNT table (or on the Add/ Change Discount screen in IntelliDealer). Any letter(s) can also be defined in the DISCOUNT table to denote that no discount should be given. Commonly, “X” or blank is used to represent no discount. |
| Disc Grp (Discount Group Code) | The default Pricing Group code applied to all new customers added to the system. |
| Branch | Specify the customer branch which should be used as a default for quick-added customer records. This field can be set to a valid branch value or left blank, in which case the customer is assigned to the current branch. |
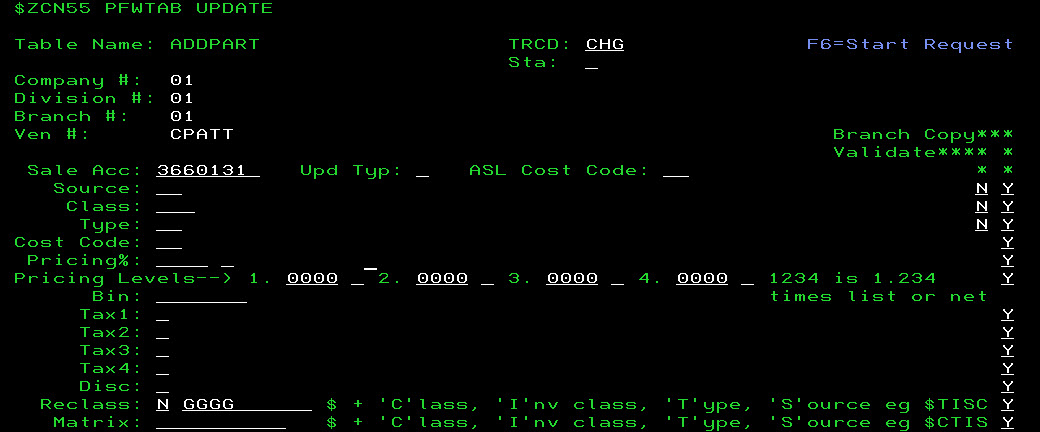
PartAdds table
The PartAdds table allows you to configure how Part Profiles are added to your system, as well as the defaults that will automatically be loaded to a profile when a new part is quick-added in IntelliDealer.Parts that are added through IntelliDealer are ones which are not in the Parts Master Maintenance file, and may or may not be in the Master Price file. The Master Price file is generated when a vendor’s price tape is loaded onto your system. The parts on the price tape(s) may or may not exist in your Parts Master Maintenance file.
If a dealer is using the PartAdds table and sets Pricing Levels make sure that if they add a level on Costthe factor is calculated in the Level fields and is based off List. If List changes it continues the same factor off of the new List value (factor is always off of the current parts list value). Dealers are better suited to use the customer parts pricing option as this gives them better control than the Pricing Level fields that store only a factor not a price. In IntelliDealer, the pricing levels are keyed as the price value, but stored as the factor of the List price. In the following example List price is $1000, Level price is 7.00 on the screen, but the stored factor would be 99.3:
A list price of 1000.00 and the level 1 price is 7.00 , the level 1 value in the PARTMAST file would show as 99.3. (99.3 % below the list price or 0.7 % of the list)
Calculation: 7 / 1000 x 100 = 0.7 (100 - 0.7 = 99.3)
99.3 would be how the factor is stored in the Pricing Levels field. The calculation would be adjusted by rounding so keep that in mind.
Some dealers use pricing levels if they want the Sales Account to go to a different G/L account. Pricing Levels must be less than 2 times the list price.
To remove a vendor from the PartAdds table, type 'R' in the status field, then press Enter.The vendor is immediately deleted from the PartAdds table.
The fields on the PartAdds table are:
| Field | Description |
|---|---|
| Sale Acc (Sale Account) | Enter the parts sale account which corresponds to the selected vendor code. When a part is added from the master price file for this vendor to the Parts Master Maintenance module, this is the sale account automatically be used for the part. |
| UPD TYP (Updated Type) (A/M) | Specify whether quick-added parts should be updated either: (A) Automatically when a price tape is run. (If the part is found on the price tape for the vendor, its information such as List and Cost is updated.) |
| ASL Cost Code (Authorized Stocking Lists Cost Code) | Deprecated. Enter the default Authorized Stocking Lists cost code to be used when a part is added to the system. |
| Source | Enter the source to which quick-added parts should default. If the part being quick-added is found in the PARTPRC file (i.e. on a Master Price file in the system), then the PARTPRC values are used instead of the value in this field. |
| Class | Enter the class to which quick-added parts should default. If the part being quick-added is found in the PARTPRC file (i.e. on a Master Price file in the system), then the PARTPRC values are used instead of the value in this field. |
| Type | Enter the type to which quick-added parts should default. If the part being quick-added is found in the PARTPRC file (i.e. on a Master Price file in the system), then the PARTPRC values are used instead of the value in this field. |
| Cost Code | Enter the default cost code to be used when a part is added to the system. Possible cost code values are stored in the COSTCODE table. |
| Pricing % | Enter the percent which should be applied to quick-added parts to obtain a selling price. This is a three-character field which contains two decimal places. For example, a percentage of ten percent would be entered as 010. In the second field, specify whether this percent is based on either the List price of the part (L), or the Net cost of the part (N). If the part being quick-added is found in the PARTPRC file (i.e. on a Master Price file in the system) and a Pricing Matrix applies to that file, the matrix is used instead of this percent. |
| Pricing Levels 1-4 (N/L) | The selling price for pricing level 1,2,3 and 4, as per the Part Master Maintenance module. Pricing levels usually refer to things such as wholesale price, fleet price, and jobber price. For example, 1234 is 1.234 times either the list or net price. If no pricing levels apply to the part, then leave these fields blank or zero. |
| Bin | Enter the bin which quick-added parts should default. It is recommended to use a value such as “NOBIN”. Reports on parts quick-added to the system can then be extracted by this bin value. |
| Tax1 | If you are using Tax 1 in your organization and quick-added parts are subject to this tax, enter the code of the tax which should be defined on quick-added parts records. Valid codes (which can be defined in the TAX1 table, or on the Tax 1 screen in IntelliDealer) are numbers 1 through 9 or a blank value. Any letter(s) can also be defined to denote that no tax applies. If Tax 1 does not apply or is not being used, the letter “X” is usually used in this field to indicate the exemption. If the application of Tax 1 should be determined by the customer master record, leave this field blank. |
| Tax2 | If you are using Tax 2 in your organization and quick-added parts are subject to this tax, enter the code of the tax which should be defined on quick-added parts records. Valid codes (which can be defined in the TAX2 table, or on the Tax 2 screen in IntelliDealer) are numbers 1 through 9 or a blank value. Any letter(s) can also be defined to denote that no tax applies. If Tax 2 does not apply or is not being used, the letter “X” is usually used in this field to indicate the exemption. If the application of Tax 2 should be determined by the customer master record, leave this field blank. |
| Tax3 | If you are using Tax 3 in your organization, specify whether quick-added parts are subject to this tax: (Y): Yes, Tax 3 is charged on the part if the customer purchasing the part is subject to TAX3 and a valid TAX3 code is defined on the customer’s account or (N): No, Tax 3 is not be charged on the part, regardless of the customer's tax status Valid Tax 3 codes are defined in the TAX3 table or on the Tax3 screen in IntelliDealer. |
| Tax4 | If you are using Tax 4 in your organization, specify whether quick-added parts are subject to this tax: (Y): Yes, Tax 4 is charged on the part if the customer purchasing the part is subject to TAX4 and a valid TAX4 code is defined on the customer’s account or (N): No, Tax 4 is not charged on the part, regardless of the customer's tax status Valid Tax 4 codes are defined in the TAX4 table or on the Tax4 screen in IntelliDealer. |
| Disc | If you are using discounts in your organization and quick-added parts are subject to the discounts, enter the discount code which should be defined on quick-added parts records. Valid codes (which are defined in the DISCOUNT table or on the Add/ Change Discount screen in IntelliDealer) are numbers 1 through 9 or a blank value. Any letter(s) can also be defined to denote that no discount applies. If discounts do not apply or are not being used, the letter “X” is usually used in this field to indicate the exemption. If the application of discounts should be determined by the customer master record, leave this field blank. |
| Reclass | Specify whether quick-added parts should be subject to OFC (Order Formula Code) reclassing. You can set-up the PartAdds table so that it calculates the Reclass and Matrix values based on a formula. This must be entered using the following syntax: Dollar Sign ($) followed by one or more of the following letters: C I S T (Where C = Class, I = Inventory Class, S = Source, T = Type) For example, if Source = AA, and Class = BBB, and Type = CC for a part, then the formula $SCT will tell the system to derive the value based on a concatenation of these 3 items. This would result in a value of AABBBCC. |
| Matrix | Specify a price matrix code to determine what the proper price increase % a part should be. You can set-up the PartAdds table so that it calculates the Reclass and Matrix values based on a formula.This must be entered using the following syntax: Dollar Sign ($) followed by one or more of the following letters: C I S T (Where C = Class, I = Inventory Class, S = Source, T = Type) For example, if Source = AA, and Class = BBB, and Type = CC for a part, then the formula $SCT tells the system to derive the value based on a concatenation of these three items. This would result in a value of AABBBCC. |
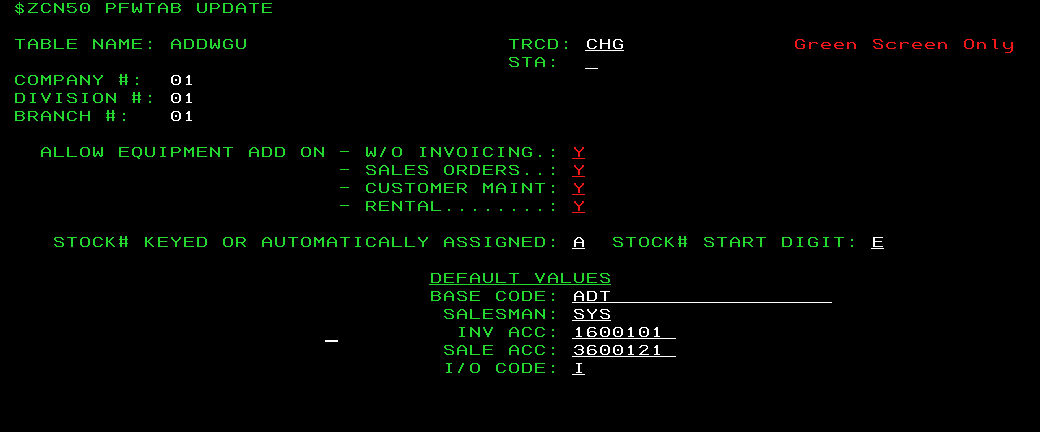
ADDWGU Table
The ADDWGU table allows you to configure the information added to customer-owned equipment units that were not previously recorded in the system. Typically, this happens the first time a unit is brought into the dealership for service or when it is acquired as part of a trade. When the unit is added to the system it is given a stock number; if the unit is quick-added through service, sales orders, or customer maintenance, the status of the unit is I (Invoiced); if the unit is quick added through an equipment invoice, the status of the unit is V (Inventory). Once recorded to the system, the unit is attached to the customer record and made available for future reference.
The fields appear on the ADDWGU table are:
| Field | Description |
|---|---|
| Allow Equipment Add On (Y/N) | Use this field to determine which IntelliDealer modules the user is (Y) or is not (N) be able to quick-add customer owned pieces of equipment to the system; either W/O Invoicing, Sales Orders, Customer Maintenance, or Rental. |
| Stock # Keyed or Automatically Assigned (K/A) |
Determines whether quick-added customer-owned units have stock numbers automatically assigned to them by the system (A) or force the user to key in the stock number upon adding the unit (K). System-assigned stock numbers are six-character sequential numbers. If a starting digit is used (see the Stock # Start Digit field below), it is followed by six numbers. The starting sequence number can be specified by contacting VitalEdge. |
| Stock # Start Digit |
If stock numbers are to be automatically assigned by the system (A is entered in the Stock # Keyed or Automatically Assigned field above), enter the start digit to be used as a prefix to the stock number. If no prefix is desired, leave this field blank. Only the letters A - Z and numbers 1 - 9 can be used as acceptable start digits. |
Default Values
If quick-added customer owned units are allowed at your dealership (ie. the Allow Equipment Add On switch is set to Y for any of the IntelliDealer modules listed), the options in this field allow you to set the system defaults that will be applied to each unit when they are added:
| Field | Description |
|---|---|
| Base Code |
The base code that will be applied to customer-owned units. VitalEdge suggests a miscellaneous base code (such as "MISSYS") so that customer-owned units are easily identifiable in the system. Miscellaneous base codes are configured on the Add Base & Options screen in IntelliDealer. |
| Salesman | Reports can be extracted on all equipment defined with a specific salesman code. VitalEdge recommends using the salesman number “SYS” in this field so that all quick-added customer equipment records can be reported on and changed as necessary. |
| Inv Acc |
Enter the default Inventory G/L account which should be used for quick-added equipment records. This account number is for reference only and no amounts are posted into the G/L for quick-added pieces of equipment. The account number entered in this field must be a Complete Good Inv. Comb. account as defined in the Application Type field on the Accounts Options screen. (Complete Good Inv. Comb. accounts are defined by an application type of "I" in Chart of Accounts Maintenance in the green screen application.) |
| Sale Acc |
Enter the default Equipment Sale G/L account which should be used for quick-added equipment records. This account number is for reference only, and no amounts are posted into the G/L for quick-added pieces of equipment. The account number entered in this field must be a Sale account as defined in the Application Type field on the Accounts Options screen. (Sale accounts are defined by an application type of "S" in Chart of Accounts Maintenance in the green screen application.) |
| I/O Code (I/O/B) | Enter the default In/Out indicator for newly added machines; either I for in, O for out, or B for branch transfer. |
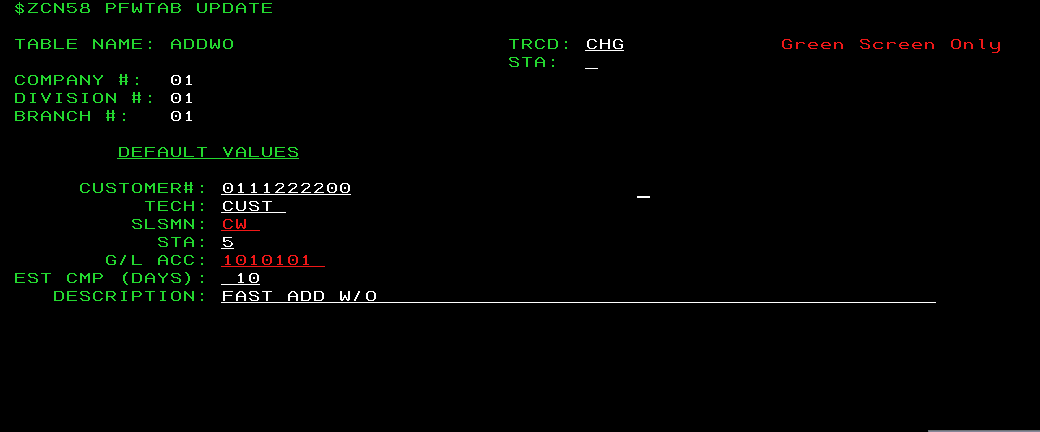
ADDWO table
The ADDWO table allows you to configure the default values that will be used when quick-adding a work order in IntelliDealer. The ability to quick add a work order allows the user to open a work order without having access to all of the Service functions. Quick-added work orders contain all of the basic information needed to proceed with work on a piece of equipment. The work order quick-add feature is often used for standard, recurring jobs, such as cleaning and inspection upon the return of a rental unit.
When a work order is quick-added through the Service menu, the technician ID, salesperson and estimated completion date are the only default values which apply.
The following fields appear on the ADDWO table:
| Field | Description |
|---|---|
| Customer # | Enter the customer number that defaults when quick-adding a work order from the Rental module only. |
| Tech |
Enter the technician number that will be defaulted to when quick-adding a work order from either the Service or Rental modules. |
| SLSMN |
Enter the technician number that defaults when quick-adding a work order from either the Service or Rental modules. VitalEdge recommends a non-standard code such as "SYS" in order to easily identify quick-added work orders by salesperson ID. |
| STA | Enter the work order status that defaults when quick-adding a work order from the Rental module only; either A (active work order), 5 (customer work order), 7 (warranty work order), 8 (internal work order). |
| G/L ACC |
Enter the general ledger account number that defaults when quick-adding a work order from the Rental module only. This is the general ledger account that the work order will be closed to. As such, VitalEdge recommends using the Rental Cleanup expense account. |
| EST CMP (Days) | Enter the number of days to use to calculate the default Estimated Completion Date for work orders that are quick-added from the Service or Rentals modules. For example, if the order is created on January 1st and 5 is entered in this field, the default Estimated Completion Date on the order would be January 5th. |
| Description | Enter the work order description that defaults when quick-adding a work order from the Rental module only. For example, "Clean and Prep Rental Equipment". |
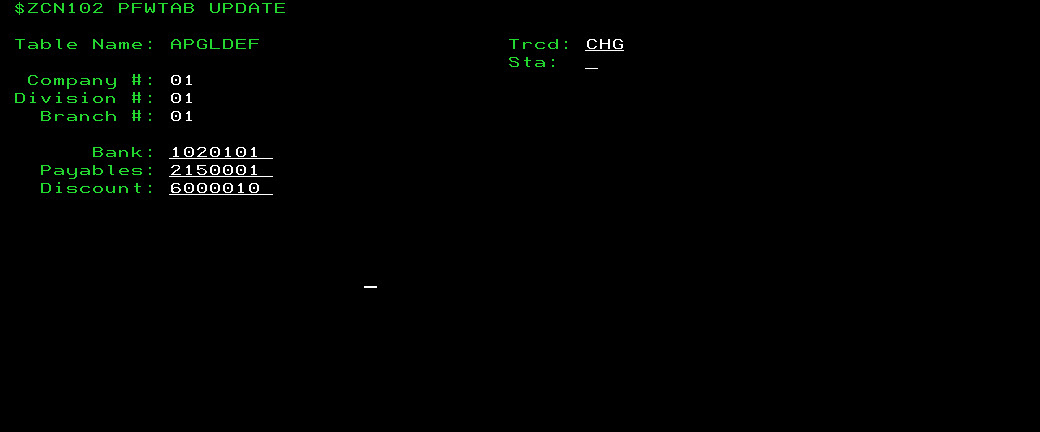
APGLDEF table
The APGLDEF table allows you to configure the default Accounts Payable and General Ledger payable accounts to use when creating A/P vouchers.
The fields on the APGLDEF table are:
| Field | Description |
|---|---|
| Bank | The default bank account number to use when creating the vouchers. |
| Payables | The default payables account number to use when creating the vouchers. |
| Discount | The default discount account number to use when creating the vouchers, if applicable. |
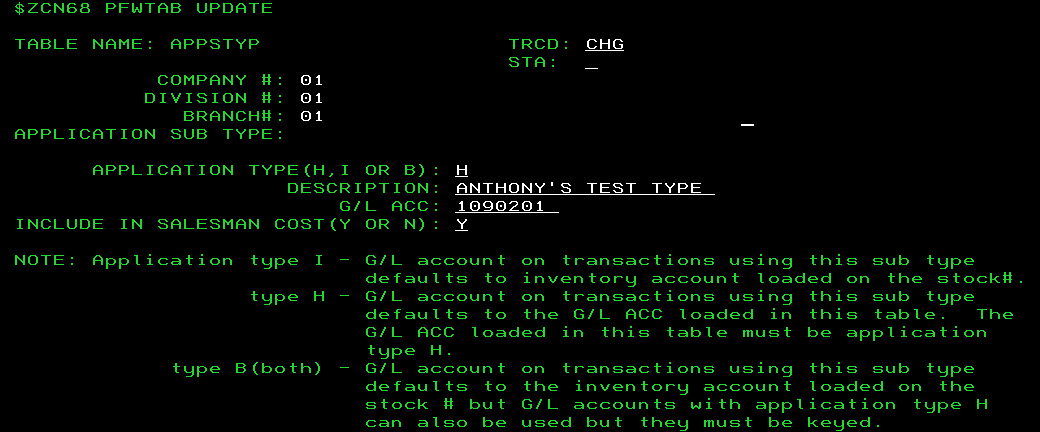
APPSTYP table
The APPSTYP table allows you to classify the History (H) and/ or Inventory (I) application types associated to the general ledger accounts used in the Equipment module of IntelliDealer.For example, a type and subtype combination of 'HF' could represent History of Freight costs; IA could stand for Inventory unit Attachments, etc.
Note: Application types are also configurable from the History Sub-Types screen in IntelliDealer.
For subtypes defined as Inventory (I) types, entries which use that subtype will default to the G/L inventory account used on the stock number. For subtypes defined as History (H) types, entries which use that subtype will default to the G/L account defined in this table. (Note that the General Ledger account entered in this table must be defined as an "H" application type.) If a subtype is used for Both Inventory and History (B), the default will be to use the G/L account on the stock number, but the G/L account entered in this table can be used if it is keyed in manually.
Note: The following application types and subtypes already hard-coded in the system are:
Types (first digit):
F - Finance Expense
H - History
I - Inventory
M - Maintenance Exp
N - Notes Payable
O - Over Allowance
P - Parts
R - Rent
S - Sales
W - Write Down
Subtypes (second digit):
O - Original Cost
C - Current Cost
S - Service
I - Internet
R - Rental Costing
T - Traffic
X - No Charge Rental Contracts
The following fields appear on the APPSTYP table:
| Field | Description |
|---|---|
| Application Sub Type | The one-character application sub type code you want to configure. |
| Application Type |
Specify whether the selected subtype code is used as either a History subtype code (H), Inventory subtype code (I), or Both a history and inventory subtype code (B). Transactions using a History subtype code default to the G/L Account configured in the field below. Transactions using an Inventory subtype code default to the inventory account configured on the stock number related to the transaction. Transactions using a subtype code configured as both History and Inventory application types default to the inventory account on the stock number. However, if the user manually enters the G/L account from the field below, it is accepted. |
| Description | A brief description of the sub type code. |
| G/L Account | If H or B are selected in the Application Type field above, specify the account number that defaults (application type H) or which can be used when the user types it in manually (application type B). |
| Include In Salesman Cost (Y/N) |
If set to Y, any equipment history entries related to the stock number to which the selected subtype code applies appear in the Sales Cost column of the Equipment Costing screen. This is only applicable for subtypes that have the Application Type field set to I (Inventory) or H (History); subtypes set to B (Both) not appear. The accounts loaded in the APPSTYP table should not be loaded in the Equipment Costing Maintenance window (command CNFIGPFW> option 19> option 13). |
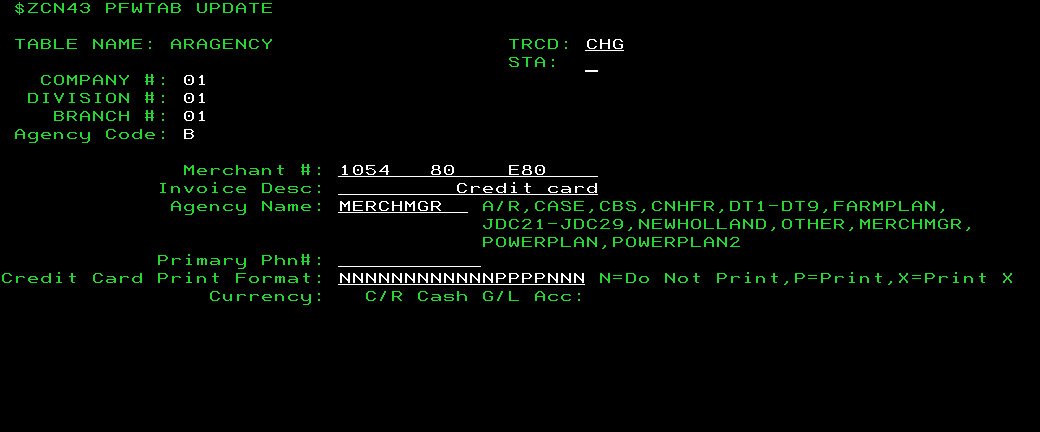
ARAGENCY table
The ARAGENCY table allows you to configure internal and external Accounts Receivable Agencies. These agencies can then, in turn, be assigned to customers on the A/R Agency tab of the customer profile. Once assigned on the A/R Agency tab, separate transaction and credit limits can be assigned to each code.
Codes defined in this table must also be defined in the CASHTAB table, however the codes must first be entered in the ARAGENCY table and then in the CASHTAB table.The following fields appear on the ARAGENCY table:
| Field | Description |
|---|---|
| Agency Code | The code representing the A/R agency you are about to configure. 1,9,B,C,D,E,G,H,I,J,K OR L - Branch.2 - Cash 3 - Parts Warranty 0, 4- Lost Sale Parts, Lost Sales Record 5 - Customer Service 6 - Lost Sale Service 7 - Service Warranty 8 - Service Internal |
| Merchant# | The merchant number should be provided by the specific credit agency you are currently working on. For example, when configuring the A/R agency code for JDC cards, JDC should provide you with a specific number to enter into this field. When configuring the A/R agency code for Case Freedom Pay (CNHFR) however, you should leave this field blank and use the ARAGENC1- 3 tables instead. |
| Invoice Description | Enter a description which will print on the bottom of each invoice. If left blank, the default description is “TOTAL CHARGE”. For aesthetic reasons, VitalEdge recommends that you right justify any text that you enter in this field. In order to use this feature, the field ONLY ONE A/R ACC PER INV in the CMBR1 table must be set to Y (yes). |
| Agency Name | The name of the agency you are configuring the code for. The valid values are:
|
| Primary Phn# | If the A/R agency requires a modem, enter the telephone number to use for dialing out to authorize the credits. |
| Secondary Phn | If the A/R agency requires a modem, enter the secondary telephone number to use for dialing out to authorize the credits. |
| Credit Card Print Format | Enter the print format you want to use for the credit card number associated to the selected A/R agency code.
|
| Currency | The currency code to which the amount of a parts invoice using this A/R agency code is converted. The Parts Invoice program cross reference the currency code to the corresponding CURRENCY table entry, retrieve the 'Sales' exchange rate from that table and divide the parts invoice amount by the Sales exchange rate to calculate the correct parts invoice amount. For example, if the amount of the parts invoice is $10.00 CDN and the A/R agency being used has the 'A' currency code assigned to it and the Sales exchange rate for that currency code is 1250000, the amount of the parts invoice is $10.00/1.250000 (or $8.00). This field is password protected. Please contact VitalEdge for details. |
| C/R Cash G/L Acc | The cash account to be used when posting cash receipts in IntelliDealer to batches that have the selected currency code assigned to it. This will allow an account to be loaded only if the currency code is not blank. This field is password protected. Please contact VitalEdge for details. |
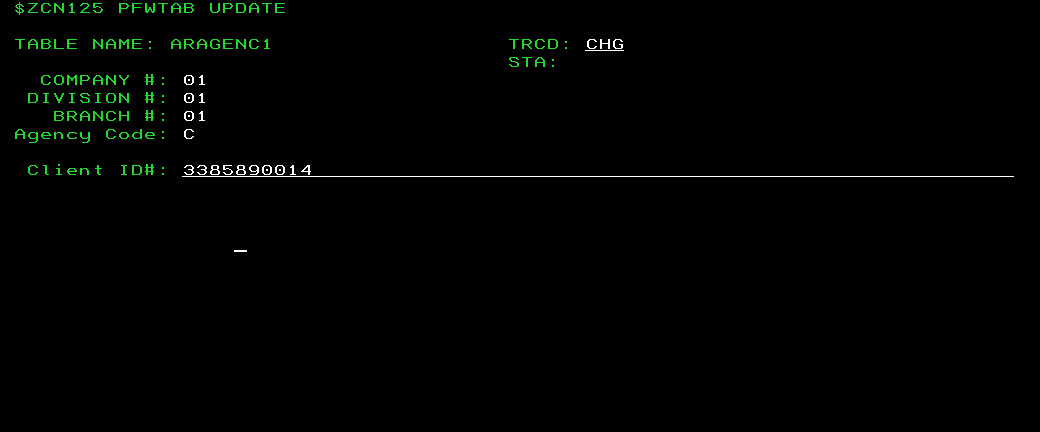
ARAGENC1 table
The ARAGENC1 table allows you to configure the client identification number for the Case Credit Card/ Freedom Pay interface (A/R agency code CNHFR).
The following fields appear on the ARAGENC1 table:
| Field | Description |
|---|---|
| Agency Code |
The code representing the A/R agency you are about to configure, as stored in the ARAGENCY table. Code 1 is typically reserved for internal A/R agencies. |
| Client ID# | The Case Credit Card/ Freedom Pay interface client ID number, as supplied by Case. |
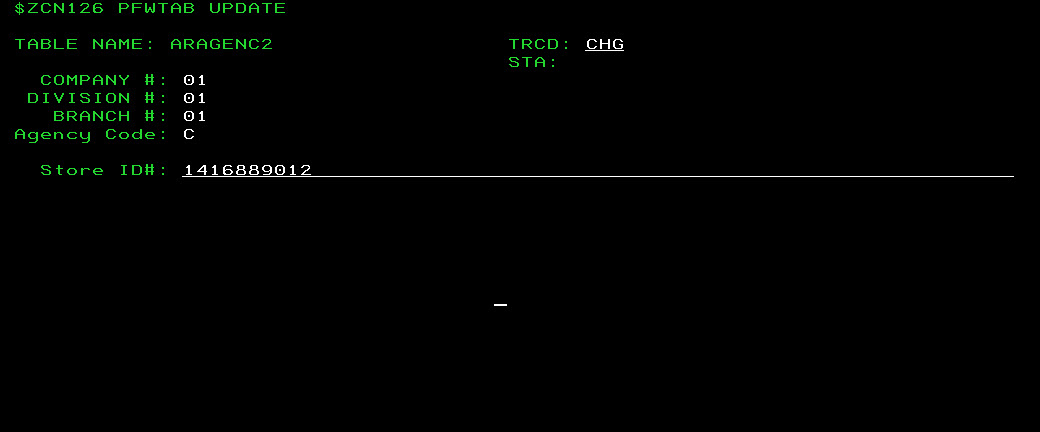
ARAGENC2 table
The ARAGENC2 table allows you to configure the store identification number for the Case Credit Card/ Freedom Pay interface (A/R agency code CNHFR).
The following fields appear on the ARAGENC2 table:
| Field | Description |
|---|---|
| Agency Code |
The code representing the A/R agency you are about to configure, as stored in the ARAGENCY table. Code 1 is typically reserved for internal A/R agencies. |
| Store ID# | The Case Credit Card/ Freedom Pay interface store ID number, as supplied by Case. |

ARAGENC3 table
The ARAGENC3 table allows you to configure the terminal identification number for the Case Credit Card/ Freedom Pay interface (A/R agency code CNHFR).
The following fields appear on the ARAGENC3 table:
| Field | Description |
|---|---|
| Agency Code |
The code representing the A/R agency you are about to configure, as stored in the ARAGENCY table. Code 1 is typically reserved for internal A/R agencies. |
| Terminal ID# | The Case Credit Card/ Freedom Pay interface terminal ID number, as supplied by Case. |
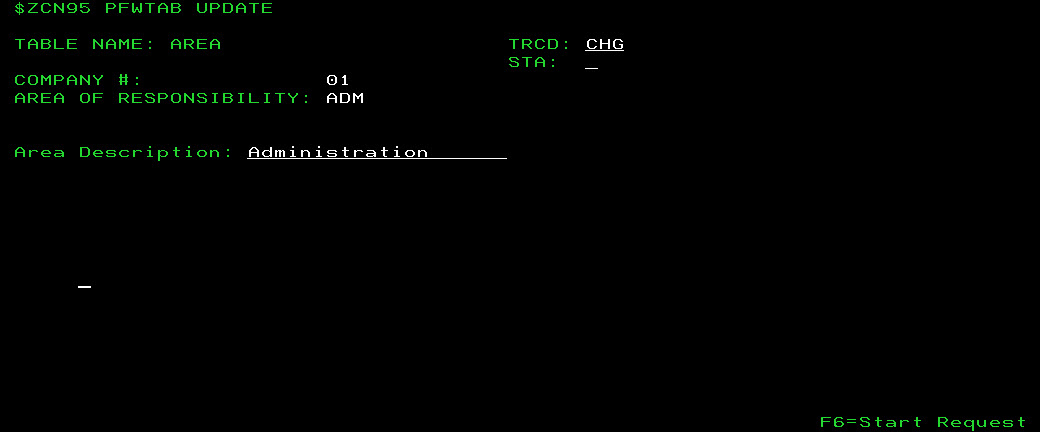
AREA table
The AREA table allows you to configure area codes which, in turn, allow you to define the area of responsibility for a customer contact on the Edit Contact/ Add Contact screen.
Area codes can also be configured from the Areas screen in IntelliDealer.The following fields appear on the AREA table:
| Field | Description |
|---|---|
| Area of Responsibility | A three character code that represents the area of responsibility. You may enter an alphanumeric code, however VitalEdge recommends using letters in order to avoid confusion. For example, a code of “ADM” is more logical than a code of “001” to denote the Administration department. |
| Area Description | A brief description of the area of responsibility. If the selected area code is active, (as defined by the STA field at the top of the table), the value entered in this field will appear as a selectable option in the Areas field of the Edit Contact/ Add Contact screen in IntelliDealer. |
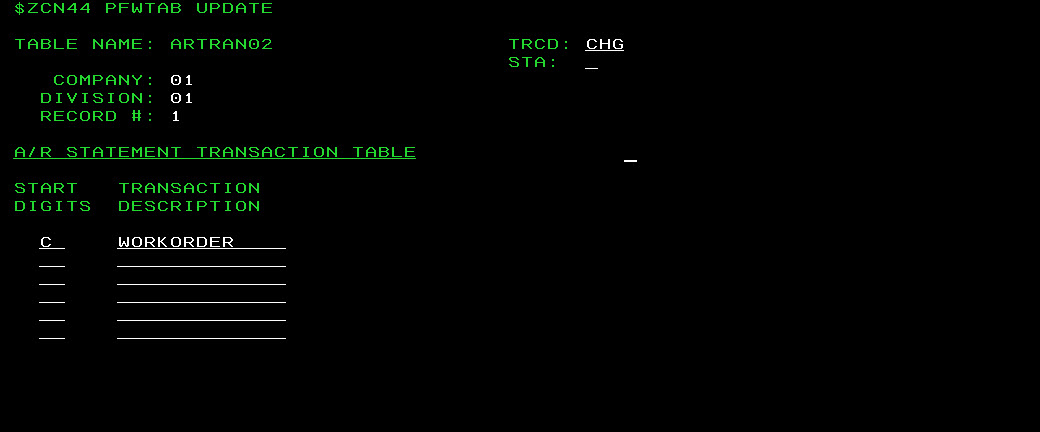
ARTRAN02 table
The ARTRAN02 table allows you to configure the invoice transaction description that appears on the A/R statement based on the starting digits of the invoice number. The start digits can be defined as either the first digit or the first two digits of the invoice. If only the first digit is used, all invoices starting with that digit and a numeric second character in the invoice number print the corresponding transaction description. For example, if the start digit R is assigned a Transaction Description of "Rental" and start digits RA are assigned a Transaction Description of "Received on Account", all invoices beginning with R and whose next digit is a number are called "Rental" on the A/R statement; all invoices beginning with R and whose next digit is an alpha character will be called "Received on Account" on the A/R statement.
The following fields appear on the ARTRAN02 table:
| Field | Description |
|---|---|
| Record # (0-9) | The record number for this set of transaction descriptions. Up to 6 descriptions are allowed per record (60 transaction descriptions in total.) |
| Start Digits | The invoice start digit for which you want to configure the A/R statement transaction description. |
| Transaction Description | The transaction description that will appear on the A/R statement for all invoices that begin with the selected Start Digit. |
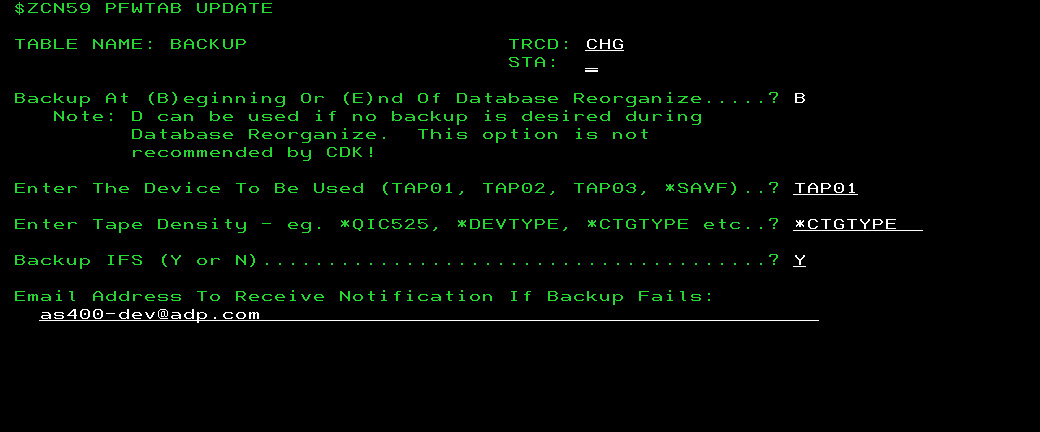
Backup table
A backup of your system data is done as part of the nightly procedure, during which billing runs and a reorganization of the database files also occur. The BACKUP table allows you to configure when and how the backup is performed as part of this nightly procedure.
All of the settings stored in the BACKUP table are not applicable for ASP dealers, with the exception of the Email Address To Receive Notification field.Performing a backup requires a dedicated server.The fields on the BACKUP table:
| Field | Description |
|---|---|
| Backup At Beginning or End of Database Reorganize | Select whether to run the backup either at the beginning (B) or end (E) of the database reorganization. You can also enter D to not run a backup at all, but this is not recommended unless you are an ASP dealer. If your dealership's backup uses one tape, select option B. If your dealership's backup uses two tapes or more, select option E. |
| Enter The Device To Be Used | Enter the name of the device that will be used to perform the backup. Normally this is the name of your tape drive (eg. TAP01). You may also enter *SAVF to backup to a save file on your network instead. The library into which the save files will be stored will be the first 8 characters of the files library name with the suffix 'SF'.(e.g. QS36FSF) In order to ensure that one files library backup is not overwritten by another files library backup, the files library name must be no longer than 8 characters. The save file name which will hold the files library objects will be the first 7 characters of the files library name plus the first 2 characters of the current day-of-the-week, plus the letter 'L'. For example, 'QS36FMOL' - holds the QS36F files library objects from Monday; 'QS36FTUL' - holds the QS36F files library objects from Tuesday, etc. If the Backup IFS switch is turned on, then the save file name which will hold the IFS files will be the first 7 characters of the files library name plus the first 2 characters of the current day-of-the-week plus the letter 'I' (e.g. QS36FWEI).The save file name which will hold the QDLS/PFW folder will be the first 7 characters of the files library name plus the first 2 characters of the current day-of-the-week, plus the letter 'Q'. (e.g. QS36FTHQ). When saving, if the save file already exists, it is cleared and then the new data is saved to it. With this naming format, one week's worth of backups can be saved, providing there is enough disk space. If the system detects a shortage of disk space, then the user will see receive a warning message on screen (if run interactively), or an email will be sent to the recipient specified in the Email Address to Receive Notification If Backup Fails field. Save files require a large amount of disk space. VitalEdge recommends that your dealership moves the save files daily in order to ensure that there will be room to save the next day’s backup. |
| Enter Tape Density | Enter the capacity of the tape which will be used for the backup. This capacity depends on the size of the tape drive and the tape being used. A tape may be smaller than the drive size but not larger. Enter *DEVTYPE in this field if the tape and the drive are the same size. Please contact VitalEdge support if you are not certain which parameter to choose. VitalEdge recommends using *CTGTYPE in this field. This setting represents a cartridge type and will automatically sense the density of the tape in the drive and adjust as necessary. Different density tapes can be used without causing a problem. |
| Backup IFS (Y/N) | This switch indicates whether or not the Integrated File System (IFS) will be saved during the backup, which includes interface files, signature files, PDF files, etc. Please contact VitalEdge for more information regarding the IFS. |
| Email Address to Receive Notification If Backup Fails | The address entered here is the recipient email address to which a message is sent in the event of a backup failure. This field is mandatory. The IntelliDealer Database will not present the backup option if the files library starts with “PFWF”. ASP customers will have a files library starting with “PFWF”. For these customers, backup will be done instead by the ASP provider. |
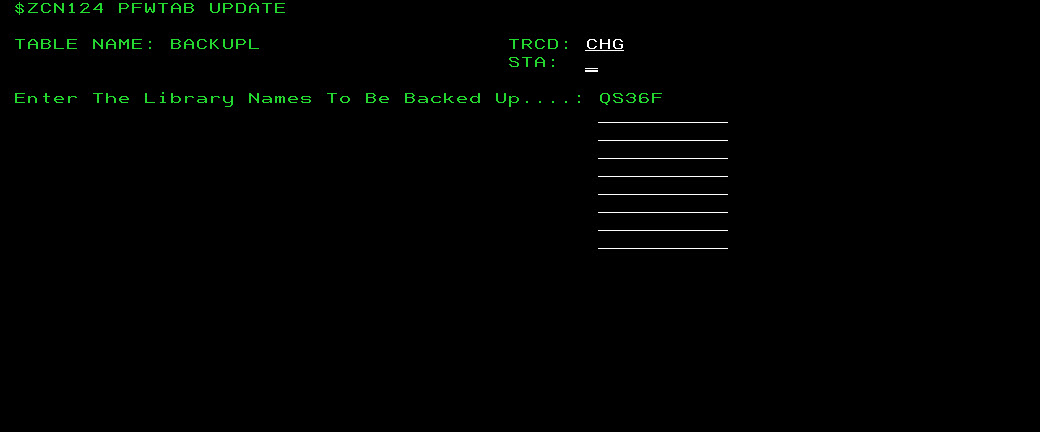
BACKUPL table
The BACKUPL table allows you to list up to 8 additional libraries you want to backup during the nightly process, in addition to the normal IntelliDealer data library that is backed up (as per the specifications in the BACKUP table). You might also consider using this table to backup any query libraries or alternate testing libraries (commonly named ALTLIB).
The first time you attempt to edit this table, you need to add it to the system.The following field appears on the BACKUPL table:
| Field | Description |
|---|---|
| Enter the Library Names to be Backed Up | The names of the additional libraries you want to back up during the nightly process. You do not need to list your IntelliDealer data library (commonly named QS36F) as this library is already backed as part of the day end process. |
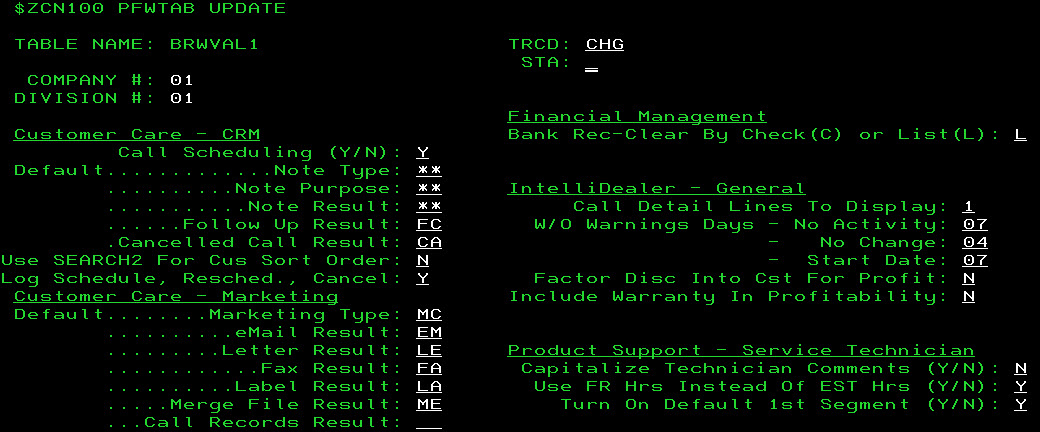
BRWVAL1 table
The settings configured in the BRWVAL1 table control various functions in multiple IntelliDealer modules.
The following fields appear in the BRWVAL1 table:
| Customer Care - CRM | |
|---|---|
| Field | Description |
| Call Scheduling (Y/N) | If activated (Y), allows the user to access the Call Schedule screens in IntelliDealer. If deactivated, the link to these screens does not appear. |
| Default Note Type |
The default note Type loaded to the system when adding a note to a customer profile from the Call History screen in IntelliDealer. See the CALLTYPE table for details. |
| Default Note Purpose |
The default note Reason loaded to the system when adding a note to a customer profile from the Call History screen in IntelliDealer. See the CALLPUR table for details. |
| Default Note Result |
The default note Result loaded to the system when adding a note to a customer profile from the Call History screen in IntelliDealer. See the CALLRES table for details. |
| Follow Up Result |
The default call Result loaded to the system when scheduling or following up a call from the Call History screen in IntelliDealer. See the CALLRES table for details. |
| Cancelled Call Result | The default call Result added to the call record when canceling a call. See the CALLRES table for details. |
| Use Search2 For CUS Sort Order |
Determines whether the Select Search 1 or 2 field on the Your Customers screen uses the 5-character Search 1 term (switch set to N), or the 10-character Search 2 term (switch set to Y). The Search 1 and Search 2 terms are defined for each customer on the Search 1 and Search 2 fields of the Customer Profile. |
| Log Schedule, Resched., Cancel (Y/N) | If activated (Y), this field enable call logging for scheduled, rescheduled and cancelled calls. If deactivated (N) logging does not occur. |
| Customer Care - Marketing | |
| Default Marketing Type | If the Create call entry switch is activated on the Campaign screen when editing or creating a new marketing campaign, this field determines the default call Type assigned to any calls created for the campaign. |
| Default eMail Result | If the Create call entry switch is activated on the Campaign screen when editing or creating a new marketing campaign, this field determines the default call Result assigned to any calls created for the campaign. |
| Default Letter Result | If the Create call entry switch is activated and Letter is selected in the Method field on the Campaign screen when editing or creating a new marketing campaign, this field determines the default call Result assigned to any calls created for the campaign. |
| Default Fax Result | If the Create call entry switch is activated and Fax is selected in the Method field on the Campaign screen when editing or creating a new marketing campaign, this field determines the default call Result assigned to any calls created for the campaign. |
| Default Label Result | If the Create call entry switch is activated and Label is selected in the Method field on the Campaign screen when editing or creating a new marketing campaign, this field determines the default call Result assigned to any calls created for the campaign. |
| Default Merge File Result | This field has yet to be implemented. |
| Default Call Records Result | This field has yet to be implemented. |
| Financial Management | |
| Bank Rec - Clear By Check (C) or List (L) |
Enter C in this field to force the user to manually enter individual check numbers and amounts for reconciliation on the Reconcile Checks screen. Enter L in this field to display a list of amounts for reconciliation on the Outstanding Checks screen. Note: The Check Reconciliation option only appears if the Reconciliation Type is set to Check Reconciliation. This field is password protected however, so if you want to change the value of the field contact your system administrator. |
| IntelliDealer - General | |
| Call Detail Lines to Display | Controls the number of call detail lines to display on the Call History screens in IntelliDealer. |
| W/O Warnings Days- No Activity |
Controls the number of days before to wait before the system will issues a warning for each of the following scenarios:
|
| Factor Discount Into Cost For Profit (Y/N) | This field has yet to be implemented. |
| Include Warranty In Profitability (Y/N) | If activated, this switch will control whether warranty information will be included in the profitability calculations displayed on the Customer Profitability screen. |
| Product Support - Service Technician | |
| Capitalize Technician Comments (Y/N) | If activated, comments added to a work order in IntelliDealer will be capitalized. |
| User FR Hours Instead Of EST Hours (Y/N) |
The Logged On Technician time count is relative to the work order hours assignment, which can be set to use flat-rate hours (Y) or estimated hours (N). If a job code is being used, the estimated hours will default to the actual average hours for this job code (determined by the previous usages of the job code). |
| Turn On Default 1st Segment (Y/N) | Enter Y to default the Based On First Segment checkbox to checked status or N to unchecked. This affect the selection process when selecting work orders by technician. |

CALLCAT table
The CALLCAT table allows you to define different kinds of call categories within the system. Once a code is defined in this table, it can be used to classify calls made to a customer. Valid category codes appear as an option on the Area of Interest drop down list on the Schedule a Call screen in the Customer Profile application.
The following fields appear in the CALLCAT table:
| Field | Description |
|---|---|
| Call Category | The code representing the call category. |
| Category Description | A brief description of the call category. |
CALLPUR table
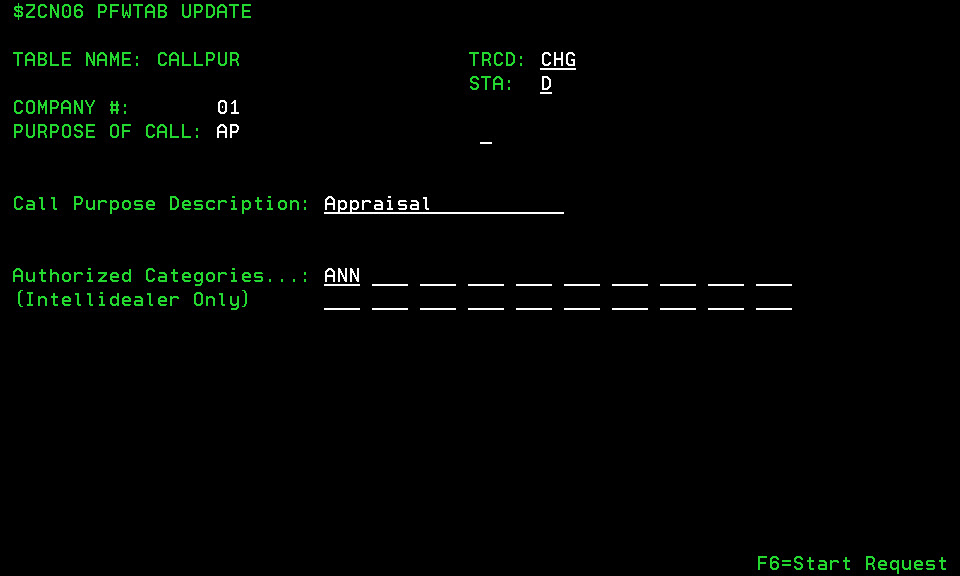
The CALLPUR table allows you to define the call purposes (defined as "reasons" in IntelliDealer) that can be used when making calls to customers. Once a code is defined, it can be used as a valid call reason code used to record the calls made to a customer. Valid call reason codes will appear on the Select Reason screen accessed by clicking on the Search![]() icon next to the Select Reason field.
icon next to the Select Reason field.
The following fields appear in the CALLPUR table:
| Field | Description |
|---|---|
| Purpose Of Call | The call reason code. |
| Call Purpose Description | A brief description of the call reason code. |
| Authorized Categories | A list of call categories that can use this call reason. Up to 20 categories can be specified, including an "N/A" category. Enter *AL in this field if you want the selected code to apply to all categories. |
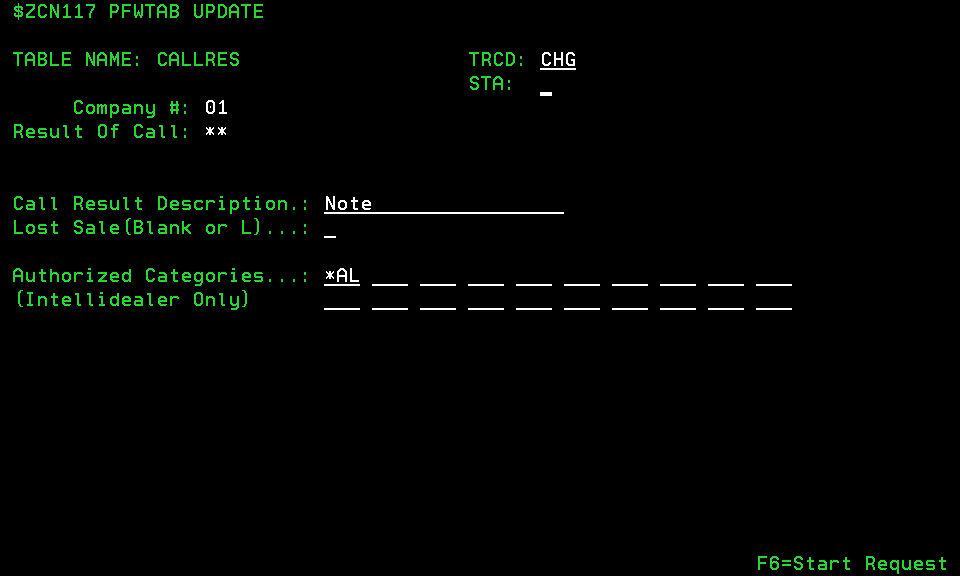
CALLRES table
The CALLRES table allows you to define different kinds of call results that can be applied by a user when making calls to customers. Once a code is defined, it can be used as a valid call result code used to record the calls made to a customer. Valid call result codes will appear on the Select Results screen accessed by clicking on the Search![]() icon next to the Select Results field.
icon next to the Select Results field.
The fields in the CALLRES table:
| Field | Description |
|---|---|
| Result Of Call | The call result code. |
| Call Result Description | A brief description of the call result code. |
| Lost Sale (Blank or L) | If L is entered in this field, the user will be prompted for equipment lost sales information when recording a call while using the selected call result code. Accumulated Lost sales information can be analyzed on the Lost Sales screen. |
| Authorized Categories | A list of call categories that can use this call result. Up to 20 categories can be specified, including an "N/A" category. Enter *AL in this field if you want the selected code to apply to all categories. |
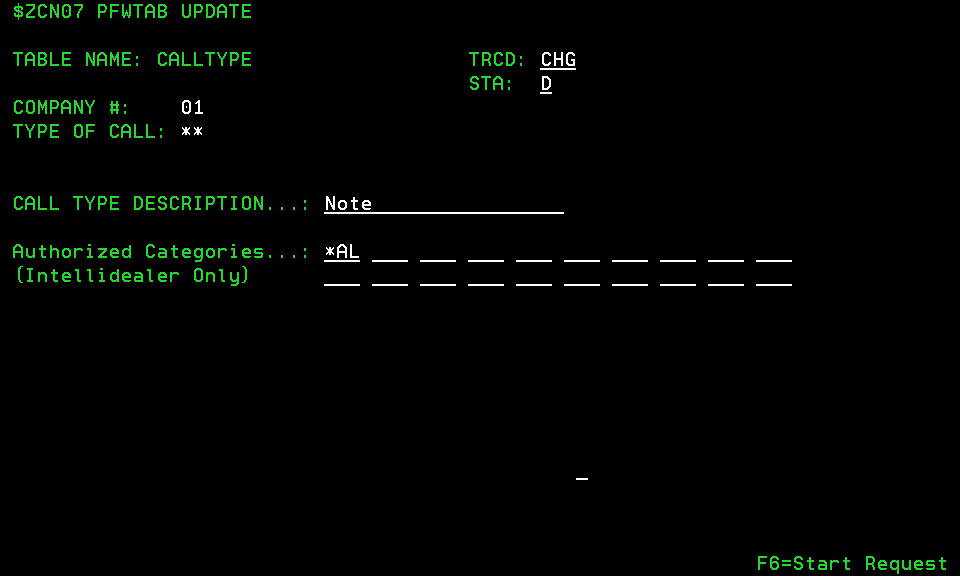
CALLTYPE table
The CALLTYPE table allows you to define different kinds of call types within the system. Once a code is defined, it can be used as a valid call type code used to record the calls made to a customer. Valid call type values will appear on the Select Type screen accessed by clicking on the Search![]() icon next to the Type of Call or Select Type field.
icon next to the Type of Call or Select Type field.
The following fields appear in the CALLTYPE table:
| Field | Description |
|---|---|
| Type Of Call | The call type code. |
| Call Type Description | A brief description of the call type code. |
| Authorized Categories | A list of call categories that can use this call type. Up to 20 categories can be specified, including an "N/A" category. Enter *AL in this field if you want the selected code to apply to all categories. |
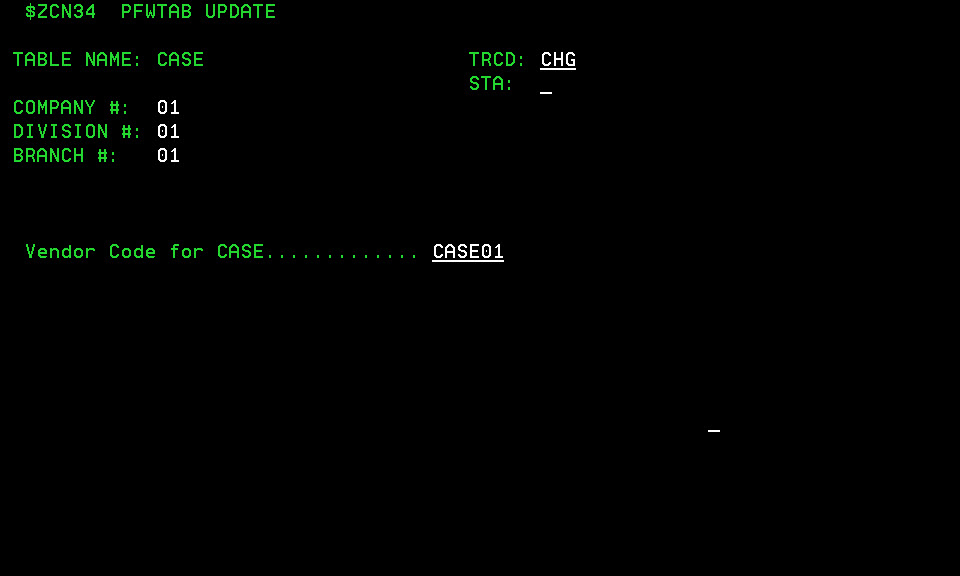
CASE table
The CASE table allows you to configure the CASE vendor number that will be used on machine down and weekly stock orders to Case New Holland ,or for the CCN WEB interface.
The following field appears in the CASE table:
| Field | Description |
|---|---|
| Vendor Code for CASE | The CASE vendor number for the selected branch location. |
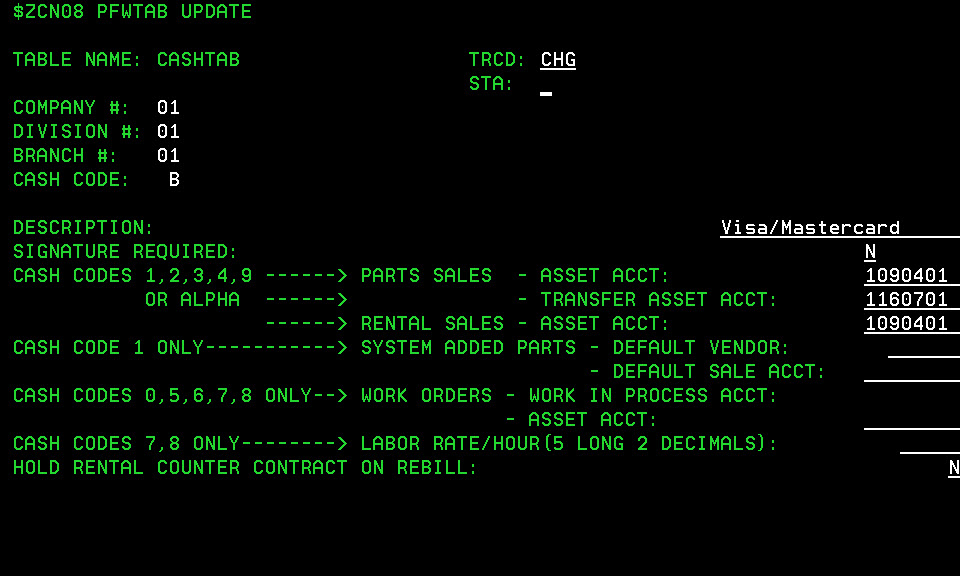
CASHTAB table
The CASHTAB table allows you to define the default G/L accounts to be used with the various cash codes.Cash codes are used to represent different forms of payment within the various invoicing modules (such as cash, charge, credit card, etc.) Cash codes 0 to 8 are hard-coded in the system, but codes 9, B,C ,D ,E ,G ,H ,I ,J ,K and L can be defined by the user. Also, the different forms of payment can be driven to separate General Ledger accounts.
In order to be defined and assigned to a G/L account in the CASHTAB table, a cash code must first be defined in the ARAGENCY table.The following fields appear in the CASHTAB table:
| Field | Description |
|---|---|
| Cash Code | The cash code you want to configure. The following are the available options:
|
| Description | A brief description of what the selected cash code represents. This field is for informational purposes only and will not be printed anywhere in the system. |
| Signature Required (Y/N) | If activated (Y), a signature must be captured whenever the G/L account associated to the selected cash code is used on an invoice or work order. |
| Cash Codes 1, 2, 3, 4, 9 Or Alpha | |
| Parts Sales - Asset Account | Enter the General Ledger Asset account which should be debited when a Parts sale is made. This is usually a Cash or an Accounts Receivable account. In the case of Cash Code 4, which represents a counter Lost Sale, the Asset account is irrelevant since no entries get posted for a Lost Sale. This account is also used by other invoicing systems (i.e. work orders and equipment sales). |
| Parts Sales - Transfer Asset Account | Enter the General Ledger Asset account which should be charged when a transfer of Parts is made between branches. This account maintains a zero balance since the value of parts is both debited and credited to this account when an inter-branch transfer occurs. The offset to the debit or credit is the Parts Inventory Asset account at each branch. This Transfer Asset account is also used for customer records defined with a Terms Code of “T”. When parts are sold to those customers, the parts Sale account is not involved. The entry is between the inventory account and the account defined in this field. See the POTOSO table for more information. In the case of Cash Code 4, which represents a counter Lost Sale, the Transfer Asset account is irrelevant since no entries get posted for a Lost Sale. This can be a different account for each branch, or the same account for all branches recommended. If different accounts are used for each branch, remember that the aggregate will total zero, but the individual accounts will hold a balance. |
| Rental Sales - Asset Account | Enter the General Ledger Asset account which should be debited when a Rental is posted. This is usually a Cash or Accounts Receivable account. In the case of Cash Code 4, which represents a counter Lost Sale, the Asset account is irrelevant since no entries get posted for a Lost Sale. |
| Cash Code 1 Only | |
| System Added Parts - Default Vendor | Enter the default Vendor number which should be used in the Part Master Maintenance module when parts are quick added to the system. When adding a new part number the system follows the steps below to retrieve the default parts information:
Because of this enhancement you should start loading all default sales accounts through the PartAdds table and blank out the current default sales accounts loaded in your PARTPRC table. If you follow these steps the only table you will have to maintain is the PartAdds table. The PARTPRC table is used to control how updates should be done on certain fields during a price update. The only time you need to maintain default sales accounts through the PARTPRC table is if you have 2 different vendor codes for the same vendor.VitalEdge recommends using a vendor number which is not one of the common parts lines carried by the dealer. If the vendor number entered here is used for a majority of parts in the system, it could prove difficult to detect a wrong vendor number on a quick added part. Users in the Parts Department should also be trained to watch the vendor numbers being used on quick added parts. |
| System Added Parts - Default Sale ACCT | Enter the default parts sale G/L account which should be used in the Part Master Maintenance module when parts are quick added to the system. When adding a new part number the system follows the steps below to retrieve the default parts information:
Because of this enhancement you should start loading all default sales accounts through the PartAdds table and blank out the current default sales accounts loaded in your PARTPRC table. If you follow these steps the only table you will have to maintain is the PartAdds table. The PARTPRC table is used to control how updates should be done on certain fields during a price update. The only time you need to maintain default sales accounts through the PARTPRC table is if you have 2 different vendor codes for the same vendor.VitalEdge recommends using a parts sale account which is not used by one of the common parts lines carried by the dealer. If the account code entered here is used for a majority of parts in the system, it could prove difficult to detect a wrong account on a quick added part. |
| Cash Codes 0, 5, 6, 7, 8 ONLY | |
| Work Orders - Work In Process ACCT | There are three Work In Process (WIP) methods available in the system. - The first is Traditional WIP (method S in the WIP table), in which WIP is valued at retail. Revenue (and cost, if applicable) is recognized immediately when components are posted to a Work Order and a billing run is performed, even if the work order is still open. One G/L account is used for all WIP transactions. - The second method is Alternate WIP (method I in the WIP table), in which WIP is valued at cost. Only cost is recognized when components are posted to a Work Order and a billing run is performed. The revenue is not recognized until the Work Order is Closed (and a billing run performed). - The third method uses different G/L accounts for WIP Parts and WIP Service (see the WIP table for more information) and Miscellaneous transactions (defined at this field) Enter the General Ledger Work In Process account to be used for WIP transactions. For Traditional WIP(method S), this account will be used for all transactions. For Alternate WIP (method I), this account will be used for miscellaneous and non-costing transactions (ie. it is not used for Parts or Labor WIP transactions). In the case of Cash Codes 0 and 6, which represent Lost Sales, the WIP account is irrelevant, since no entries get posted for a Lost Sale. For simplicity, dealers should use the same WIP account for all codes. |
| Work Orders - Asset Account | Enter the General Ledger account which should be debited when a Work Order is closed to the selected Cash Code. In the case of Cash Codes 0 and 6, which represent Lost Sales, the Asset account is irrelevant, since no entries get posted for a Lost Sale. Most dealers use the system clearing account at this field for Cash Codes 0 and 6. For Cash Code 5 (Customer), a cash account is usually used; for Cash Code 7 (Warranty), a Warranty A/R account, and for Cash Code 8 (Internal), an internal expense or inventory account is commonly entered in this field. When Code 8 is used and the unit on the Work Order is not Invoiced (status “I”), the debit amount is driven to the Inventory account defined on the stock number of the unit on the Equipment Profile. |
| Cash Codes 7, 8 Only | |
| Labor Rate/ Hour | Enter the Labor Rate per hour which should be charged on Work Orders. The default labor rate per hour on a work order is determined by a number of factors. For details, see the About Default Labor Rates topic.This field is five numeric characters in length and consists of two decimal places. A labor rate of $57.50 per hour would be entered as 05750. |
| Hold Rental Counter Contract On Rebill | If set to Y and the Hold On Rebill switch on the Billing/ Invoicing tab in IntelliDealer is set to Cash Code, whenever the selected cash code is used on a rental contract no invoices will be generated when re-billing the contract until an authorization number is entered into the system (the contract will be put on hold.) |
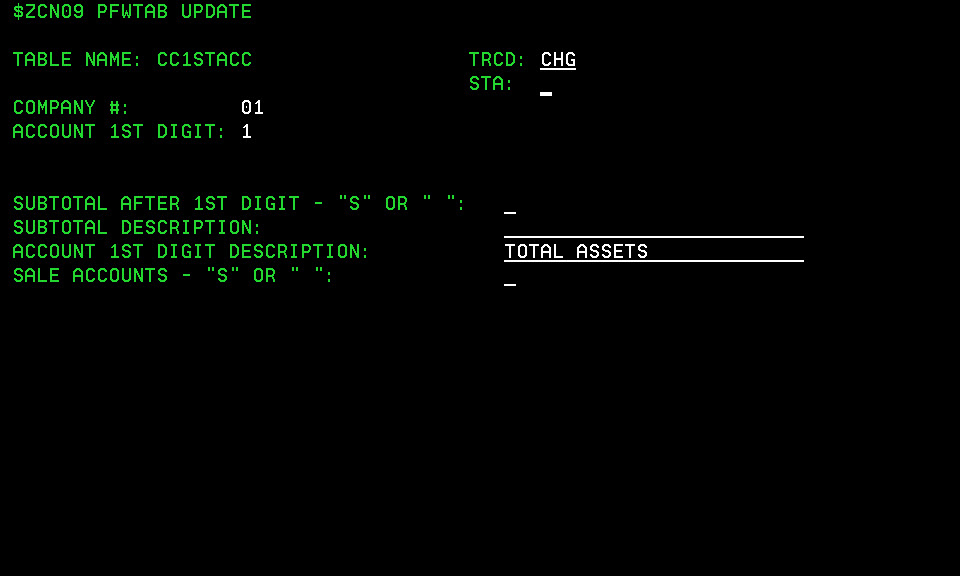
CC1STACC table
The CC1STACC table allows you to configure the first digits for the accounts that will be used in your General Ledger Chart of Accounts. Valid first digits are 1, 2, 3, 4, 5, 6, 7, 8, 9. VitalEdge recommends using the following structure:
- 1= Assets
- 2= Liabilities and Equities
- 3= Sales
- 4= Cost of Sales
- 5= Expenses
- 6= Miscellaneous Income
- 7= Miscellaneous Expenses
- 8= Adjustments
- 9= Other
The following fields appear in the CC1STACC table:
| Field | Description |
|---|---|
| Account 1st Digit | The first digit value used to represent the type of account. Up to nine single digit numbers can be defined. |
| Subtotal After 1st Digit - "S" OR " " | Indicate for each first digit defined in the previous field whether a subtotal should appear on your financial reports. If you indicate an “S”, then the system calculates a subtotal of all accounts which start with the immediately preceding digit less all amounts which start with the current digit. For example, an “S” is usually specified on the cost of sale first-digit (4) so that a subtotal will be printed showing total sales (3) less cost of sales. If no subtotal is desired, leave this field blank. |
| Subtotal Description | A brief description of the subtotal that appears on your financial reports. Up to 25 alphanumeric characters are available for each description. |
| Account 1st Digit Description | A description that will appear on the total line on preliminary and final month end G/L reports after all accounts using the associated 1st digit are printed. The Description set up on the Add Account Grouping/Change Account Groupings screen (ACCGRP table) print each time there is a change in the first three digits of the account number.The descriptions set up in this field print when there is a change in the first digit of the account number. |
| Sale Accounts - "S" or " " | Indicate which account first digit(s) represent your sale accounts. An “S” represents a sale account, a blank entry will indicate that an account starting with that number is not a sale account. The purpose of this field is to provide the option to run a Tax Analysis report (BIL921) with only sale accounts listed. |
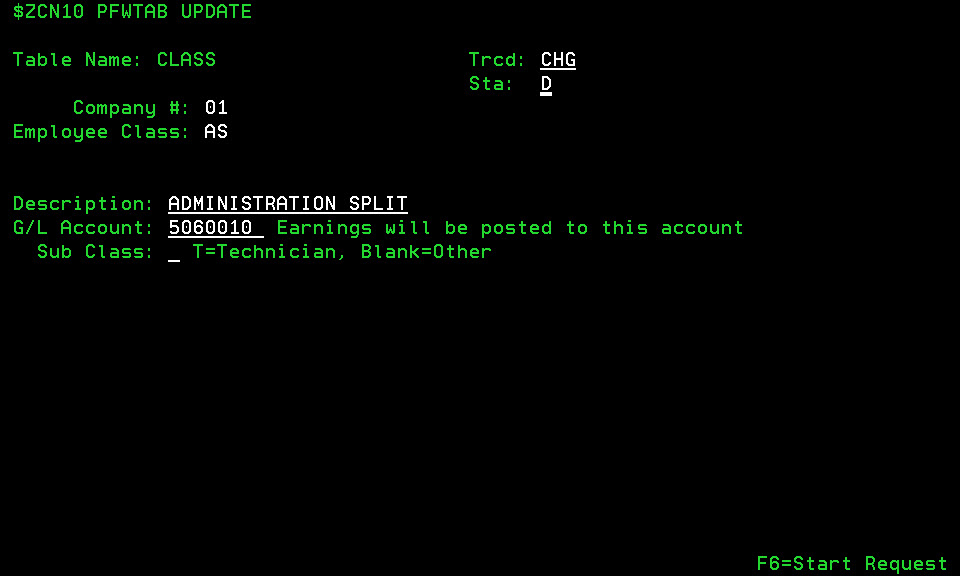
CLASS table
The CLASS table allows you employee class codes which, in turn, allow you to differentiate between the different types of employees at your dealership (eg. technicians, administrative staff, parts counter employees, etc.). Classes assigned to different employees
The following fields appear on the CLASS table:
| Field | Description |
|---|---|
| Employee Class | A one or two character alphanumeric code used to define the class code within the system. A distinct class code is only required for each unique five-digit core account. The profit center will be determined by the profit center loaded on each Employee Profile.For example, if the wages of owners and managers should be posted to core G/L account 52000, only one code is needed for both. |
| Description | A brief description of the selected class code. A maximum of 20 characters can be used in this field and the value entered here will be the options listed in the Class field of the Employee Profile tab. |
| G/L Account | The gross earnings for any employee assigned to this class code will be posted to this account. The system checks the Employee Profile to determine the profit center to use for the class code (eg. 5200UB). If there is a G/L account loaded in the Company Expense Account (Debit) field of the table EARNDEDN (for an earnings or benefit code) that account would override the G/L account listed in the CLASS table. |
| Sub Class (T or Blank) | If T is entered in this field, any employees assigned to this class appears on the Technician Selection screen, accessible from the Segments tab of a work order by clicking the magnifying glass next to the Technician field. Among other requirements, an employee must be assigned to a class code with a sub class of T in order to appear on the Work Order Service Scheduling screen. For details, see the Drag and Drop Service Scheduling Overview topic. |
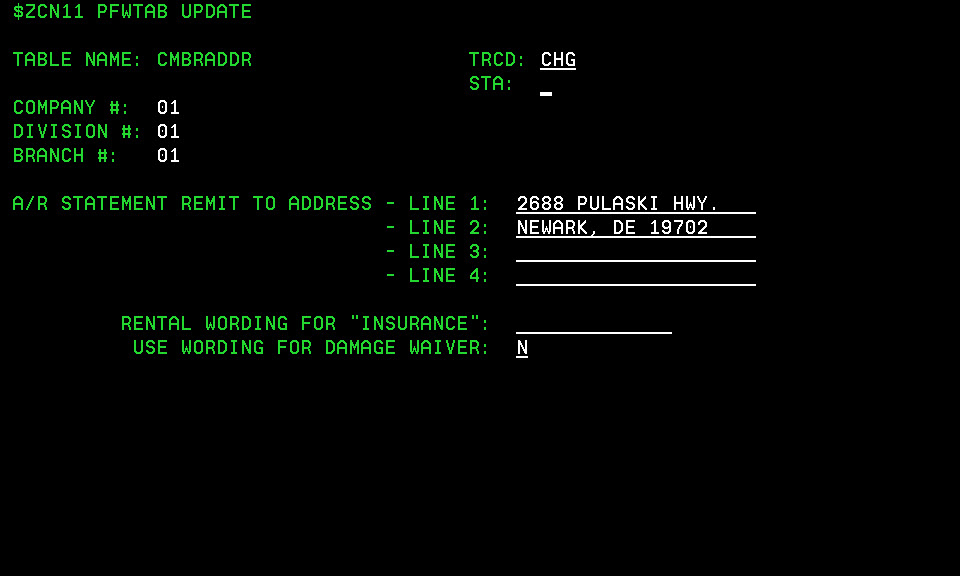
CMBRADDR
The CMBRADDR table allows you to configure the Remit To address for A/R statements generated at the selected branch and wording variables for rental contracts and invoices.
The following fields appear on the CMBRADDR table:
| Field | Description |
|---|---|
| A/R Statement Remit To Address | The address entered in this field prints in the REMIT TO box of the A/R statements generated at the selected branch. |
| Rental Wording For "Insurance" |
The language variable that the system uses to replace instances of "Insurance" on rental invoices and contracts. Leave this field blank to continue printing "INSURANCE" on rental contracts and invoices. |
| Use Wording for Damage Waiver | If activated (Y), the text "DAMAGE WAIVER" print on rental contracts and invoices. |
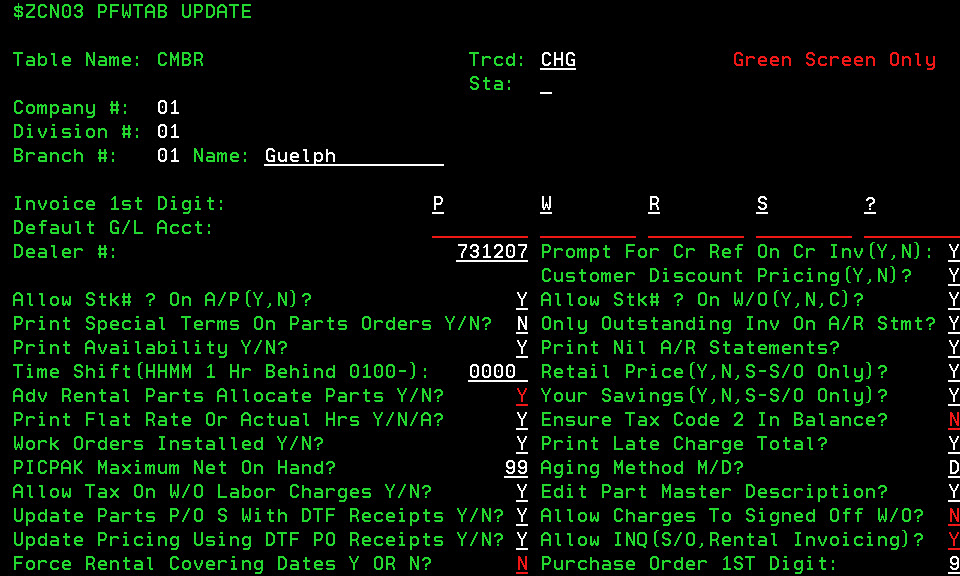
CMBR table
The CMBR table allows you to configure a variety of settings for a specific branch.
The following fields appear in the CMBR table:
| Field | Description |
|---|---|
| Name | The name of the branch location, as it appears on invoices and reports. This field allows for a maximum of 15 characters. |
| Invoice 1st Digit |
This digit has been moved to CMBR3 Allows you to specify an alphanumeric digit to be used as the first character for each invoice type generated at your dealership, in the following order:
For example, based on the screen shot above, any invoices generated from the Parts Counter for the Guelph branch would begin with "P" and Work Order invoices would begin with "W". One benefit of configuring a 1st digit for the different types of invoices at your dealership is that it allows you to run the Accounts Receivable Aging reports by 1st digit which, in turn, allows you to extract an aged A/R report of only Parts tickets. Only characters A-Z, numbers 1-9 and "?" can be used in these fields. "?" is recommended in the Key Invoices field, as the "?" allows any start digit to be used in that module. Start digits Q, L and R should be reserved for sales order invoice values. Do not use these start digits for other purposes. |
| Default G/L Account |
Allows you to configure the default G/L account for each of the invoice types noted in the Invoice 1st Digit field above (Parts Counter, Work Orders, Rental Contracts, Sales Orders, Key Invoices.) You cannot configure a default G/L account for Key Invoices if a question mark ("?") is entered in the Invoice 1st Digit field above. |
| Dealer # | If you are a John Deere or CNH dealership, please indicate the dealer number, as assigned to you by Deere or Case New Holland. |
| Allow Stk#? On A/P (Y/N) | Specify whether the system allows "?" for a stock number. |
| Print Special Terms On Parts Orders (Y/N) | Determines whether special terms information is printed on stock order reports PAR007, PAR190, and STO003. |
| Print Availability (Y/N) | Determines whether the selected branch is included when generating parts report PAR016 (only available through green screen.) |
| Tim Shift (HHMM 1 Hr Behind 0100-) | Determines whether the selected branch should have the time zone offset. This is so the local time is printed on sales order invoices, rental invoices, and work orders. |
| Adv Rental Parts Allocate Parts (Y/N) |
If activated (Y), the system updates the on hand quantity as soon as each rental invoice is completed. If not activated (N) the system does not update the on hand quantity until the billing run is made, and allow the invoice to be edited before the billing run. It is recommended that this switch be set to Y. |
| Print Flat Rate Or Actual Hrs (Y/N/A) | Hours may only be printed on a work order under the following circumstances: - The status of the work order has to be C or closed. - If there are no customer labor charges on the order, then the Flat Rate hours are printed (only internal and/or warranty allowed) - If there are customer labor charges on the order, then the hours printed will depending on the value configured for this switch. Allows you to configure whether or not Flat Rate or Actual hours will be printed on closed work orders:
|
| Work Orders Installed (Y/N) | This switch controlled access to the work order module in the green screen application. As the module has since been removed, this switch is no longer valid. |
| PICPAK Maximum Net On Hand |
Determines the Net On Hand quantity that will be printed on picpaks generated at the branch. If 0, then no quantity will be displayed. If the value is 99, then any quantity up to a maximum of 99 will be printed. The default value for this field is 0. |
| Allow Tax On W/O Labor Charges (Y/N) | If activated (Y), tax will be applied to labor charges at your dealership, based either on the tax code assigned to the associated customer profile, or manually entered on the Work Order. |
| Update Parts P/Os With DTF Receipts (Y/N) | Allows the activation or deactivation of the update of John Deere DTF P/O receipt data. This allows a dealer to ignore receipt data but still update pricing information sent with the receipt records. |
| Update Pricing Using DTF PO Receipts (Y/N) | Allows the activation or deactivation of the update to pricing data that comes with DTF P/O receipt data. Pricing information is updated as if the pricing information actually came in on pricing records rather than receipt records - whatever is currently updated with standard pricing records will also be updated with the pricing information on the receipt records. |
| Force Rental Covering Dates (Y/N) | If activated (Y), users will be forced to enter the dates covered by a rental invoice if more than one invoice is involved. |
| Prompt For Cr Ref On Cr Inv (Y/N) | If activated (Y) and the total amount of an invoice is a credit amount, users will be prompted to enter a credit reference number in all IntelliDealer invoicing applications. |
| Customer Discount Pricing (Y/N) |
If activated (Y), controls whether or not the branch will recognize the Customer Pricing records/discounts configured at your dealership. If this switch and the Yours Savings switch below are both activated, a "Your Savings" line is included on all parts invoices created for customers that have an existing Customer Pricing record. |
| Allow Stock # ? On W/O (Y/N/C) |
If activated (Y), users can use a "?" in the stock number field when creating a work order. This would be used, for instance, when the Service department wants to open a work order for a unit but is waiting for the accounting office to assign the unit a stock number. If C is entered in this field, work orders can be opened using a "?" stock number, but cannot be closed until a valid stock number is entered. If N is entered in this field, a "?" can never be used. If this switch is activated, you can still control whether a "?" is allowed at the user level with the Allow ? Stock Number switch on the Authorization List For Product Support - Work Orders screen. |
| Only Outstanding Inv On A/R STMT (Y/N) |
If activated (Y), only outstanding A/R invoices are included on the A/R statements generated at the selected branch. If deactivated (N), all invoices and the matching payments are printed. |
| Print Nil A/R Statements (Y/N) |
If activated (Y), statements with a zero balance ($0) are printed at the selected branch. If deactivated (N), only A/R statements with a debit balance are printed at the selected branch. (Statements with a credit balance will print depending on the value set in the CMBR3 table). Statements with a zero balance always print for miscellaneous customers. |
| Retail Price (Y/N, S-S/O Only) |
Retail price refers to the regular selling price from the Parts Master files. (Regular selling is after any price increase percent is applied). This field applies to both the Parts Counter and Sales Orders. If a part is sold above retail price, retail price does not show on the invoice in any case.The options are available for this field:
|
| Your Savings (Y/N, S-S/O Only) | If activated (Y) and the customer on a parts invoice has had discounts applied to the invoice (ie. the Customer Discount Pricing switch above is set to Y, and there is a Customer Pricing record for the customer on the invoice), a "Your Savings" line be printed on the invoice displaying the total discount that was applied. |
| Ensure Tax Code 2 In Balance (Y/N) |
This field applies to the Rental and Key Invoices modules. If Tax Code 2 is being used and this switch is activated (Y), the system check to ensure that the tax amount entered to the tax liability account is correct according to the percentage to be charged. Valid tax 2 percentages are configured on the Tax2 screen. |
| Print Late Charge Total (Y/N) | If activated (Y), display total late charges as a separate line item on printed A/R statements. |
| Aging Method (D/M |
Allows you to configure whether you age by Day or Month. For example, a transaction dated August 29 would be aged as follows, depending on the selected method:
|
| Edit Part Master Description (Y/N/D) |
Controls whether part master descriptions will be uniform across all branches of the dealership:
|
| Allow Charges To Be Signed Off W/O |
If activated (Y), users are able to post labor and/or parts to work orders that have been Signed Off, but not Closed (Status "S"). |
| Allows Inq (S/O, Rental Invoicing) (Y/N) |
If activated, allows you to create a parts inquiry invoice using the INQ customer number. The use of parts inquiry invoices is optional. This option can only be done in Green Screen and is no longer supported in IntelliDealer and eventually be removed entirely. |
| Purchase Order 1st Digit | Allows you to configure the first digit for all parts purchase orders generated at the selected branch. |
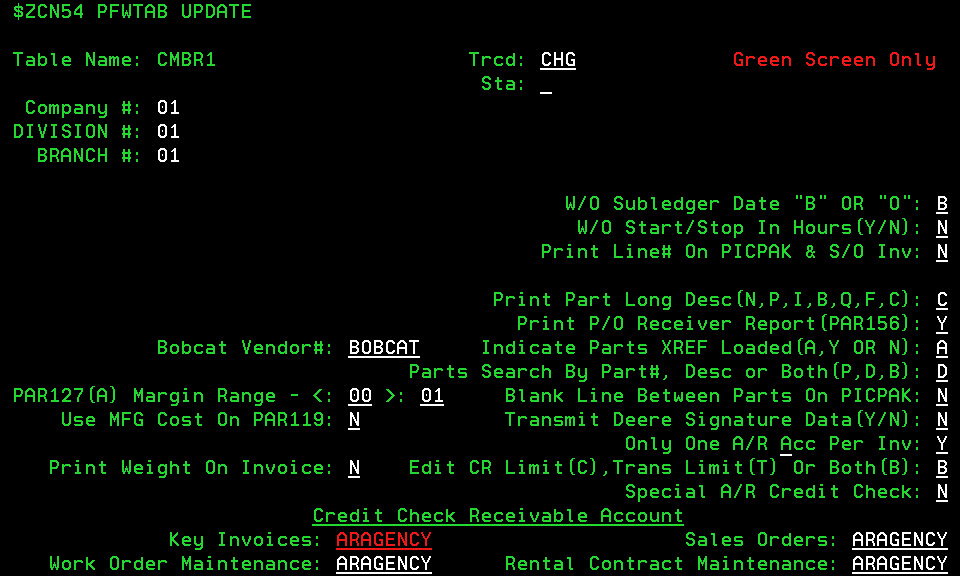
CMBR1 Table
The CMBR1 table allows you to configure a number of settings regarding the IntelliDealerParts module and the accounts receivables sections for different areas of the business.
The following fields appear on the CMBR1 table:
| Field | Description |
|---|---|
| W/O Subledger Date "B" or "O" |
If subledgered G/L accounts are used on a work order (the account on the work order has the Subledgered Account field selected on the Account Profile screen), those accounts will be updated during a work order billing run. This field will determine whether the date used on those invoices in the subledger will reflect:
|
| W/O Start/Stop In Hours (Y/N) |
Allows you to configure whether the start and stop time on work orders will be recorded in minutes of the hour (1/60) (Y), or in hundredths of an hour (N). For example, a start time of 1630 hrs would be recorded as 4.30 in minutes (switch set to Y) and as 4.50 when using hundredths (switch set to N). |
| Print Line# On PICPAK & S/O Inv (Y/N) | If activated (Y), an extra line for each item on a picpak or sales order with the text "Line X" will be printed at the left margin of the sales order body. |
| Print Part Long Desc (N, P, I, B, Q, F, C) |
Allows you determine whether short or long part descriptions should be printed on picpaks and sales order invoices:
|
| Print P/O Receiver Report (PAR156) |
When a purchase order is received and the system is updated with the new inventory levels, if this switch is activated (Y) the PAR156 report will automatically be printed detailing the part numbers ordered, back ordered and received, as well as the individual and extended costs of the order. Usually, this report is attached to the packing slip received with the shipment and forwarded to the Accounts Payable department to ensure that the vendor’s invoice is correct for the goods received. If the CMBR3 table is set to produce a duplicate report (see that table for details), it will be identical in every way except that it is spooled as PAR156A. |
| Bobcat Vendor # | Enter the Bobcat vendor number for the selected location. This field is required for certain Bobcat interfaces throughout the system. This field is required for dealers choosing to send parts and service information to Bobcat via DTF. |
| Indicate Parts XREF Loaded (A, Y, N) | This switch will determine when and if cross referenced parts are indicated in IntelliDealer; either always (A), only when there is not enough on hand quantity to fill the order with the original part (Y), or never (N). |
| Parts Search By Part #, Desc or Both (P, D, B) | This field is related to the green screen application only and will not affect IntelliDealer functionality. This switch determines the default setting of the Search field on the Parts Profile for parts that are quick-added to the system; either the part number (P), description (D), or a combination of both (B). |
| PAR127 (A) Margin Range |
The Parts Cost Analysis Summary(PAR127) and Parts Cost Analysis Detail reports (PAR127A) indicate the profit earned per part. The margin entered in this field dictates which parts will be included on the reports. For example, if <05 and >50 are entered, only parts with a profit margin less than 5% or greater than 50% will be included on the report. To capture all parts, set the range to <01 and >00. All branch transfers go though the system at a 0% profit margin (regardless of the actual percentage) as most people don't want to see these on an exception report. For example, if you want to see all parts that have a loss of over a 40% margin, you would use the range <0 and >40. This can cause confusion as all branch transfers (T's on the BIL900 report) will be excluded because they are on this report with a 0% profit margin even though they might have been the cause of a loss on the day in question.If you still want to see all parts that have a loss of over a 40% margin with all branch transfers, you would need to set the range up as <01 and >40. |
| Blank Line Between Parts On PICPAK |
If activated (Y), the system automatically include a blank line between parts on picpaks and sales orders. |
| Use MFG Cost on PAR119 |
If activated (Y), the manufacturer's cost is printed on the parts order faxes (PAR119). If deactivated (N), the landed cost is printed instead. |
| Transmit Deere Signature Data (Y, N) | This switch is no longer in use and is scheduled for removal in the next software release. |
| Only One A/R Acc Per Inv |
If activated (Y), only one A/R agency is allowed per invoice. This switch is forced to Y if the Edit CR Limit (C), Trans Limit (T), or Both (B) switch below is set to anything other than No (N). More than one cash code is still allowed on an invoice if the Activate TAX3 and TAX4 switch in the CMBR3 table is activated (Y). |
| Print Weight on Invoice | If activated (Y), the total weight of all parts on an invoice is printed on sales orders and picpaks. |
| Edit CR Limit (C), Trans Limit (T), or Both (B) |
Allows you to select when the user must enter an authorization number when a customer exceeds their credit or transaction limits; either on Credit limits (C), Transaction limits (T), Both (B), or Never (N). If this switch is set to anything besides N, the Only One A/R Acc Per Inv switch above will automatically be set to Y.If this switch is set to anything besides N, the credit and transaction limits should be configured on the Customer Profile: A/R Agency screen for each customer and each A/R agency code assigned to the customer. If a specific limit is not manually set, the system will default the limit to 0, thereby forcing authorization on all transactions. If this switch is set to anything besides B, credit cards transactions deos not work in the system. |
| Special A/R Credit Check |
If you are licensed for the Special A/R Credit Check system, this switch default to Y to activate the special A/R credit check system. This field is only configurable by VitalEdge support. Please contact Support for details about the special A/R credit check system. If the special credit check circumstance exists where the customer's default A/R agency is 1, accounts loaded for Key Invoices, Work Order Maintenance, Sales Orders, and Rental Contract Maintenance under the Credit Check Receivable Accounts section are ignored and instead A/R balances for all accounts that are being credit checked displayed. If your dealership is licensed for the special A/R credit checking feature, it is recommended that this switch be turned on at every branch. If the switch is deactivated at a specific branch, the credit check does not be performed in that branch but the purchases still be factored into the customer's available credit. |
| Credit Check Receivables Account |
These fields determine what area of the system checked to determine credit limits for each of the listed modules; either a specific A/R account number, the ARAGENCY table, or all A/R general ledger accounts combined (*ALL). One reason to use specific A/R accounts is that this allows certain flexibilities. Suppose, for example, there is one A/R account for Parts sales and another A/R account for Equipment sales. If it is always necessary to credit check Parts transactions, but never necessary to check Equipment transactions, when the parts A/R General Ledger account is defined in this table, the customer’s Parts purchase is verified against credit limits, but any Equipment purchase made by the same customer is not. The ARAGENCY option has certain advantages in that the credit check is performed by charge code. (Charge codes and their limits can be defined on the Customer Profile: A/R Agency screen for each customer.) When the customer makes a purchase, the system verifies the charge code used against the same code in the Customer Profile: A/R Agency screen and performs the credit check for each charge code used in the transaction. The customer can pay for purchases using a combination of charge types, and each is checked. For example, suppose a customer is allowed to charge up to $500 on an in-house A/R, and up to $2000 on a third-party A/R, such as an A/R account held with a manufacturer. The customer purchases $2500 worth of goods and wants to put $1000 on the in-house A/R, and $1500 on the manufacturer-held account. (Remember that these would be on separate invoices, since only one A/R account can be used per invoice if credit checking is performed - see previous fields.) If ARAGENCY is selected for this field, the in-house transaction would be checked and would require authorization since it exceeds the $500 in-house A/R limit. The manufacturer-held portion would then be checked and processed without requiring authorization. The other function of this field is to determine the information displayed when the invoicing modules are used; *ALL in this field means that the total of all A/R accounts outstanding display, a specific A/R account in this field means that the total owing on that specific A/R account displays, ARAGENCY in this field means that the amount owing on the A/R account of the charge code which is the default for the customer (as specified on the A/R Agency tab of the customer profile) displays. This is especially important if no checking of credit limits is being done (see previous field). VitalEdge recommends using ARAGENCY in this field and setting credit limits for each A/R agency assigned to your customers on the Customer Profile: A/R Agency screen. |
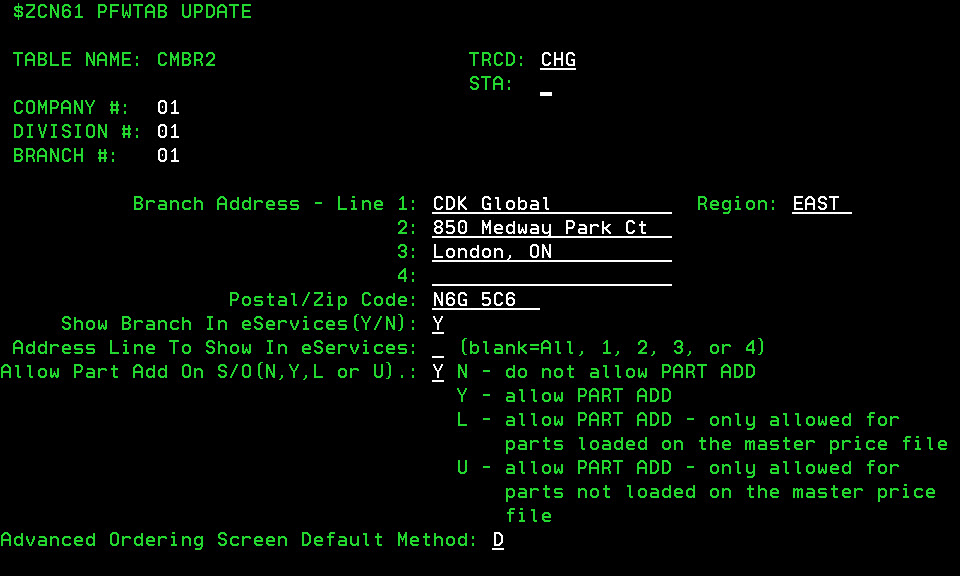
CMBR2 Table
The CMBR2 table is used to configure the branch address of your dealership that will be used on faxes generated in the system, as well as MyDealer information, whether or not quick-adding a part is allowed when creating a sales order, and the default method is used on the Parts Ordering screen.
The following fields appear on the CMBR2 table:
| Field | Description |
|---|---|
| Branch Address | The branch address displays on parts orders when they are faxed directly to the vendor through the system. Up to four address lines, each with a maximum of 20 characters, can be configured. |
| Region | Allows you to group multiple branches into separate regions which, in turn, allows you to generate reports at a region level (as opposed to only individual branches or divisions.) |
| Postal/ Zip Code | The branch's postal or zip code. |
| Show Branch in MyDealer |
If activated (Y), the selected branch appears as a valid pick up location for MyDealer orders. If activated (N), then the first valid location found is used as he default branch. |
| Address Line to Show in MyDealer | Allows you to select the address lines from the Branch Address field above appears in MyDealer; either all (Blank), 1, 2, 3, or 4. |
| Allow Part Add On S/O (N, Y, L or U) |
Allows you to select when parts that are not currently in the Parts Master file can be added in the Sales Order module; either do not allow the addition of any parts (N), allow the addition of all parts, including those from the master price file (Y), allow the addition of all parts, but only for those loaded from the master price file (L), or only allow the addition of parts that are not loaded on the master price file (U). For example, if Y is selected for this field and a part number that is currently not in the parts master file is added to an invoice, an Add link appears in the Extended Price field of the Parts Invoicing Details screen allowing users to add the part to the system using the Part Quick Add screen. If users are not allowed to add parts while in the Sales Order module, all new parts must be added using the Add Part function in the IntelliDealer Parts module. |
| Advanced Ordering Screen Default Method |
Determines which fields will automatically be populated on the Parts Ordering screen when creating a purchase order from within a parts invoice. The Parts Ordering screen only appears when the Advanced Ordering Screen switch has been activated on the Authorization List For Product Support - Parts Invoicing screen and if there are parts on the invoice where the order quantity minus the issued quantity is greater than zero. If the switch is deactivated, the Create Purchase Order screen will appear instead. For details, see the About the Advanced Ordering System help topic.The available default methods are: APreload the screen automatically based on the store priority table with the remainder of the order coming from the supplier configured on the part profiles. |
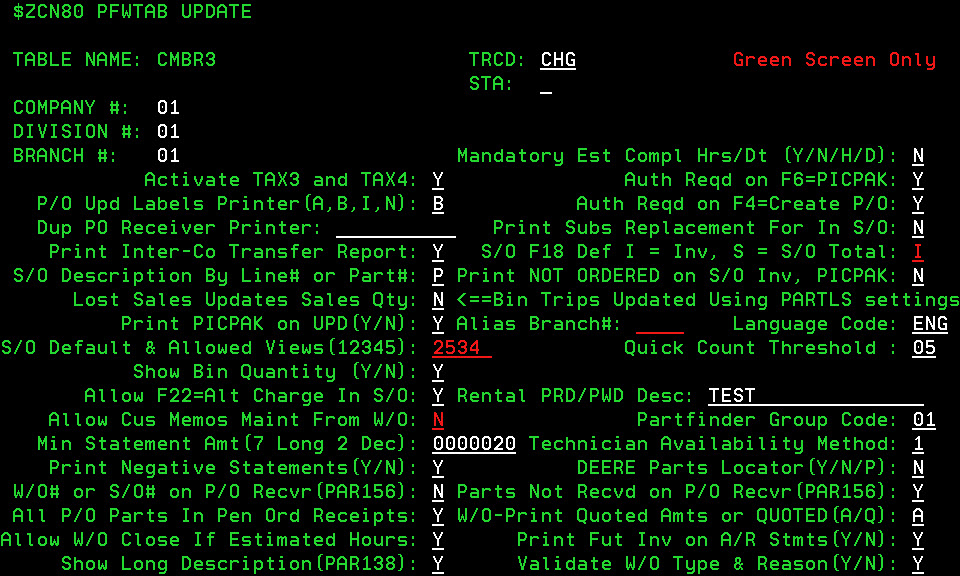
CMBR3 Table
The CMBR3 table allows you to configure a number of settings for the purchase orders and sales orders created in the system.
The following fields appear on CMBR3 table:
| Field | Description |
|---|---|
| Mandatory Est Compl Hrs/ Dt (Y/N/H/D) |
Determines whether the Estimated Hours or Estimated Completion Date fields will be mandatory on the work order Segments tab when creating a work order; either both the Estimated Hours and Estimated Completion Date fields will be mandatory (Y), neither will be mandatory (N), only the Estimated Hours field will be mandatory (H), only the Estimated Completion Date field will be mandatory (D). In order to properly function, both the Work Order Service Scheduling screen and the Technician Service Scheduling screen require Estimated Hours to be configured for each work order in the system. As such, it is strongly recommended that if you are using either of these screens, you set this field to either Y or H. For details, see the Drag and Drop Service Scheduling Overview topic. |
| Activate TAX3 and TAX4 |
If activated (Y), Tax 3 and Tax 4 codes is used to calculate sales tax throughout the system. It is recommended that you use Tax 3 and Tax 4 codes as their larger codes (4 alphanumeric characters) allow for more tax types to be defined. Valid Tax 3 and Tax 4 codes are configured on the Tax 3 and Tax 4 screens, respectively. |
| Auth Reqd on F6=PicPak | If activated (Y) and credit checking is activated at your branch, authorization is required through the A/R Agency tab before printing the picpak. |
| P/O Upd Labels Printer (A, B, I, N) |
Determines the printer to use for the bin labels that are generated after a parts purchase order is receipted into the system Only parts for which the Label switch is activated on the Parts Profile tab have a bin label printed.The following options are available: A: AFPDS printer If option A, B, or I is selected in this field (and at least one part on the order has the Label switch activated) the Print Labels screen will appear after clicking Update on the Parts Order screen. |
| Auth Reqd on F4= Create P/O | If activated (Y), and credit checking is activated at your branch, authorization required through the A/R Agency tab before special ordering a part on an invoice. |
| Dup PO Receiver Printer | The name of the printer that generate a duplicate of the parts order receiver report (PAR156) when parts are receipted into inventory through the system (after the user clicks Update on the Parts Order screen.) |
| Print Subs Replacement For In S/O | If activated (Y), print a line on picpaks and sales orders stating that the part sold is a substitute for the originally requested part (as well as the original part number on the order.) |
| Print Inter-Co Transfer Report | If activated (Y), the Inter Company Transfer report (PAR229) automatically prints when parts are transferred to the current branch from another location using the Need to create a stock order? Click here to add. link on the Parts Ordering screen. |
| S/O F18 Def I= Inv, S=S/O Total | This field only applies to the green screen application and not affects IntelliDealer functionality. Allows you to determine how the totals on a parts invoice calculated: I: the Invoice total will show the total of the parts currently available to the customer (i.e.the amount the customer can be invoiced for immediately) S: the Sales Order total, which includes the entire order (parts in stock as well as those on order from the vendor.) This includes all parts not issued or previously invoiced. |
| S/O Description by Line# or Part# |
If set to Part# (P) any extended Descriptions added to a parts invoice using the Extended Description screen will be applied to all instances of the part on the invoice. If set to Line# (L), any extended Descriptions added to a parts invoice remain unique to the associated line number, regardless of how many times the selected part appears on the invoice. |
| Print NOT ORDERED on S/O Inv, Picpak | If activated (Y), "NOT ORDERED" prints on picpaks and parts invoices next to any parts on the invoice that were not ordered using the Purchase Order link on the Parts Invoicing Details tab when creating the invoice. |
| Lost Sales Updates Sales QTY |
If activated (Y), if a Cash Code 4 is used on a parts invoice (denoting a lost sale), the system automatically updates the part(s) sales quantity accordingly. The system will also automatically update the part(s) bin trip totals according to this switch setting. |
| Print Picpak on UPD (Y/N) | If activated (Y), picpaks automatically be printed whenever a receipted parts invoice is updated, for which a purchase order was created using the Purchase Order link on the Parts Invoicing Details tab. |
| Alias Branch# | This field only applies to the green screen application and does not affect IntelliDealer functionality. The alternate name for the current branch. This field is for reference only. |
| Language Code |
The language in which traffic tickets, picpaks and invoice headers print. The default value for this field is ENG (English), however other codes that can validated on the Language screen can be used. |
| S/O Default and Allowed Views (12345) | This switch affects green screen functionality only. The order in which you want to display sales order information using the F14 key in the sales order module of the green screen application (The first option entered in this field will be the default view, and the other views will appear in the order listed. For example, if 21345 is entered in this field, when you first open the Sales Order module, Extended Price information will appear first):
|
| Quick Count Threshold |
When using the Deere Parts Receipting option on the wireless inventory device, if a part's on hand quantity is under the threshold configured in this field the user will be forced to count and enter the number of parts currently in the bin during the receipting process. For more information, please see the Wireless Inventory Control manual. |
| Show Bin Quantity | If activated (Y), the Bin and Quantity fields on the Bins tab of the parts profile will be editable. |
| Allow F22= Alt Charge In S/O | If activated (Y), allows you to enter either an alternate G/L account or stock number on the Alternate Charge tab when creating a parts invoice which, in turn, allows you to charge parts to an equipment unit or a G/L account other than the one associated to the cash code(s) used on the invoice. |
| Rental PRD/ PWD Desc | This switch is no longer in use and will be removed during the next software release. |
| Allow Cus Memos Maint From W/O | This switch applies only to the Service module of the green screen application, which as of IntelliDealer Insight 1.0 has been moved to IntelliDealer. If activated (Y), the user will be able to edit the comments associated to the customer profile on the work order that they are currently viewing. |
| Partfinder Group Code | If your dealership uses the Partfinder application, this code will group together any parts listed by your branch on the Partfinder website. |
| Min Statement Amt (7 Long 2 Dec) | The minimum amount due before a customer A/R statement is printed.This field is seven characters long and includes two decimal places (i.e. $5.00 would be keyed as 0000500). |
| Technician Availability Method |
Allows you to select the method in which technician availability will be determined (as specified on the Technician Availability tab: Method 1: The system will take work orders with the oldest Estimated Completion Date first and schedule the estimated hours starting at this date, then continue backwards until today’s date is reached or the total hours are accounted for. This is repeated for each work order. This method requires all work orders to have an Estimated Completion Date, and as such, the Mandatory Est Compl Hrs/ Dt switch above should be set to Y.If the total hours for all work orders for one day for one technician is greater than the total available hours for that technician for that day, the technician's remaining hours will be added to the previous day. For example, if a work order has an Estimated Completion Date of August 6th, an Estimated Hours of 10 and the selected technician is available to work for 8 hours, 8 hours of the service will be scheduled for August 6th while the remaining 2 hours on the order will be scheduled for August 5th (assuming August 5th is a business day for which the technician has available hours.) When using this method, Overtime hours can only appear if the current day being viewed is today and the selected technician is completely booked (meaning any remaining time cannot be pushed back to the previous day and will therefore be considered overtime.)Method 2: The system selects the data for scheduling in the following manner:
This method determines which work orders are selected for scheduling purposes and does not reflect the order in which the jobs are done in. When using this method, Overtime Hours will appear when the job cannot be completed by the Estimated Completion Date (the number of hours remaining will be shown.)When using either method 1 or 2, Overdue Hours represent any leftover hours from work that had an Estimated Completion Date from a day prior to today. |
| Print Negative Statements (Y/N) | If activated (Y), A/R statements with a negative balance can be printed in the system. |
| Deere Parts Locator (Y/N/P) | This field applied to Deere dealers only. If activated, the system will send John Deere their parts inventory information using the Deere DTF program. It will only send parts that are loaded under the vendor Deere or parts that are loaded with a vendor that begins with JD. If there is a change in the On-hand, Order Formula Code, Parts/Pkg, and/or Current Sales Qty, the part information will be transmitted to Deere. Enter P in this field to transmit "price percentage" increases to Deere in Parts Locator. |
| W/O# or S/O# on P/O Recvr (PAR156) | If activated (Y), the Sales Order and Work Order numbers will be printed on the Parts Receiver report (when applicable). |
| Parts Not Recvd on P/O Recvr (PAR156) | If activated (Y), any part numbers that were not received will be printed on the Parts Receiver report (when applicable). |
| All P/O Parts In Pen Order Receipts | If activated (Y), all parts will be included on the Pending Order Receipts report (PAR221), including those that have yet to be receipted. |
| W/O - Print Quoted Amts or QUOTED (A/Q) | Allows you to select whether to include the total quoted amount including all parts and labor on printed work order quotes (A), or only the total quoted amount and the word "Quoted" in the Parts and Labor Amounts field (Q). |
| Allow W/O Close If Estimated Hours | If activated (Y), will allow the user to close a work order segment even if Estimate is selected in Hours fields of the Customer - Work Order Header tab. |
| Print Fut Inv on A/R Stmts (Y/N) | If activated (Y), future invoices (invoices with an invoice date greater than the statement date) will be included on printed A/R statements. |
| Show Long Description (PAR138) | If activated (Y), will include the extended description on the PAR138 report. |
| Validate W/O Type & Reason (Y/N) | If activated (Y), only valid work order Type codes (as specified on the Types screen) will be allowed on new work orders. |
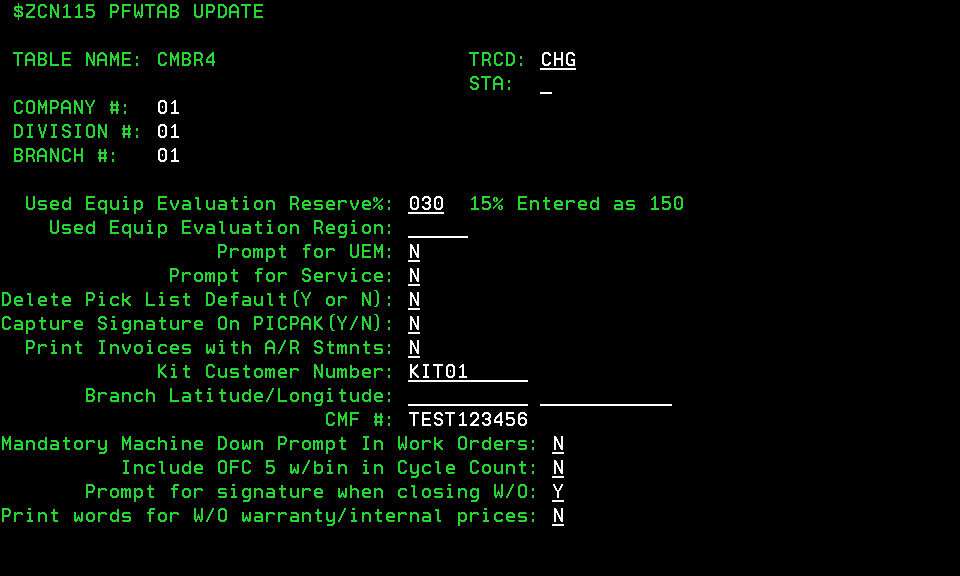
CMBR4 Table
The CMBR4 table allows you to configure a number of settings regarding the IntelliDealerEquipment and Service modules.
The following fields appear on the CMBR4 table:
| Field | Description |
|---|---|
| Used Equip Evaluation Reserve % |
The percentage entered in this field is used to automatically calculate a reserve amount for Used Equipment Evaluations created at the dealership. For more information, see the Used Equipment Evaluation Overview topic. |
| Used Equip Evaluation Region |
The region to which Used Equipment Evaluations created at the dealership belong to. Regions are defined in the CMBR2 table. |
| Prompt For UEM |
If activated (Y), the Sales Representative will be prompted to choose a specific UEM for the evaluation to be sent to. If there is aStore Equipment Manager defined then that person will be prompted to choose. For more information, see the Used Equipment Evaluation Overview topic. |
| Prompt For Service | As with the Prompt for UEM switch above, if activated (Y) allows the user to forward used equipment evaluations to a specific Service Manager (if defined), or to a queue where the UEM(s) that are responsible for the selected branch can “pick up” the
evaluation for review (N). For more information, see the Used Equipment Evaluation Overview topic. |
| Delete Pick List Default (Y/N) | If activated (Y), the Delete Pick List option on the Import screen (which appears after selecting the Parts Catalog/PC File option) will be selected by default. |
| Capture Signature On PICPAK (Y/N) | If activated (Y), the user will be prompted to capture a signature whenever the picpak option is selected in IntelliDealer.The signature is then reprinted to the final invoice that is generated during the billing run. |
| Print Invoices with A/R Stmnts |
If activated (Y), the current month's invoices will be printed with A/R statements. Only invoices that were not printed on a statement run will be generated.The invoices are generated in a separate spool file from the statements. |
| Kit Customer Number | When the on hand quantity of a parts kit is updated, the system will use this customer number to create the sales order that will reduce the kit component on hand quantity, and increase the kit on hand quantity. This field allows for up to 10 characters. |
| Branch Latitude and Longitude | The latitudinal and longitudinal coordinates of the selected branch. |
| CMF# |
A unique identifier that is assigned to each store by VitalEdge. This field is password protected. Please contact VitalEdge for more information. |
| Mandatory Machine Down Prompt In Work Orders | If activated (Y), the Machine Down field on the Customer - Work Order Header tab will be mandatory on all work orders. |
| Include OFC 5 w/bin in Cycle Count | If activated (Y), parts that have been assigned Order Formula Code 5 with a bin and zero on hand quantity will be included in the cycle count. |
| Prompt for signature when closing W/O | If activated (Y), the user will be prompted to capture a signature when closing a work order. |
| Print words for W/O warranty/internal prices |
If activated (Y), warranty or internal charges (for parts for example) will be billed without showing the actual dollar amount on the customer invoice. Instead, the labels "Warranty" or "Internal" will be shown in place of the price. The system will ignore this switch if the invoice is for an internal customer, (as specified in the Category field of the Customer Profile) in which case the price will always be shown. |
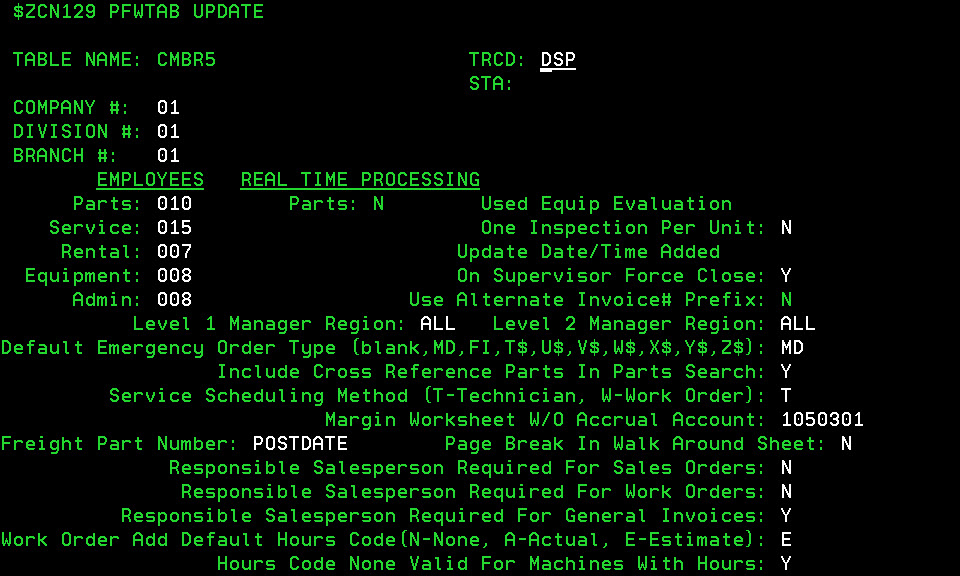
CMBR5 Table
The CMBR5 table allows you to configure a number of settings regarding the IntelliDealer Equipment and Service modules.
The following fields appear on the CMBR5 table:
| Field | Description |
|---|---|
| Employees | Lists the number of employees in the selected branch by department. This data is used when calculating KPI information. |
| Real Time Processing |
There are two Real Time Processing (RTP) switches:
|
| Update Date/ Time Added On Supervisor Force Close | If activated (Y), any labor entries closed on the Labor In Progress tab will have their Date Added and Time Added fields in the WOTTM file (WTDTA and WTTMA) updated with the current date/time (when the entry was closed). |
| Use Invoice Number Prefix |
If activated (Y), the system will automatically insert an alpha-character between the Invoice First Digit (configured on the CMBR table) and the first number of an invoice. For example, with this switch activated, the invoice sequencing used by the system is as follows: "Invoice First Digit", followed by A0001-A9999 to B0001-B9999, etc.For example, if the Invoice First Digit for the Parts department were P and the last invoice created for the Parts department was PC0029, the next invoice number created in the Parts department would be PC0030. |
| Level 1 Manager Region |
The region(s) that level 1 managers at the selected branch can approve margin worksheets for. For example, if West is selected in this field, all level 1 managers from the selected branch can approve worksheets generated from any branch in the West region. Manager levels are defined in the Margin Worksheet Area field of the User Profiles screen.Branch regions are defined in the CMBR2 table. |
| Level 2 Manager Region |
The region(s) that level 2 managers at the selected branch can approve margin worksheets for. For example, if West is selected in this field, all level 2 managers from the selected branch can approve worksheets generated from any branch in the West region. Manager levels are defined in the Margin Worksheet Area field of the User Profiles screen.Branch regions are defined in the CMBR2 table. |
| Default Emergency Order Type | The default order type for emergency orders created in IntelliDealer; either blank, MD, FI, T$, U$, V$, W$, X$, Y$, or Z$). |
| Include Cross Reference Parts In Parts Search | If activated (Y), when searching for a specific part number using the Select Part Number field on the Your Parts Inventory screen, any cross-referenced parts for the selected part number will also be displayed in the search results. With this switch activated, any parts listed in the search results with cross referenced part numbers will also display a reverse-highlighted Description; hovering over the description will display the cross referenced part number(s). For more information, see the Your Parts Inventory screen help topic. |
| Service Scheduling Method (T or W) | Allows you to select whether the Technician Service Scheduling screen (T) or Work Order Service Scheduling screen (W) will be used for drag and drop service scheduling at your dealership. For more information, see the Drag and Drop Service Scheduling Overview topic. |
| Margin Worksheet W/O Accrual Account | Currently not being used. |
| Freight Part Number |
Used in the wireless inventory picking system, if a part number is entered in this field,the Add Freight screen will automatically appear when completing the picking process, allowing the user to add a freight charge to the parts invoice. The part number entered in this field must have a corresponding record in the PARTMAST file in order for the freight to be properly charged. |
| Page Break In Walk Around Sheet | If activated (Y), the system will automatically insert a page break between each technician when printing a Walk Around Sheet from the Work Order Assignment tab. |
| Responsible Salesperson Required For Sales Orders | If activated (Y), users will be forced to enter a Responsible Person on any sales orders created in IntelliDealer. |
| Responsible Salesperson Required For Work Orders | If activated (Y), users will be forced to enter a Responsible Person on any work orders created in IntelliDealer. |
| Responsible Salesperson Required For General Invoices | If activated (Y), users will be forced to enter a Responsible Person on any general invoices created in IntelliDealer. |
| Work Order Add Default Hours Code (N, A, E) | The default hours code that will be selected in the Hours field of the Customer Work Order Header tab when creating a work order in IntelliDealer; either None, Actual or Estimate. |
| Hours Code None Valid For Machine With Hours (Y, N) | If deactivated (N), the None hours code will not be available throughout the system, forcing users to select either Actual or Estimate hours when creating an equipment profile or work order in IntelliDealer. |
| Turn Off Tech Scheduling Auto-Refresh | If activated (Y), the auto-refresh function on the Service Scheduling screen will be disabled. With this switch active the only way to refresh the service list is by clicking on the Click here to refresh list link on the Service Scheduling screen. |
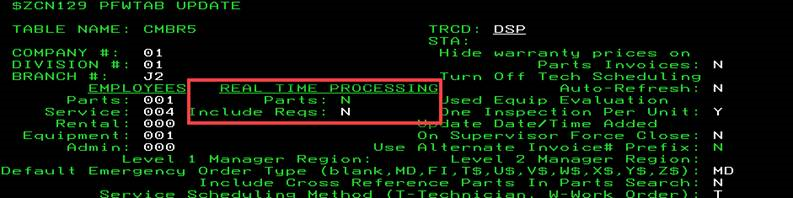
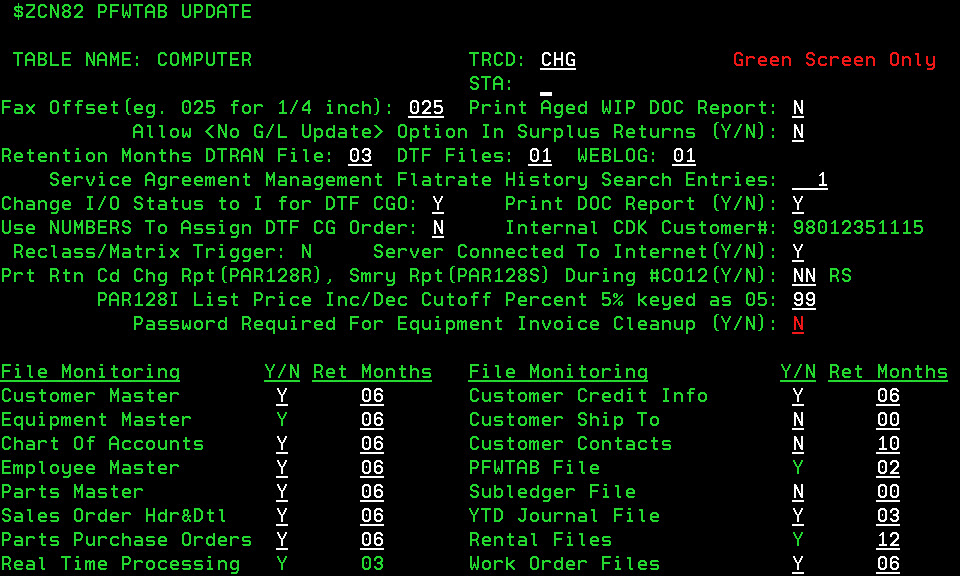
Computer table
As of IntelliDealer 6.5 or later, this table can only be configured within IntelliDealer at Configuration/ Miscellaneous/Other/ System Settings
The COMPUTER table allows you to configure the settings for your server and file retention history.
The following fields appear on the COMPUTER table:
| Field | Description |
|---|---|
| Fax Offset | Determines the printing offset for any faxes sent via the iSeries server. |
| Print Aged WIP DOC Report (Y/N) |
If activated (Y), will print the Work-In-Process report (DOC003) during the nightly database reorganization. The DOC003 report is an aged summary WIP report for customer work orders only. It lists all open customer work orders and a combined total of parts and labor charged to each work order to date. The DOC003 report is not designed to be a balancing report for WIP. As an alternative, you can create a work in process report from the Work in Process screen in IntelliDealer which contains more details.VitalEdge recommends entering N in this field in favor of creating the work in process report in IntelliDealer. |
| Allow <No G/L Update> Option In Surplus Returns (Y/N) | Determines the options that will appear on the Surplus Returns - Update screen when updating a surplus return. For details, see the Surplus Returns - Updates screen help topic. |
| Retention Months For DTRAN File | The DTRAN file stores communication records for credit authorizations between IntelliDealer and different vendors. These communication records are purged as part of the A/R month end process. Enter the number of months between each purge. |
| Retention Months For DTF Files | This field is specific to John Deere dealers. DTFARCH file data, DTFPOR (regardless of status/completion) data, and files in the IFS Deere directories are purged based on this number. The purge will occur during the first full database reorganize after the A/R month end process. The default and minimum value is 01 with a maximum of 06. |
| Retention Months For WEBLOG | This field will determine when the log files in the WEBLOG file should be removed using the WLCLEANUP program. |
| Service Agreement Management Flatrate History Search Entries |
This field will determine the number of historical entries that should be used to calculate the average dollars for non-completed jobs in the Service Agreement Management system, based on the job code associated to the service order. Historical entries are defined as the total dollar amount for closed work orders. For example, if 10 is entered in this field the system will look at the dollar amounts used on the last 10 occurrences of a job code to determine the average dollar amount for the selected code. |
| Change I/O Status to I for DTF CGO | If activated (Y), the In/Out status on the Equipment Profile will be updated when JDMINT orders are received from John Deere. |
| Print Doc Report |
If activated (Y), the Daily Operating Controls reports (DOC) will be printed when a database re-organize is run.The Daily Operating Controls reports include the following: DOC001D (Detail), DOC001F (Financial), and DOC001S (Summary).
|
| Use NUMBERS To Assign DTF CG Order |
If activated (Y), the following logic will apply in regards to Complete Goods Orders and Invoices:
|
| Internal IntelliDealerCustomer# |
This field is used for two purposes:
When a Melroe dealer wishes to transmit financial information to VitalEdge for forwarding to Melroe, this field must be completed prior to the first transmission. When a dealer participates in Partfinder, this field must be completed prior to the dealer’s first transmission of parts for sale. The value in this field is determined by VitalEdge. It consists of the dealer’s customer number, preceded by the numbers 9801. Note that the field is password protected. Please contact VitalEdge for full details.This field does not control whether the transmission of financial or Partfinder information happens; it simply allows the files to be transmitted if the dealer creates them. For example, a Melroe dealer may choose to participate in Partfinder but not to submit financial information to Melroe via VitalEdge. The value in this field would be the same for both situations, but the dealer would not create the transmission file to send the financial data if they did not want to. |
| Reclass Matrix Trigger |
This table setting controls how the Matrix field on the Parts Profile and the Reclass field on the Ordering Information tab of the parts profile are updated. If activated, any changes to the Source, Class, Type, or Inventory Class fields in the Parts Profile or in the Price File will "trigger" the system to recalculate the Reclass and/or Matrix value, thus keeping the Reclass and Matrix field automatically up to date as changes occur. In order for this to work, all PartAdds table records must first be setup with the desired CSTI combination for the Reclass and Matrix fields. You may enter one of the following values:
Once you turn on the switch (R, M or B), the job RCLMTXUPDT will be submitted to batch to update all of the Parts Profile (PARTMAST) records that are affected by your COMPUTER/PartAdds switch selections. From this point forward, any change to the Source, Class, or Type fields in Parts Profile will cause that record's Reclass and/or Matrix field to be updated. |
| Server Connected To Internet | Determines whether your server is connected to the internet. This field should always be set to Y. |
| Prt Rtn CD Chg Rpt (PAR128R), Smry Rpt (PAR128S) During #C012 |
This field is for Deere dealers only. When a parts Master Price file update is performed via the Deere poll (#CO12), report PAR128R can be produced. This report shows all parts whose Return Code has changed and lists the branch, the affected part number and the old and new return codes. The first character in this field (Y/N), determines whether to generate the report. The second character in this field (Y/N) determines whether or not to generate a Summary Report(PAR128S) during the update. If the switch for the summary report is a Y, then the parts file will be sorted by class—which is a requirement for the summary report—and the summary report will be produced. The RS shown next to this field indicates the report that will be controlled by the corresponding value that is entered. For example, if "NY" is entered, the PAR128R report will not be produced during the update but the PAR128S report will be. |
| PAR128I List Price Inc/ Dec Cutoff Percent 5% keyed as 05 |
This entry controls the percent threshold for what will display on the PAR128I report (a detailed report of list price or cost increases that can currently only be produced from within the green screen application when a parts price file is processed, using #PARTPRC.) The same part number may appear on both the increase and decrease report but will only be added to totals once. Parts without an increase or decrease will not appear on the reports. However, the cost and list amounts will be added to the totals to reflect an accurate value of inventory on the summary reports. |
| Password Required For Equipment Invoice Cleanup | This switch is related to green screen only and does not affect IntelliDealer functionality. If activated (Y), the CLEANINV utility will be password protected. The CLEANINV utility is used to clean up orphan equipment invoice details left behind by an abnormal end of job while keying an invoice. |
| File Monitoring |
Controls whether or not to monitor the files listed (using the Y/N field) and, if so, the number of months to retain records for (using the Ret Months field.) Once you have turned on the file monitoring system the following files are created and can be used for queries:LOGBANK - Bank Reconciliation File LOGCCAU - Credit Card Authorizations LOGCGIB - W/G Master Log File LOGCMAA - A/R Agency Log File LOGCMAS - Customer Master Log File LOGCMSC - Customer Contacts Log File LOGCMSH - Customer Master Ship To Log LOGCOAC - Chart Of Accounts Log File LOGEMPL - Employee Master Log File LOGEMPS - Employee Secondary Log File LOGPART - Part Master Log File LOGPORD - Purchase Order Header LOGPPRT - Purchase Order Details LOGRMCT - Rental Management Contract Log LOGRMDT - Rental Management Detail Log LOGRMID - Rental Invoice Detail Log File LOGRMIN - Rental Invoice Log File LOGSD - Sales Order Header File LOGSO - Sales Order Detail File LOGSUBL - Subledger Log File LOGTABL - Tables Log File LOGUSER - Web Browsers by User LOGWOD - Work Order Details LOGWOH - Open Work Order Header LOGWOL - Work Order Labor (WIP) LOGWOR - Open Work Order Repair (Segment) LOGXMDT - Credit Card Postings LOGYTDJ - Journal Log for Manually Keyed Journals Only LOGVMST - Vendor Master File LOGVMDL - Vendor Dealers LOGVMCN - Vendor Contacts LOGVMDS - Vendor G/L Distribution LOGVMMF - Vendor Manufacturers |
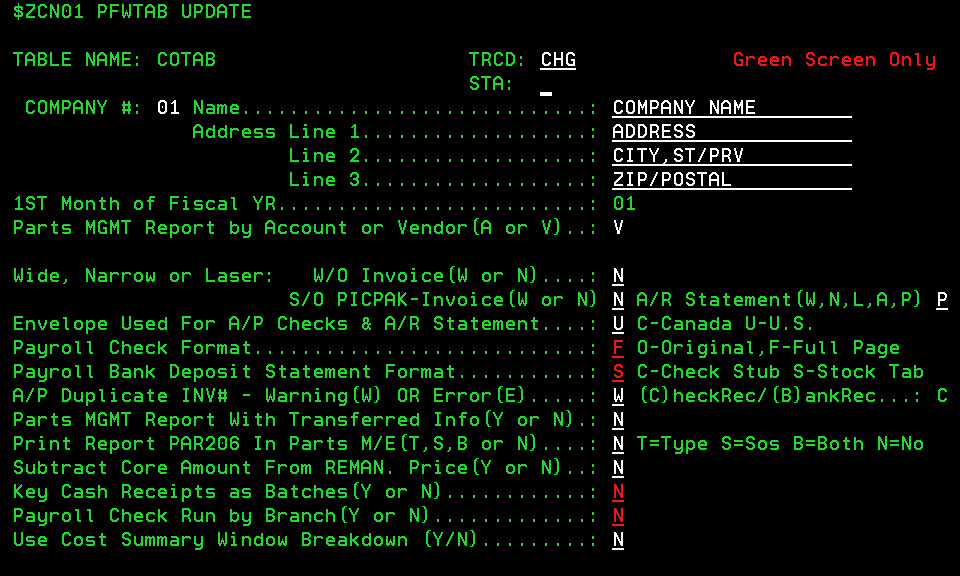
COTAB table
The COTAB table allows you to configure financial and print settings for each specific branch in your dealership.
The following fields appear on the COTAB table:
| Field | Description |
|---|---|
| Name | The branch location name which will appear on various reports throughout the system. This field allows for up to 20 alphanumeric characters. |
| Address Line 1-3 | This information is optional and will not appear or be printed anywhere in IntelliDealer. Each address field allows for up to 20 alphanumeric characters. |
| 1st Month of Fiscal YR | Enter the first month of the fiscal year for the selected branch. This field is 2 digits. For example, January is '01', February is '02', etc. |
| Parts MGMT Report By Account of Vendor (A or V) |
The Parts Management Information report (PAR029) provides an analysis of the parts department activity for the month. This report includes percent of fill, parts inventory turns, sales detail by type, and activity statistics information. The Parts Management with Transfer Information report (PAR29A) provides the same analysis but also includes branch transfer information. This switch will determine how the reports are sorted: A: By part sale Account number V: By part Vendor number This switch is password protected, as it can negatively affect parts management files and reports as per month end. Contact VitalEdge support for assistance.Vendors, sale accounts and branches can all be grouped together for the PAR029 and PAR29A reports on the Report Groupings screen.For example, if there are 3 vendors and 3 branches at your dealership and you want 1 line to represent vendors 2 and 3 and 1 line to represent branches 2 and 3, the Report Groupings screen will allow you to configure the reports as such. |
| Wide, Narrow or Laser (W/N/L) |
Allows you to specify the type of paper you use for the W/O Invoices and S/O PICPAK- Invoices created at your dealership:
|
| A/R Statement (W/N/L/A/P) |
Select the form type your accounts receivable statements are printed on: W: Statement forms have (1) portion for the dealership, (1) portion for the customer’s records and (1) portion to be returned with the customer’s remittance. N: Statement forms have (1) portion for the customer’s records and (1) portion to be returned with the customer’s remittance. L: Statements are printed on 8-1/2” x 11” paper on a laser printer. Overlays developed by VitalEdge can be used. The overlays print out in statement style format. A: Statements are printed on a laser printer and the customer’s name and address should print four lines lower on the statement than normal. This allows you to fold the statements with a folding machine and have the customer’s name and address appear in the window of a standard #10 envelope. Overlays developed by VitalEdge can be used. The overlays print out in statement style format. P: Statement laser forms will have a perforation set three inches from the right edge, so that this segment may be detached and sent back by the customer. Overlays developed by VitalEdge can be used. The overlays print out in statement style format. If option L or A is selected, duplicate copies of laser printed statements can be printed from the file spooled at the time of statement production. |
| Envelope Used For A/P Checks & A/R Statements |
Specify the type of envelopes used by your dealership for Accounts Payable checks and Accounts Receivable statements. (Both options are #10 business envelopes): C: Canadian #10 envelopes have a window 1” high x 4” long, located 5/8” from the left edge of the envelope and 3/4” from the bottom edge of the envelope U: U.S. #10 envelopes have a window 1-1/8” high x 4-1/2” long, located 7/8” from the left edge of the envelope and 1/2” from the bottom edge of the envelope |
| Payroll Check Format | This field applies to the green screen application only. Specify the format of the payroll checks that will be generated at your dealership: O: The Original check format, which are 9.5" x 7" continuous forms used on a dot matrix printer or F: The Full page format, which is the 8.5" x 11" laser form. The earnings and deductions information prints at the top of the form and the actual check prints at the bottom. |
| Payroll Bank Deposit Statement Format | This field applies to the green screen application only. If you are using an electronic payroll bank deposit service, specify the format in which you want the employee payroll statement detail to be printed: C: Payroll detail information prints in check stub format. This format will print the word “Void” on the check portion and print the payroll information on the stub. S: Payroll detail information prints on 8.5” x 11” plain paper. An overlay can be used for this format to print your company’s information. |
| A/P Duplicate INV# - Warning or Error (W/E) |
Allows you to select the manner in which the system will notify of you the fact that you have entered a duplicate invoice number for the same vendor on the Vouchers Information screen: W: A Warning message will appear on the screen, however the user will be able to continue using the duplicate invoice number. E: An Error message will appear on the screen, preventing the user from entering the duplicate invoice number. The number of months of Invoice History that the system will use to determine whether the entered invoice number is a duplicate is set in the RETNHIS table.If the original and the duplicate invoice numbers are both in the current unposted A/P batch of vouchers, the user does not receive any message. However, the system will automatically produce a second report with an A/P Voucher Edit. This report (AP0007) will be titled “Accounts Payable Voucher Edit Register - Duplicate Invoice Numbers” and will list the voucher numbers of the duplicate invoice number(s). |
| Parts MGMT Report With Transferred Info (Y/N) | If activated (Y), both the Parts Management Information report (PAR029) and the Parts Management with Transfer Information report (PAR29A) will be automatically generated as part of the parts month end procedure. If deactivated, only the PAR029 report will be produced. |
| Print Report PAR206 In Parts M/E (T/S/B/N) |
The Type Code Information report (PAR206) can be printed as part of the parts month end procedure. It reports parts type codes (John Deere critical codes). This field allows you to specify whether to print this report with your parts month end, and if so, by Type (T), by Source of Supply (S), by Both Type and Source of Supply (B), or No (N). For John Deere dealers, any option other than N is recommended. For all other dealers, N is recommended. |
| Subtract Core Amount From Reman. Price (Y/N) |
If activated (Y), the core price of remanufactured parts listed on the Parts Availability screen will be calculated by subtracting the core price from the remanufactured price (in cases where the core and reman parts are both loaded in the master parts file (PARTMAST). This switch affects the prices displayed on the Parts Availability screen only if the user searches for the parent part number of the remanufactured part. If the user searches for the remanufactured part number, the Parts Availability screen will display both the remanufactured part and the core part, each at their full price. |
| Key Cash Receipts As Batches (Y/N) |
This switch is no longer used and will be removed for the next IntelliDealer release. |
| Payroll Check Run By Branch | This field applies to the green screen application only. If activated (Y), the system will automatically sort and print payroll checks first by branch, then by profit center. If deactivated (N), payroll checks are printed by employee number within the division. The branch indicator is the last 1 or 2 characters of the profit center. |
| Use Cost Summary Window Breakdown (Y/N) | If deactivated (N), the Equipment Costing window will display the Historical cost (H) of the selected unit. |
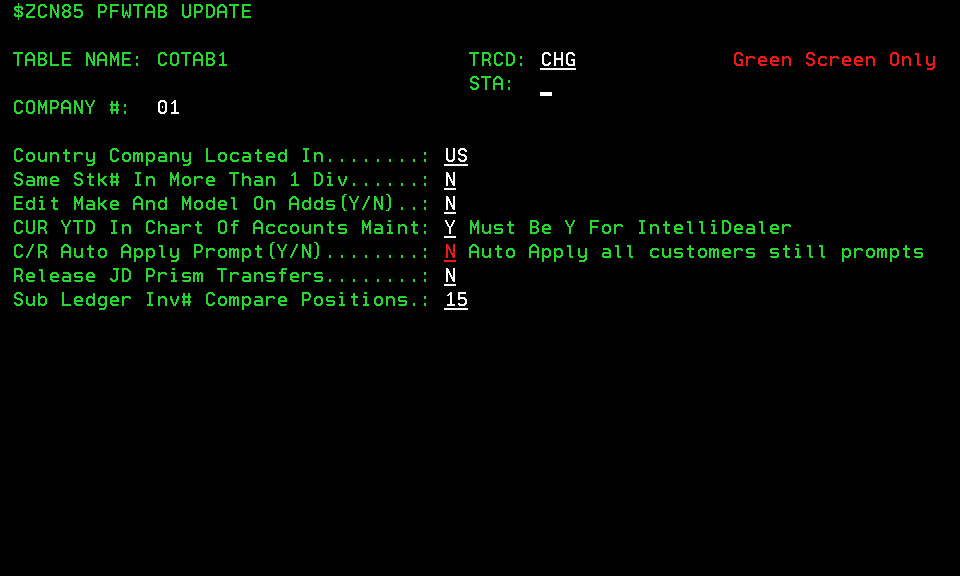
COTAB1 table
The COTAB1 table allows you to configure settings for your dealership.
The following fields appear on the COTAB1 table:
| Field | Description |
|---|---|
| Country Company Located In |
Indicates the country for the company. Can be one of:
This setting affects several functions throughout the system:
|
| Same Stk# In More Than 1 Div |
If activated (Y), will allow duplicate stock numbers for equipment across different divisions in the company. This is useful if you transfer equipment across divisions and want to keep the same stock number for the same piece of equipment in each division. The system will automatically assign the next available number when quick adding units. For units manually added, divisions should co-ordinate how the numbers will be reallocated. If a permanent transfer of equipment between divisions occurs, General Ledger journal entries will be necessary to properly account for the value of the equipment in its new division. |
| Edit Make and Model On Adds (Y/N) |
If activated (Y), when adding a new equipment profile in IntelliDealer the system will validate the Model code entered on the Equipment Profile screen against the model codes listed on the Equipment Models screen. For example, if this switch is set to Y and you attempt to add a new equipment profile with Model code 'ZZ', if 'ZZ' is not a valid code on the Equipment Models screen, the system will not allow you to save the equipment profile to the system. |
| Current YTD in Chart of Accounts Maintenance (Y/N) |
This switch must be set to Y in order for IntelliDealer to establish a rolling 12 month value in the COACMC and DEPTMC files. If there are "rogue" companies in your system (companies with no real chart of accounts, sales history, etc.) then this switch should be set to N, otherwise the program that creates the rolling 12 month value will crash. |
| C/R Auto Apply Prompt (Y/N) | This switch applies to the green screen application only and will not affect IntelliDealer functionality. Use this in order to perform an auto apply on specific A/R accounts for a customer, if you have more than one G/L-A/R account set up in the SPECCACT table. A “Y” will generate a prompt, which is the $ZCAR003 Auto Apply screen that will appear in the Key Cash Receipts module when a payment is applied from the Auto Apply line, asking you to continue or cancel the auto apply. An “N” will tell the system not to prompt. In IntelliDealer, a user will have to option to perform an auto apply from the Cash Receipts - Outstanding Accounts Receivable screen (assuming the Access Auto Apply All Customers switch is activated on the Authorization List for Financial Management - Accounts Receivable screen.) |
| Release JD Prisms Transfers | If activated (Y), part transfer orders generated by the JD Prism interface will automatically be updated and released. |
| Sub Ledger Inv# Compar Positions |
When performing a subledger update from the Subledger Account Selection screen, if you are performing the update by Invoice Number (as specified on the Subledger Update screen) the value entered in this field will determine the number of digits that the system will use to compare the invoice number on each credit and the invoice number on each original claim. For example, if 5 is entered in this field, the system will only compare 5 invoice number characters in order to "match" each credit to its corresponding original claim. |

CUSMTG table
The CUSMTG table applies to dealerships licensed for feature number 5002 (Customer Marketing System), which allows a third party company called SatisfYd to send out marketing surveys to specific customers based on sales in the business system. The settings in this table determine the kind of information that will be transmitted to SatisfYd in order to produce the marketing surveys for your customers.
Information will only be transmitted to customers who have the Survey option selected on the Geographic & Business tab of the customer profile. Subsequently, surveys will only be sent to those customers.Based on the values in this table, the nightly parts and service billing runs also produce a "Customer Marketing Surveyees" report (BIL963) listing all of the customers for whom the Survey option has been selected and for whom the selected table settings apply.The following fields appear on the CUSMTG table:
| Field | Description |
|---|---|
| Parent "Billing" Dealer # | The dealership number of the branch that is set up for SFI's services. |
| Transmit Parts Invoices/ Work Order Invoices/ Equipment Invoices/ Rental Invoices | If activated (Y), all of the selected invoices will be sent to SFI. |
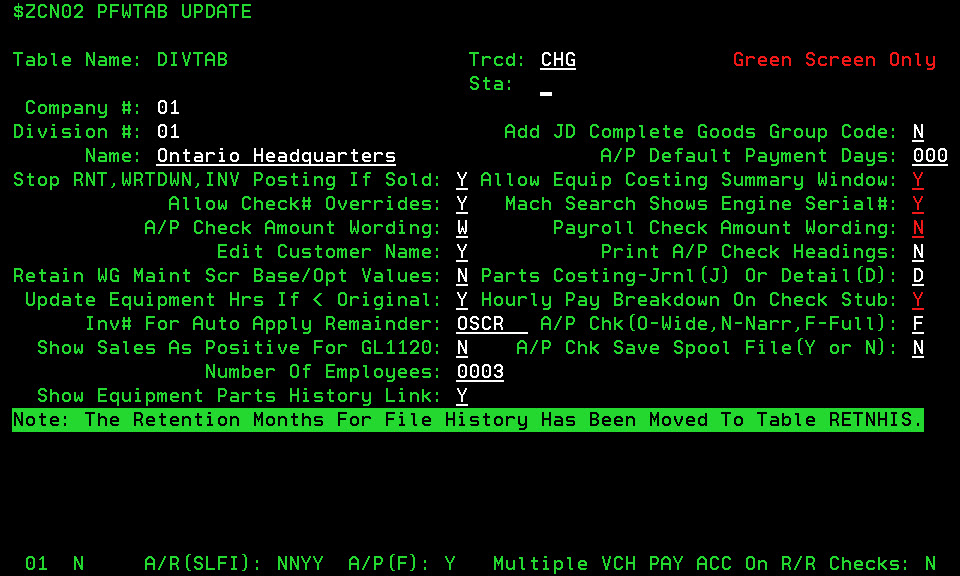
DIVTAB table
The DIVTAB table allows you to configure a number of settings at the Division level of your dealership.
As of IntelliDealer Insight 2.0, the retention month settings have been moved from the DIVTAB table to the RETNHIS table.The following fields appear on the DIVTAB table:
| Field | Description |
|---|---|
| Name | The name of the selected division. The value entered in this field can be up to 20 characters long and will be included on numerous division-level reports. |
| Stop RNT, WRTDWN, INV Posting If Sold | If activated (Y), will stop the user posting amounts to the rental, inventory or writedown accounts assigned to a piece of equipment after it has been sold, until the Accounts Receivable month end is closed. If deactivated (N), the user will be able to post the rental, inventory or writedown accounts assigned to the unit until the AR month end is closed. Amounts can always be posted to the Cost of Sale account for a piece of equipment; only the inventory and writedown accounts are affected by this field. “Invoiced” in this context means that the invoice has been released and processed through a billing run.The A/P update will be aborted and produce an error report if either of the following is true:If the Stop RNT,WRTDWN,INV Posting If Sold switch is set to Y and vouchers are found that effect an application type "I - Inventory" G/L account for a stock number that is Status I or T. - or - If the Stop RNT,WRTDWN,INV Posting If Sold switch is set to N and vouchers are found that effect an application type "I - Inventory" G/L account for a stock number that is Status I or T, and the G/L date of the voucher is not in the same month the unit was invoiced. |
| Allow Check# Overrides | If activated (Y), will allow the user to create an Accounts Payable or Payroll check run with a check number other than the one suggested by the system. VitalEdge recommends setting this switch to Y. If not, you dealership should have as a minimum a) checks that are not pre-numbered and b) a printer dedicated to checks .This printer must be able to immediately begin printing on the first check in the printer (i.e., the printer does not form feed and leave the first or last check blank).Normally, the first check in the printer is used to align the printing on the check. This helps ensure proper printing for the rest of the checks in the run. In order to be able to align check printing, the user will need to override the suggested check number. For example, the last check used was 99. The system will suggest that the next check number available is 100. While 100 would be the next check in the printer, the user would enter 101 as the starting check number so that the system will use 100 as an alignment check. The letter X will be printed on check 100 in the appropriate places so that the user can verify alignment. |
| A/P Check Amount Wording | Determines whether the amount of a check will be printed in text below the numerical value when performing an Accounts Payable check run; either yes (Y), no (N) or wrap to the subsequent line when the text amount exceeds the allotted space (W). If your dealership stamps the check amount on A/P checks with an imprinting machine, you should select N for this field. |
| Edit Customer Name | If activated (Y), users will not be able to change the name of a customer when adding a record that already exists in another division. If deactivated (N), users will be able to add a customer that already exists in another division can have a different name. For example, if customer number SMITH001 in Division 1 is "Joe Smith", if this switch is set to Y for Division 2, customer number SMITH001 in Division 2 must also be "Joe Smith". If this switch is set to N for Division 2, customer number SMITH001 in Division 2 can be something other than "Joe Smith". |
| Retain WG Maint Scr Base/ Opt Values | This switch determines whether base and option code values that are changed on the Base Profile or Options screens will be applied to existing equipment profiles assigned to the Base and Option codes in question. If set to Y, the system will retain the existing base and option code values already assigned to a unit, even when the base and option code values are changed. (Changes can only be keyed manually on the Base & Options tab of an equipment profile.) If set to N, the system will automatically change existing base and option code values already assigned to a unit when they are changed on the Base Profile or Options screens. (Changes cannot be manually entered on the Base & Options tab of an equipment profile.) Changes to base and option code values can also be made from a price tape when available. Please contact VitalEdge to determine which vendors this option is available for. |
| Update Equipment Hours If < Original | If activated (Y), users will be able to enter a number of hours smaller than the hours currently recorded on a piece of equipment (as specified in the Machine/Hours field of the Equipment Profile tab.) For example, if there are 300 hours currently recorded for a machine and the unit is brought in for a repair where the employee mistakenly updates the hours to 35, the system will refuse the change if this field is set to N. GPS-enabled machines that automatically update the machine hours for a unit via the GPS device will have their hour readings updated regardless of this switch. |
| Invoice # For Auto Apply Remainder | The setting in this field is used by True Balance Forward A/R customers. A system generated entry is created after A/R statements are run by these customers. The amount of this system generated entry is the remainder of all credits/payments for the month that could not be applied to the oldest outstanding invoice. The date on the system generated entry is the same date as the oldest outstanding invoice on the customer account. This field determines the invoice number that will be used for the system generated entry. VitalEdge recommends using an invoice number such as "OSCR" to represent an Outstanding Credit entry. |
| Show Sales As Positive For GL1120 | If activated (Y), the credit sign (-) normally applied to sales figures on the Summarized Financial Reports generated in IntelliDealer will be removed. |
| Number Of Employees | The number of employees in your division. |
| Show Equipment Parts History Link | If activated (Y), will display the Part History link on the Equipment Profile screen which, in turn, gives users access to the Part History screen where they can view any part numbers that have been sold on parts invoices associated to the selected unit. |
| Add JD Complete Goods Group Code | If John Deere group codes are used at your dealership, you can use the equipment inventory defaults to separate the inventory accounts for different groups. If not, the inventory account will always get loaded by other criteria.
|
| A/P Default Payment Dates | Enter the number of days which should be used in calculating voucher due dates in the Accounts Payable module.The system will use the invoice date plus the number of days in this field to arrive at a due date and suggest that date when a voucher is added on the Vouchers - Outstanding Batches screen. If default payment terms are defined on a particular vendor profile (as specified on the Payment Terms tab), this field is ignored and the terms defined for the vendor are used to calculate voucher due dates. Also, any suggested due date, regardless of whether it was calculated based on this field or the Payment Terms tab, can be overridden when the voucher is entered. |
| Allow Equipment Costing Summary Window | This field applies to the green screen application only. The Equipment Costing screen will be accessible in IntelliDealer regardless of this switch. If activated (Y), will allow the user to access the Cost Summary window from within the Equipment Maintenance screen which, in turn, will display a summary of the transactions that account for the current cost of a unit including Original Cost, Write Down entries, Net Book Value, and any postings to accounts with an application type of "I". |
| Mach Search Shows Engine Serial# | This field applies to the Work Order and Sales Order modules of the green screen application only. If activated (Y), will display the last 6 characters of the engine number followed by the last 6 characters of the machine serial number whenever an equipment search is conducted in the Work Order or Sales Order modules. If deactivated (N), the system will only display the machine serial number whenever an equipment search is conducted in the Work Order or Sales Order modules. |
| Payroll Check Amount Wording | This field applies to the green screen application only. The setting in this field will not affect IntelliDealer functionality. If activated (Y), the payroll check amount will be included as text on the check when doing a payroll check run. |
| Print A/P Check Headings | If activated (Y), the following check headings will be included at the top of the check stub when printing Accounts Payable checks: Invoice #, Amount, Disc (Discount) and Voucher #. If the stub of your A/P checks are pre-printed with voucher information, you should set this field to N. When using the W option, the description wording will print exactly as before and, if two lines are needed, will wrap around to print on two lines (a line above the current line, stopping before the text hits the Check Date, and wrapping to the current line.) If two lines are required but this check type has funds verbiage, then the check wording will not be printed . This would apply only to full page A/P checks. |
| Update Machine Location In JDMINT | When changed to N the Machine Location field (CBBIN) in Equipment Profile will not be updated by the JDMINT interface. |
| Parts Costing - JRNL or Detail (J/D) | This field determines how the parts costing is to be posted and reported on by the parts billing run. The options are as follows:
|
| A/P Check (O- Wide, N- Narr, F- Full) | Determines the format in which Accounts Payable checks will be printed in your division.
|
| A/P Check Save Spool File | If activated (Y), the system will automatically save the Accounts Payable check spool file. |
| Days Part Return Allowed | A 3 digit numeric field used to calculate when a part can still use a sale price if previously sold. A value of 0 deactivates it. The driving factor in this process is the PARTHIST file. For each line that has a negative order quantity, the system will grab all associated PARTHIST records for the part being returned. The PARTHIST entries are sorted by Receipt/Sale Date in descending order. |
| Allow Equip Current Cost/NBV | During the release load, this switch will be defaulted to N. The allowed values are: N-No C-Current Cost V-NBV B-Both In order to access this field, you must use WRKPFWVAL PFWSW(Y) which will require you to enter a PFW Password. This switch allows the current cost and/or net book balue of a unit to go below zero. |
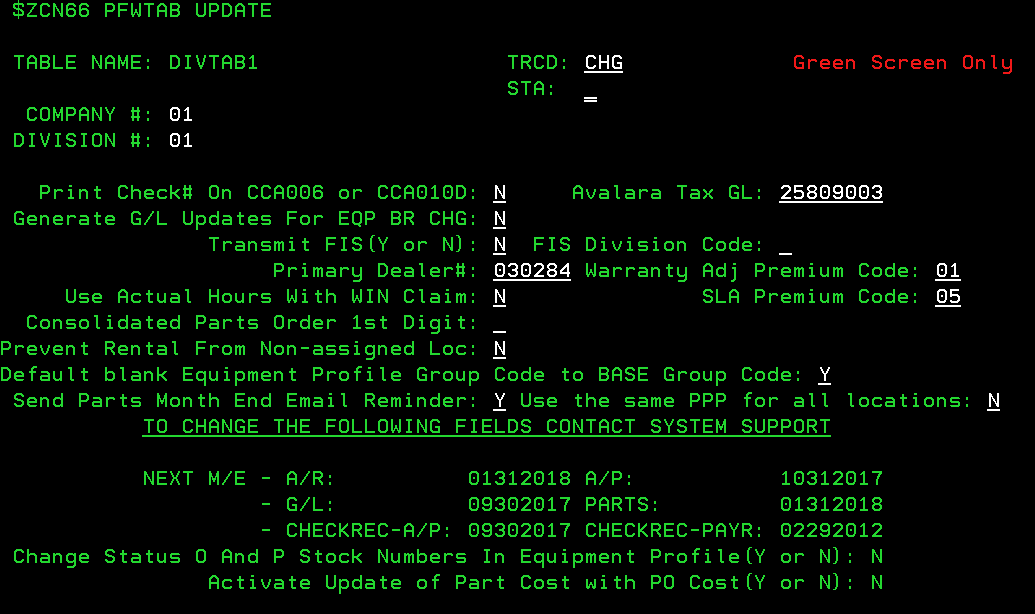
DIVTAB1 table
The DIVTAB1 table allows you to configure the month end process for each IntelliDealer module. The month end dates are set by VitalEdge at the time of installation and are not configurable by the dealership. If any of these dates need to be changed, please contact VitalEdge Support.
The following fields appear on the DIVTAB1 table:
| Field | Description |
|---|---|
| Print Check# in CCA006 or CCA010D |
If activated (Y), a check number and date will be printed in the Description field of the Accounts Payable Journal Details report (CCA010D), where applicable. If there is both a non-blank description and a check number, the check takes priority. The CCA010D report can be generated from Journal Breakdown screen in IntelliDealer.The CCA006 report is no longer used in the system. |
| Avalara Tax GL | The general ledger account for the Avalara Tax system. This account is credited during the billing run and is displayed in the invoice history G/L details. See AvaTax: Introduction to Avalara's AvaTax. |
| General G/L Updates For EQP BR CHG |
When equipment moves from branch to branch, this field controls the activation of the system to check for inventory account changes. This switch controls more than just GL updates on equipment for branch changes, but controls GL updates on equipment with any changes to any of the elements configured in equipment defaults (make/group/type/branch/status). This is essentially a divisional level on/off switch for GL updates coming from the Equipment Defaults table. With this table switch set to 'N', accounts will not automatically update in the equipment profile and will not create TR journals. |
| Transmit FIS (Y/N)/ FIS Division Code/ Primary Dealer # |
Allows you to specify whether or not to send financial data to John Deere during the G/L month end process. The Primary Dealer # must also be present in at least one CMBR table belonging to that division. The FIS Division Code and Primary Dealer # are assigned to your dealership by John Deere. Non-John Deere dealers can load '000000' into this field instead. |
| Use Actual Hours With WIN Claim |
This switch is no longer used and will be removed at a future date. |
| Warranty Adj Premium Code/SLA Premium Code | Allows you to add Warranty Adjustment Premium codes for the system to assist in creating labor adjustments based off of Hours Worked or Supplier hours and SLA Premium codes for Hours Worked between technicians. |
| Consolidated Parts Order 1st Digit |
Allows you to specify the 1st digit for all consolidated order numbers created in the system. Having the order number’s first character different than the start digit for regular orders will allow users to quickly identify consolidated orders. Only the letters A - Z and the numbers 1 - 9 will be allowed as acceptable start digits. |
| Create Accruals From Worksheet | If activated (Y), will prevent margin worksheet accrual entries from being created when a quote is moved to an invoice. |
| Prevent Rental From Non-assigned Loc | If activated (Y) the system will prevent the user from selecting or entering a unit from another location when creating a rental contract (unless the selected unit has it's location updated on the Equipment Profile.) |
| Print Branch Suffix | If activated (Y), the branch number will display after the invoice number as a suffix. |
| Default blank Equipment Profile Group Code to BASE Group Code |
If activated (Y), the Group code on the Equipment Profile tab will default to the group code loaded on the selected Base number when adding or editing a unit with a blank group code. If deactivated (N), the Group code on the Equipment Profile tab will default to the group code loaded on the selected Base number only when adding a unit with a blank group code. When editing a unit with a blank group code, the group code will remain blank. |
| Send Parts Month End Email Reminder | If activated (Y) and the Next M/E date for A/R is greater than the Next M/E date for Parts (as specified in the Next M/E field below), the system will send an email to the dealer to remind them to run their parts month end procedure. The email will be sent to the email address specified in the BACKUP table. |
| Use the same PPP for all locations | If activated (Y), whenever the Parts/ Package value is changed for a part in one branch location, the value will be updated for the part across all branches. |
| Next M/E |
The next date on which the month end process will be performed for each of the modules listed. Only VitalEdge Support staff can manually change the dates listed in these fields, and only under special circumstances. For details, contact VitalEdge Support.These dates change automatically when a Month End is performed for each module. |
| Change Status O and P Stock Number in Equipment Profile (Y/N) | If activated (Y), will allow you to change the stock number on units that are either On Order or Presold (as specified in the Status field of the Equipment Profile screen.) |
| Activate Update of Part Cost with PO Cost (Y/N) | If activated (Y), the system will update the cost of a part whenever a purchase order with the part on it is updated. For example, if the existing cost of a part is $45 and a purchase order with the part on it is updated with the price of that same part listed as $45.99, the cost on the part profile will be changed to $45.99. |
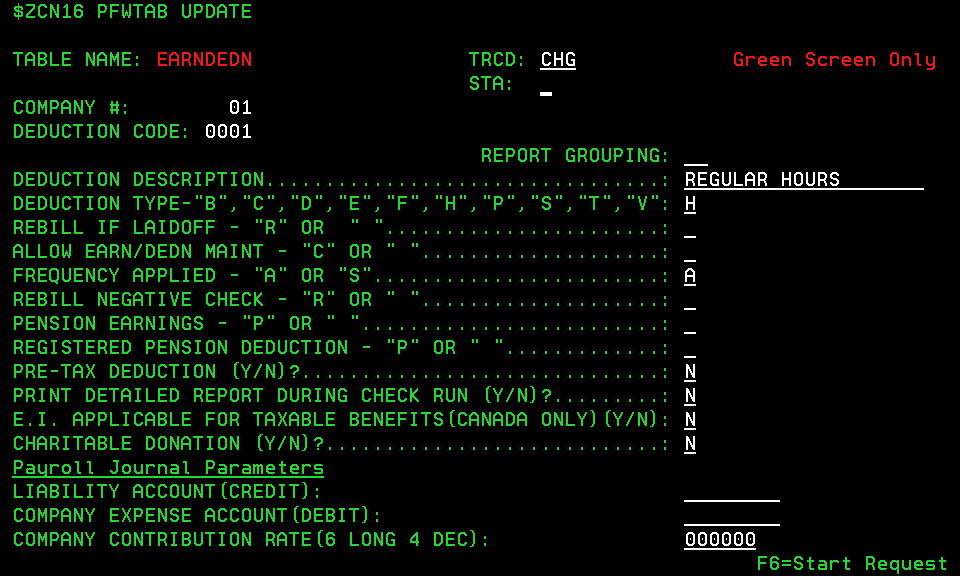
EARNDEDN table
The EARNDEDN table is used to define the Earnings and Deductions codes used in the Payroll module of the green screen application.
At a future date, the Payroll module of the green screen application will be sunset from the system.The following fields appear in the EARNDEDN table:
| Field | Description | |||||||||||||||||||||||||||||||||||||||||||||||||||
|---|---|---|---|---|---|---|---|---|---|---|---|---|---|---|---|---|---|---|---|---|---|---|---|---|---|---|---|---|---|---|---|---|---|---|---|---|---|---|---|---|---|---|---|---|---|---|---|---|---|---|---|---|
| Deduction Code | Allows you to enter a deduction code between 0001 and 9999. The following codes are predefined in the system:
| |||||||||||||||||||||||||||||||||||||||||||||||||||
| Report Grouping | This field will be used to group earnings and deduction codes together on certain reports. The procedure is currently in development and is intended for future use. | |||||||||||||||||||||||||||||||||||||||||||||||||||
| Deduction Description | Enter an appropriate description for this deduction code. This description will appear on payroll checks as well as reports. | |||||||||||||||||||||||||||||||||||||||||||||||||||
| Deduction Type (B/C/D/E/F/H/P/S/T/V) | Enter the type of deduction that the current code represents. The valid options are: B: This type represents Benefits, such as company paid course fees. Amounts using this code are added to total earnings and are taxable C: This type denotes codes that serve only as a totalling code, such as time off without pay or sick time without pay. Amounts using this code are not added to earnings or deductions. This type can also be used for accrual of company paid benefits such as FUTA, or for pension adjustment deductions D: This is the code for forced deductions, such as federal tax which must be deducted from every check. Amounts using this code are added to the total deductions E: This code represents earnings in dollars, and includes regular and premium earnings. Amounts using this code are added to total earnings per check F: This code is the same as a code “T” (see below) on the T4, except that the amount of the taxable benefit is only applied to federal wages or earnings H: This code is used for the hours on which the earnings are based. Amounts using this code are added to total hours worked per check (used in EI calculations in Canada) P: This code represents premium hours, hours worked beyond the regular hours on which a premium earnings has been paid (e.g.. overtime or night shift). Amounts for this code are not added to total hours worked for each check S: This code is the same as a code “T” (see below) on the T4, except that the amount of the taxable benefit is only applied to provincial wages or earnings T: This code is used for taxable benefits. These are benefits that are paid by the company but the employee must pay tax on the benefit. Taxable benefits appear as both an earnings and a deduction on the pay check. Amounts using this code are added to total earnings and to total deductions V: This code represents voluntary deductions such as life insurance premiums. Amounts using this code are added to total deductions | |||||||||||||||||||||||||||||||||||||||||||||||||||
| Rebill If Laidoff (R or Blank) | If an employee is laid off (L in the field directly after the termination date), and receives no pay, the system will automatically accumulate the amount that the employee owes for this deduction code due to missed pays. Choose from: R: The system will automatically accumulate the amount owing and deduct it from the employee’s first check when he/she returns to work. This option is only available if the Deduction Type (see previous field) for the current code is T or V Blank: The deduction is ignored and will not accumulate amounts owing due to missed pays. For example: An employee is paying a life insurance premium through payroll deductions and the employee is laid off. The company wishes to continue to pay the premiums for the employee and then deduct the amount of all premiums paid by the company from the employee’s first check when the employee returns to work. The system will automatically accumulate the amount owing and deduct it from the first check if this field is set to R. | |||||||||||||||||||||||||||||||||||||||||||||||||||
| Allow Earn/ Dedn Maint (C or Blank) | Is Earn/Dedn Maintenance (option 2 on menu PAYR01) allowed for this deduction code? If so, enter C in this field, otherwise leave it blank. | |||||||||||||||||||||||||||||||||||||||||||||||||||
| Frequency Applied (A/S) | How often is the deduction applied? Choose from: A: The deduction code will be automatically deducted on every check S: This is a special deduction code that is to be deducted only when requested by the operator during the payroll check run. | |||||||||||||||||||||||||||||||||||||||||||||||||||
| Rebill Negative Check (R or Blank) | If the total deductions for an employee are greater than the total earnings, the system will start dropping deductions from the check (starting at deduction code 0001) until the amount of the check becomes zero or positive. The value in this field determines what the system does with the dropped amounts. Enter: R: Rebill to have the system accumulate the amount dropped from the check and add it into the total owing. It will then try to deduct the amount owing from the next check. This option is only available if the Deduction Type for the current code is T or V Blank: The deduction is dropped from the check. Only a message is printed. It is important to note that the deduction will not be taken at all. If the Rebill If Laid Off field is set to R, this field will be forced to R by the system. | |||||||||||||||||||||||||||||||||||||||||||||||||||
| Pension Earnings (P or Blank) | Only certain types of earnings are allowed to be considered as pension earnings (earnings on which contributions to a registered pension plan can be made). Choose: P: This code is considered pension earnings. This option is only available if the Deductions Type is set to E, B or T for the current code Blank: Pension contributions are not allowed based on this earnings type. When the pension amount is being calculated for a registered pension plan deduction code, the earnings used are not the total earnings but are the pension earnings (earnings whose deduction code has a P in Pension Earnings). For example, the contribution amount for a registered pension plan is usually a percentage of earnings. The earnings used in the calculation are the pension earnings. | |||||||||||||||||||||||||||||||||||||||||||||||||||
| Registered Pension Deduction (P or Blank) | This field determines whether the current code is a registered pension plan. If it is, the amount of this deduction will be subtracted from the total earnings before tax is calculated. The amount for the deduction code will also print in the registered pension plan box on Canadian T4’s. Enter: P: If the code is a registered pension plan. This option is only available if the Deductions Type is set to D or V Blank: Leave this field blank if this is not a registered pension plan. This code is not to be used for RRSP deductions. Deduction code 9052 should be used to reduce earnings before the tax is calculated (see 9052 in the Deduction Code field above). | |||||||||||||||||||||||||||||||||||||||||||||||||||
| Pre-Tax Deduction (Y/N) | Allows a user to specify whether deduction made before or after taxes. Enter Y (yes) for deduction to occur before taxes and N (no) for deduction to occur after taxes. | |||||||||||||||||||||||||||||||||||||||||||||||||||
| Print Detailed Report During Check Run (Y/N) | If activated (Y), the deduction code will automatically print on the deduction code register during the payroll check run. | |||||||||||||||||||||||||||||||||||||||||||||||||||
| EI Applicable For Taxable Benefits (Canada Only) (Y/N) | Select whether or not the code is Employment Insurance applicable. This option is only available if the Deductions Type is set to T. | |||||||||||||||||||||||||||||||||||||||||||||||||||
| Charitable Donation (Y/N) | This option is set up for voluntary deductions for donations (Quebec only). It is identified on the RELEVE1 form. | |||||||||||||||||||||||||||||||||||||||||||||||||||
| Payroll Journal Parameters | The following three fields pertain to the General Ledger accounts to which amounts may be posted as part of the payroll journal: Liability Account (Credit): This field is applicable if the Deduction Type for the current code is C, D, T, or V. If it is D or V, enter the General Ledger liability account to which the employee contribution amounts should be posted. The amount deducted from the employee check is credited to this account. The G/L account is keyed as a 5 digit account followed by a 2 or 3 digit profit center. Note that since this is a liability account, there is often no profit center, depending on the set-up of the dealer’s Balance Sheet G/L accounts. If a profit center is used and “SUB” is entered, the system will automatically substitute the profit center on the employee master for each employee when posting to this account. If only one profit center is desired, key the actual profit center.If the Deduction Type for the current code is C or T, this field can only be defined if a “Company Expense Account” (debit) and a “Company Contribution Rate” (see following fields) are defined. The amount credited in this case is the amount posted to this deduction code times the “Company Contribution Rate”. Company Expense Account (Debit): This field is applicable if the Deduction Type for the current code is B, D, E, T or V. If it is D, T, or V and the company is also contributing to the deduction code (e.g.. the employee pays part and the company pays part such as EI), enter the General ledger expense account to which the company portion is to be debited. For example, the amount deducted from the employee’s check times the company rate (see below) is credited to the Liability account (see previous field) and the same amount is debited to the account defined in this field. If the Deduction Type for the current code is B or E, enter the expense account to which the earnings for the current code should be posted. This field would be used only if all earnings are to be expensed to one G/L account regardless of employee class. If the Deduction Type for the current code is B or E and this field is left blank, the earnings will be posted to the expense account loaded in the table CLASS for the class of each employee. Earnings are then expensed by class. The G/L account is keyed as a five-digit account followed by a two- or three-digit profit center. If “SUB” is entered as the profit center, the system will automatically substitute the profit center on the employee master for each employee when posting to this account. If only one profit center is desired, key the actual profit center. Company Contribution Rate: This field is only applicable if the Deduction Type is D, T or V and a Company Expense Account is specified. Enter the company rate to be used when the employee pays part and the company pays part (such as EI in Canada). This is a 6 character numeric field containing 4 decimals. For example, if the company and the employee pay the same amount, enter 010000 in this field. If the company pays one half of what the employee pays, enter 005000 in this field, etc. |
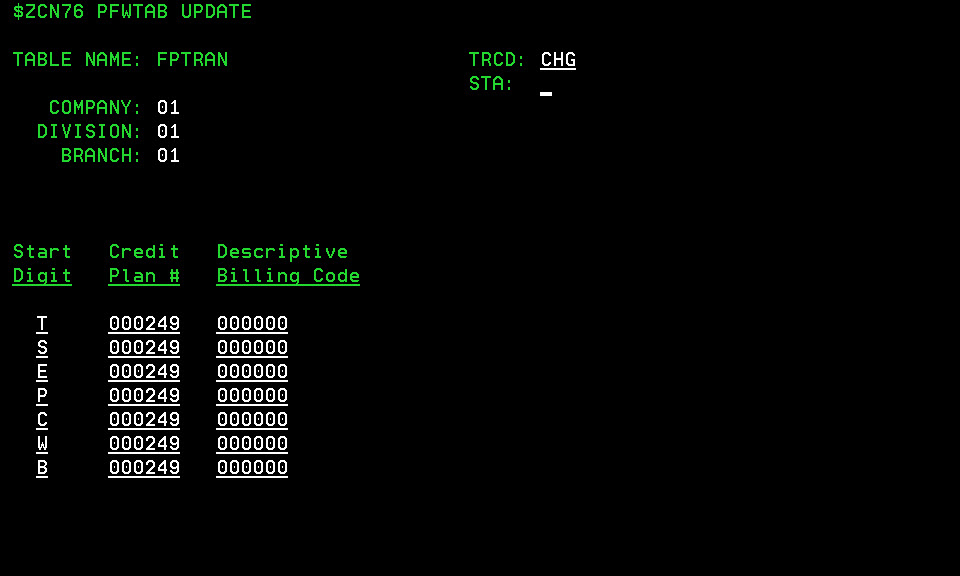
FPTRAN table
The FPTRAN and FPTRAN1 tables are for dealerships participating in the John Deere Financial/ PowerPlan™ credit systems. They are used to correlate start digits on invoices generated in IntelliDealer with product codes supplied by John Deere Financial.
The information is transmitted to JD Financial/ PowerPlan when the upload of sales transactions to JD Financial/ PowerPlan is performed by the dealership (usually daily).
The following fields appear on the FPTRAN/ FPTRAN1 tables:
| Field | Description |
|---|---|
| Start Digit |
The invoice start digit associated to the types of invoices produced in IntelliDealer. For example, all Parts invoices may begin with the letter “P”. These start digits are defined in the CMBR table. A start digit of ‘-’ (hyphen) can be used for credits. |
| Credit Plan # | The credit plan number associated to the selected type of invoices (as specified by the Start Digit field.) This number will be provided John Deere. |
| Descriptive Billing Code | The descriptive billing code associated to the selected type of invoices (as specified by the Start Digit field.) This number will be provided John Deere. |
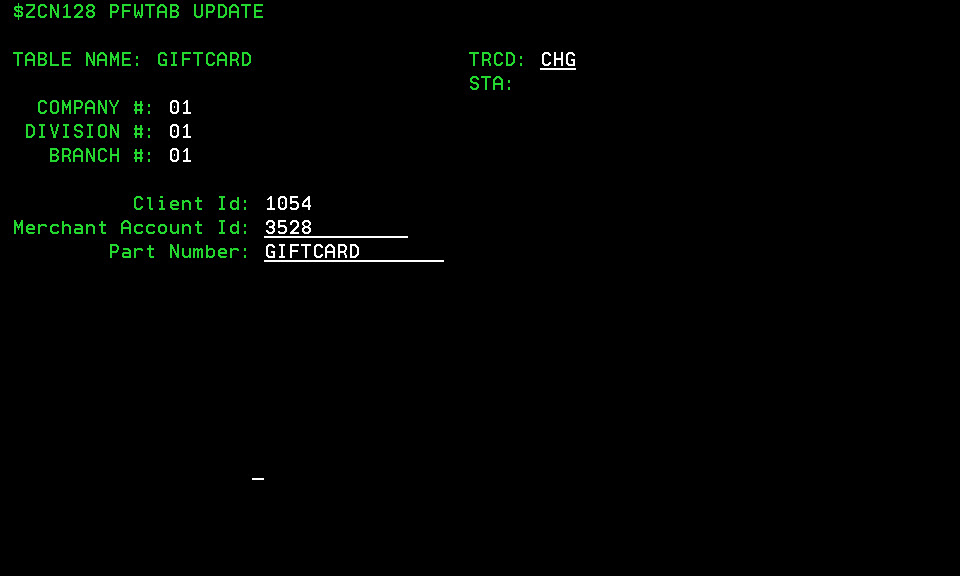
GIFTCARD table
The GIFTCARD table is used to configure the information required by the Payment Card Interface (previously known as Merchant Manager) in order to accept gift cards at your dealership.
If you have previously been using gift cards outside of IntelliDealer, you cannot turn on one branch at a time to start using gift cards. The only exception to this is if you turn one branch on, and prevent all other branches from using gift cards.If you have never used gift cards before and you are starting the database from scratch, you can turn on one branch at a time.Gift cards can only be used in the Parts Invoicing and Parts Requisitions systems in IntelliDealer.For details about redeeming and loading a gift card, see the Redeeming a Gift Card and Loading a Gift Card procedures.
The following fields appear on the GIFTCARD table:
| Field | Description |
|---|---|
| Client ID/ Merchant Account ID | Both the client and merchant account IDs are provided by Merchant Manager and are used to identify your branch location. |
| Part Number | This is a special part number that will be used to keep track of the gift cards that are sold and redeemed at your dealership. It should be created prior to configuring this table using a G/L vendor for the Vendor code and the sale account that you want to use to keep track of the sale/ redemption of the cards. When a card is sold at your dealership, a positive quantity of this part is put onto the invoice. When a card is a redeemed, a negative quantity of this part is put onto the invoice (denoting that the price should be credited from the invoice). |
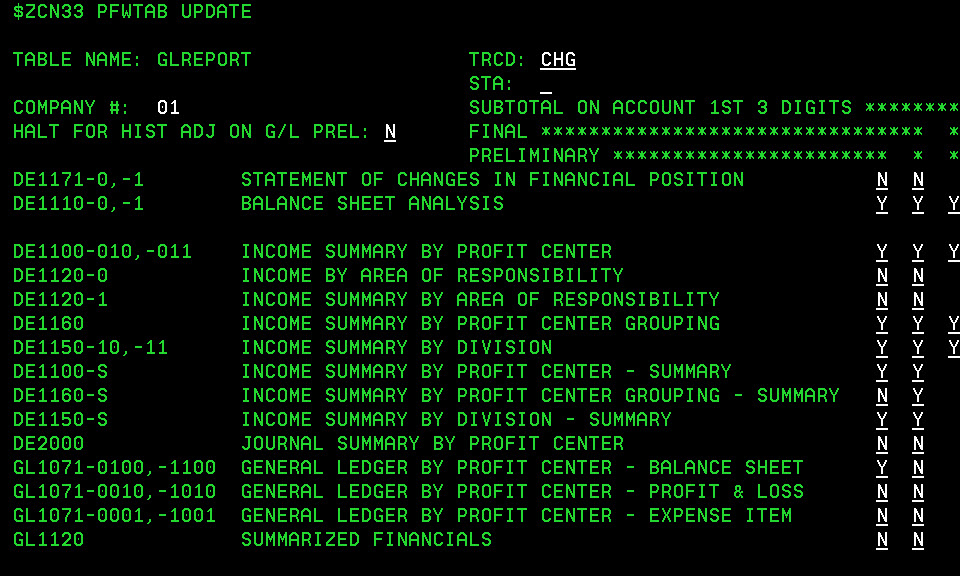
GLREPORT table
The GLREPORT and GLREPRT1 tables allow you to configure which reports are generated during the General Ledger month end preliminary and month end final procedures. There are several reports available including the balance sheet, income statement and journal information broken down by division, profit center or area of responsibility. The breakdown by profit center and area of responsibility is based on the definition of the profit centers and profit center groupings in the WCNUMB table. The description given to the profit center(s) and grouping(s) in the WCNUMB table will be printed on the General Ledger reports generated on the basis of profit center or area of responsibility.
The GLREPRT1 table is a continued list of available reports, and its functionality is identical to the GLREPORT table.To see detail about the reports listed in this table, you can type the word REPORTS on any command line in the green screen application and then search for the report by the report number. This feature will give you a detailed description of the report, as well as an example of the report using test data.The following fields appear on the GLREPORT and GLREPRT1 tables:
| Field | Description |
|---|---|
| Halt for Hist Adj on G/L Prel (Y/N) | If activated (Y), the system will stop the G/L preliminary month if there are outstanding payroll history adjustments that have not been updated, and provide a warning of this fact. If deactivated (N), the run will not be stopped and no warning will be given that there are un-posted payroll history adjustments. If Y is selected in this field and the operator proceeds without updating the outstanding adjustments, those adjustments will not be included in the preliminary month end totals.Outstanding payroll history adjustments must be posted before proceeding with the G/L month end final run. If they are not posted, the system will provide a message on the screen and the run will be aborted. |
| Preliminary (Y/N) | If activated (Y), the selected report will be generated during the G/L preliminary month end run. The default value for this field is Y. VitalEdge recommends that you run at least one G/L month end preliminary with all reports set to Y so that you can review what the contents of the report will be, and whether it will be useful to your organization. |
| Final (Y/N) | If activated (Y), the selected report will be generated during the G/L month end final run. There may be some reports that are required during the preliminary run that are not required during the final run, or vice versa.VitalEdge recommends that you run at least one G/L month end final run with all reports set to Y so that you can review what the contents of the report will be, and whether it will be useful to your organization. |
| Subtotal on Account 1st 3 Digits (Y/N) | If activated (Y), the system will subtotal the indicated reports by the first three digits of the G/L account number. For example, if the cash accounts were 10100, 10101 and 10102 and you entered Y in this field for the applicable reports, the system will subtotal these accounts on the report because each account number has 101 as the first three digits. |

ID table
The ID table allows you configure a number of defaults for multiple IntelliDealer modules and functions.
The following fields appear in the ID table:
| Field | Description |
|---|---|
| User Extended Fields in ID-Equipment (Y/N) |
This switch will default to N on a release load and can only be changed by VitalEdge . It allows for extended base codes, option codes and long descriptions. Once this switch is set to Y, it cannot be set to N. If this switch is set to Y and your system is licensed for feature number 6508, then you will not be able to access any equipment green-screen applications. This will prevent users at your dealership from corrupting the extended fields in green screen applications that only support the current field lengths. |
| Immediate Parts Order History Update (Y/N) | When activated, this switch will cause IntelliDealer to run an immediate update of the PARTHIST file when a parts order is updated. This switch will default to N. |
| Generate Username on Add (Y/N) | When activated, this switch will cause IntelliDealer to automatically generate a user name for new user profiles created in IntelliDealer. This switch will default to N. |
| Session Time Out (minutes) |
Allows you to configure the amount of time (in minutes) that a user's IntelliDealer session can remain idle before it will time out, forcing the user to re-enter their user credentials on the log in screen. The default value for this field is "00", meaning the system will not time out until the next full database run, regardless of how long each IntelliDealer session has been idle.
|
| Allow Password To Be Saved (Y/N) | Determines whether users will be able to use the auto-complete feature within their browsers on the IntelliDealer log in page to store their user ID's and passwords. By default this switch will be set to Y. |
| Update G/L Balances From Financial Reporting (Y/N) |
If the system detects that the general ledger account balances can be updated (which is caused by a user manually creating a journal entry or updating an A/P journal for a date in a future fiscal year), and if this switch is set to Y, the system will automatically update the general ledger account balances before generating a financial report from the Financial Reporting Runs screen in IntelliDealer. If the system detects that the general ledger accounts balances can be updated but this switch is set to N, no the general ledger accounts balances will not be updated when generating the report. |
| Reset Avg Cost During Master Price Load |
This option will allow the dealer to reset the average cost of a part to its current cost if the that part's inventory value is zero. The option will be set to 'N' by default and must be manually switched to 'Y' to enable it. More information about this option can be found here. |
PAYRJRNL table
The PAYRJRNL table allows you to configure the cutoff date for each month of the year. When the payroll journal is being created, the day of the payroll transaction date is compared to the cut off day in this table for the transaction month. If the transaction day is less than or equal to the day in this table, the transaction is posted on the payroll journal for the year and month of the transaction. If the transaction day is greater than the day in this table, the transaction is posted to the payroll journal for the following month.
For example, the transaction date is 12/29/2000. If the cut off day in this table for December is 29 or greater, the transaction is posted on the payroll journal for December of 2000. If the cut off day in this table for December is 28 or less, the transaction is posted for the payroll journal in January of 2001.
The transaction date is calculated as shown for the following runs:
- Payroll check Run:
- Regular checks - the pay period ending date
- History adjustments - the history adjustment date
- History Adjustment Only Run - the history adjustment date
- Vacation Pay Run - the payroll journal date that is requested at the start of the run
If no cut-off dates are specified in this table, the transaction will be posted on the payroll journal for the transaction month and year. The cut-off date for each month is assumed to be the month ending date.
This table should be modified yearly to update the cut-off dates. This should be done after the last payroll check run or history adjustment run for the calendar year.At a future date, the Payroll module of the green screen application will be sunset from the system.The following field appears on the PAYRJRNL table:
| Field | Description |
|---|---|
| Enter the Payroll Journal Cut Off Day for Each Month | For each month, enter the day of the month that should be used as the cut-off day for payroll journal entries. |
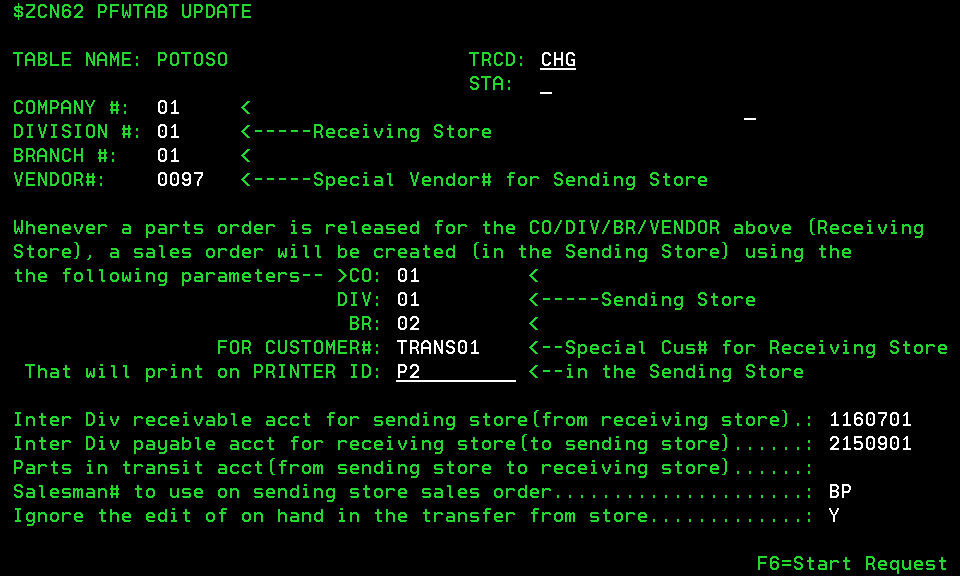
POTOSO table
The purpose of the POTOSO table is to facilitate the movement of parts inventory between branches and between divisions (stock transfers).
When inventory is ordered on demand through a Sales Order or transferred from a manual order or as surplus stock, or when a stock order is created manually using the sending branch’s vendor number, a purchase order is issued by the system from the ordering store (i.e. the receiving store). This purchase order is a list of parts ordered from another store (i.e. the sending store). A picpak is automatically printed (on the printer identified in this table) and a Sales Order is created at the sending store. When the sending store prints the invoice and performs a billing run, the General Ledger entries are created.
For a transfer between branches, the G/L entry affects the parts inventory account and the transfer asset account defined for Cash Code 1 in the CASHTAB table for the sending store. When the transfer is between divisions, the entries involve the parts inventory and payable/receivable G/L accounts defined in this table.The actual inventory count is updated when the store receiving the parts receipts them into inventory and updates the order.
This table must be completed for each branch or division that may transfer parts.The following fields appear in the POTOSO table:
| Field | Description |
|---|---|
| Company # | Enter the company number of the store receiving/ ordering the parts. |
| Division # | Enter the division number of the store receiving/ ordering the parts. |
| Branch # | Enter the branch number of the store receiving/ ordering the parts. |
| Vendor # | The sending store must be a vendor of the receiving store. Enter the vendor number that the store receiving the parts uses to represent the store sending the parts. This number must be associated to a vendor profile in IntelliDealer. |
| CO/DIV/BR | The company, division and branch of the store that will be sending the parts. |
| For Customer # | The receiving store must be a customer of the sending store. Enter the customer code that the store sending the parts uses to represent the store receiving the parts. This number must be defined in the Customer Care module of the sending store’s division. In order to prevent transferring parts to the wrong branch, each branch in the POTOSO table must have a unique customer number in this field. |
| That will print on Printer ID | The printer ID where the picpak should print in the sending store. Usually, this is a printer located in the Parts Department and is often the same printer used to print normal picpaks and invoices. |
| Inter Div Receivable Account For Sending Store (From Receiving Store) | When the sending store prints the invoice for the order generated by the transfer and then performs a billing run, the General Ledger entries are posted for both stores. If parts are to be transferred between divisions, enter the G/L Accounts Receivable account which should be debited in the sending store. This account must exist in the sending store’s division. It cannot be an Accounts Receivable account defined in the SPECACCT table. This field is not used in the transfer of parts between branches. The transfer asset account defined for Cash Code 1 in the CASHTAB table for the sending store is debited to offset the credit to the sending store’s inventory. |
| Inter Div Receivable Account For Sending Store (To Sending Store) | When the sending store prints the invoice for the order generated by the transfer and then performs a billing run, the General Ledger entries are posted for both stores. If parts are to be transferred between divisions, enter the G/L Accounts Payable account which should be credited in the receiving store. This account must exist in the receiving store’s division. It cannot be an Accounts Payable account defined in the SPECACCT table. This field is not used in the transfer of parts between branches. The Parts Sales - Transfer Asset Account defined for Cash Code 1 in the CASHTAB table for the receiving store is credited to offset the debit to the receiving store’s inventory. (The actual inventory count is updated when the receiving store receipts the parts and updates the order). |
| Parts In Transit Account (From Sending Store to Receiving Store) | If this is used, it replaces the transfer asset account in CASHTAB and works as follows in two separate steps:
This system does a better job of keeping the inventory in balance with the general ledger as the accounting and on hands are updated at the same time. The 'parts in transit' account holds the value of parts that are truly in transit. |
| Salesman # to use on Sending Store Sales Order | Enter the salesman number to be assigned to the sales order created in the sending store. VitalEdge recommends that a special salesman number is used to help identify parts transfers more easily. For example, a code such as "TFR", or the number of the store that the parts are being transferred to (ie. 01, 02, etc.) |
| Ignore the Edit of On Hand in the Transfer from Store (Y/N) | If activated (Y), items that are not currently on hand in the transfer branch will appear as back ordered on the generated picpak. |
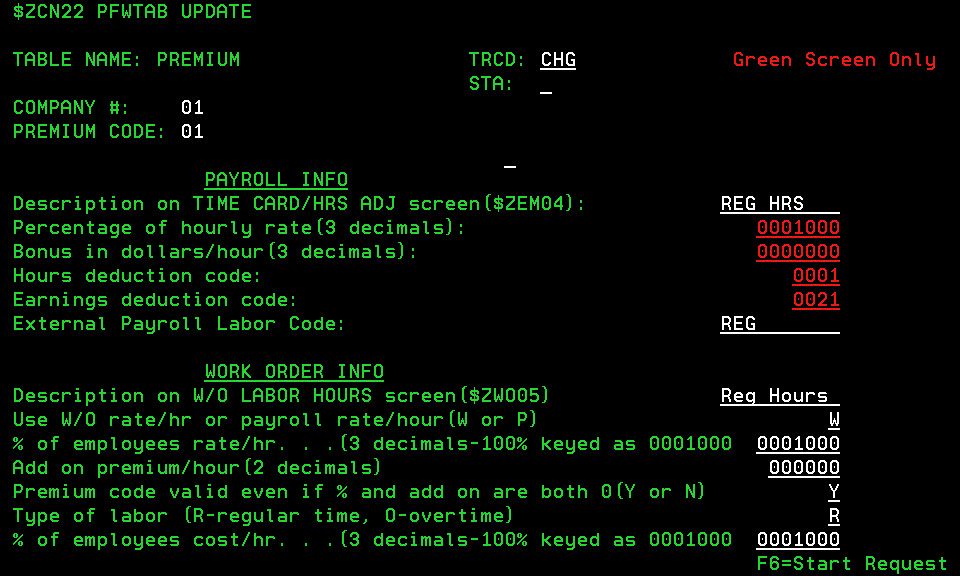
PREMIUM table
The PREMIUM table allows you to define premium code for the payroll and service modules. In the payroll module, the premium codes are used to adjust the employee’s pay using a percentage or dollar amount, and to indicate which EARNDEDN codes to use when recording the hours and earnings. In the service module, the premium codes are used to adjust the charge out rate when posting the technician’s hours to a work order.
The following fields appear on the PREMIUM table:
| Field | Description |
|---|---|
| Premium Code | The two digit numeric code that will be used when posting hours in the service or payroll modules. |
| Payroll Info | |
| Description on Time Card/ HRS ADJ screen ($ZEM04) |
Enter the description that will appear on the payroll “Time Card/Hrs Adj” (#4 in menu PAYR01) screen for this premium code. This is a ten character alphanumeric field. Only the first twelve premium codes will be shown on any screen where premium codes display. All premium codes are valid and can be used, but since only the first twelve defined will display, each dealership should consider whether to define the most commonly used or the least used codes first. |
| Percentage of Hourly Rate (3 Decimals) |
Enter the desired percentage to be applied to the employee's Hourly Rate (as specified on the Employee Profile tab) to obtain the earnings for the hours posted to this premium code. This field is seven numeric characters in length with three decimal places. For example, 100% would be entered as 0001000, or 150% would be entered as 0001500, etc. If this premium code is only a flat amount and not based as a percentage of the employee’s rate per hour, enter zeroes in this field and enter a bonus amount in the Bonus in Dollars/Hour field below. |
| Bonus in Dollars/ Hour(3 Decimals) |
Enter the bonus amount per hour that is to be added to the employee’s Hourly Rate (as specified on the Employee Profile tab) to obtain a bonus earnings for the hours posted to this premium code. This field is seven numeric characters in length with three decimal places. For example, a bonus of $5.00 per hour would be keyed as 0005000. Payroll earnings are calculated as follows: (Employee Hourly Rate X Percentage of Hourly Rate X Number of Hours) + (Bonus in Dollars/Hr X Number of Hours) |
| Hours Deduction Code | Enter the code from the EARNDEDN table where the payroll labor hours are to be posted for this premium code. This earnings code will accumulate the hours worked for the premium code that this table represents. |
| Earnings Deduction Code |
Enter the code from the EARNDEDN table where the earnings for this premium code are to be posted. This earnings code will accumulate the earnings generated from this premium code. If the fields Percentage of Hourly Rate, Bonus in Dollar/Hour, Hours Deduction Code and Earnings Deduction Code are all blank or zero, this premium code is not valid in payroll. If it is desired to have a premium code to report only hours to the payroll system and have no earnings calculated, the Hours Deduction Code field should be completed and the Percentage of Hourly Rate, Bonus in Dollar/Hour and Earnings Deduction Code all set to blank or zero. |
| External Payroll Labor Code | Enter the labor code from the external payroll product (eg. Payroll Plus) that corresponds to the selected premium code. |
| Work Order Info | |
| Description on W/O Labor Hours Screen | The description of this premium code, as it will appear on the Time Card Entry screen when adding labor to a work order. |
| Use W/O Rate/ HR or Payroll Rate/ Hour (W/P) |
Determines whether to charge hours worked on an order based on the (P) Payroll Rate of the employee (as specified on the Hourly Rate field of the Employee Profile tab), or the (W) Work Order Rate/Hour (as specified on the Work Order Rate Per Hour field of the Service Information tab of the employee profile.) The answer in this field will be used as the base for calculations in the % of Employees Rate/HR and Add On Premium/Hour. |
| % of Employees Rate/ HR |
Enter the percentage of that should be applied to the rate per hour used on work orders (as specified in the Use W/O Rate/ HR or Payroll Rate/ Hour field above) to calculate the work order rate to be charged when the technicians' hours are posted. This field is seven numeric characters long and contains three decimals. For example, a rate of 100% would be entered as 0001000. If this premium code is only a flat amount and not based as a percentage of the employee’s rate per hour, enter zeroes in this field and enter a bonus amount in the next field (Add On Premium/Hour). |
| Add On Premium/ Hour |
Enter an additional flat charge to be added to the rate/hour specified in the Use W/O Rate/ HR or Payroll Rate/ Hour field above. This field is six numeric characters in length and contains two decimals. For example, an add on premium of $5.00 per hour would be keyed as 000500. The total charge for hours posted to a work order are calculated as follows: (W/O rate/hr X percentage of employees regular W/O rate X number of hours) + (add on premium/hr X number of hours). |
| Premium Code Valid Even If % and Add On are Both 0 (Y/N) |
If activated (Y), the selected premium code will be valid for posting labor hours to a work order, even if the % of Employees Rate/ HR and Add On Premium/ Hour fields are left blank (or 0). If this field is activated when the % of Employee’s Regular Rate and Add on Premium/Hour fields are both zero, this allows an alternate method to correctly record technician efficiency without affecting the General Ledger.For example, suppose technician 664 works 5 hours at 100% efficiency and you do not want to charge the customer, but the efficiency should remain at 100% for the technician. This can be handled in one of two ways:
|
| Type of Labor (R/O) | Allows you to specify what the selected premium code represents; either Regular hours (R) or Overtime hours (O). |
| % of Employees Cost/HR |
Indicate the percentage of the employee’s Hourly Rate (as specified on the Employee Profile tab) which should be used when costing the hours posted to a work order. For example, when a job is charged out at overtime rates, some dealers also pay the employee who works on the job overtime. Suppose a premium code which represents time and a half is defined in this table. When that code is used to post time to a work order, the employee should be costed out at time and a half. For that premium code definition, a percentage of 150% would be defined in this field. It would be entered as 0001500. |
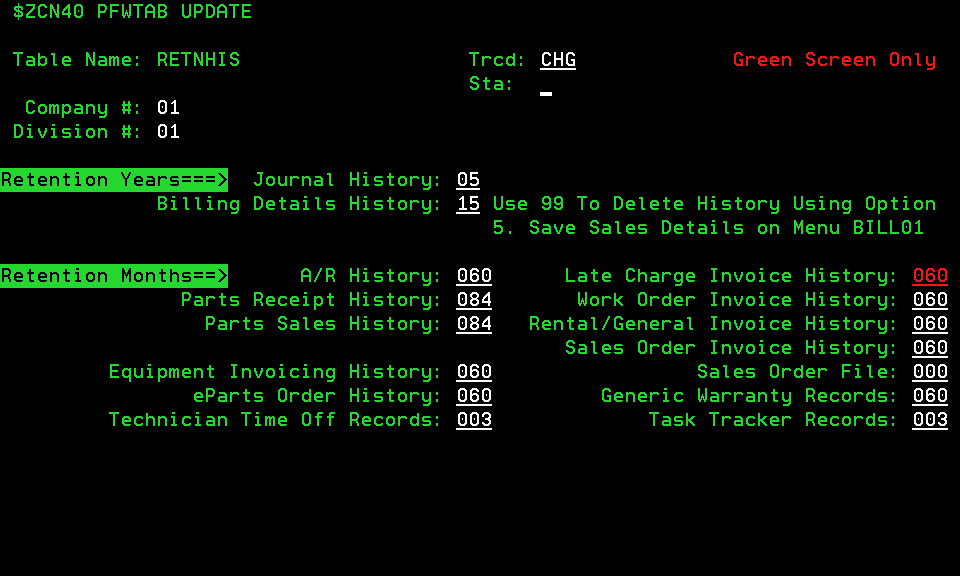
RETNHIS table
The RETNHIS table allows you to configure how much history is retained in the system when a purge of records is performed, either in months or years.
Purges happen automatically as part of the month end process.The following fields appear on the RETNHIS table:
| Field | Description | Main Files |
|---|---|---|
| Journal History | Enter the number of years of General Ledger journal and A/P history is to be kept on the system. This history is displayed in IntelliDealer on the Journal Details screen. You must have a minimum of 2 years entered up to a maximum of 15. Journal history that is older than the retention period will be removed during the General Ledger month end final. This setting is also used in the parts deletion logic so any part with receipt history that includes accrual entries is NOT deleted. See Parts Profile for more information on the parts deletion logic. | YTDJRL, OUTSTD, YTDIST, BANKREC |
| Billing Details History | Enter the number of years of billing details to be kept on the system. The minimum is 10 years with a maximum of 15.If you are on your own server and not on the hosted solution, you can enter 99 as an option. This will prevent all automatic removal of the billing details data and you will have to manually run the Save Sales Details option. Contact Client Services for more information. | MNBD* files including MNBDH, MNBDD, MNBDW, MNBDM, MNBDT, etc. |
| A/R History | The number of months to retain Accounts Receivable transaction history. The minimum value is 001 with a maximum of 180.Records are only removed during the first full database restructuring after the A/R month end process. | ARFILE, ARSTHH, ARSTHD |
| Late Charge Invoice History | The number of months to retain Late Charge invoice history. The minimum value is 001 with a maximum of 180. | MNBDH, MNBDD |
| Parts Receipt History | The number of months to retain Parts Receipts history. The minimum value is 001 with a maximum of 180. | PARTHIST receipt records as well as matching PURORD entries |
| Work Order Invoice History | The number of months to retain Work Order invoice history. The minimum value is 001 with a maximum of 180. | INVH* files for work order invoice history including INVHH, INVHD, etc. Multimedia and signature data is also removed |
| Parts Sales History | The number of months to retain Parts Sales history when a purge occurs. The minimum value is 001 with a maximum of 180. | PARTHIST sales records |
| Rental/ General Invoice History | The number of months to retain Rental/General Invoice. The minimum value is 001 with a maximum of 180. | INVH* files for general invoice history including INVHH, INVHD, etc. Multimedia and signature data is also removed |
| Sales Order Invoice History | The number of months to retain Sales Order (Parts) Invoice. The minimum value is 001 with a maximum of 180. | INVH* files for parts invoice history including INVHH, INVHD, etc. Multimedia and signature data is also removed |
| Equipment Invoicing History | The number of months to retain Equipment Invoicing history. The minimum value is 001 with a maximum of 180. | INVH* files for parts invoice history including INVHH, INVHD, etc. Multimedia and signature data is also removed |
| Sales Order File | The number of months a Sales Order should remain on the screen after it is completely filled and invoiced. A successful Database Reorganize causes the Sales Orders to drop from the screen once they have met the criteria specified in this field. VitalEdge recommends “00” for Sales Order File retention. The completed parts invoices are in Invoice History but this setting controls the active parts tickets in the open list. Having anything other than '00' here will leave parts tickets in the open list for at least one month after completion. | SALORD, SALDET, SALCOM files for active sales orders where all lines are complete and/or the ticket is invoiced with no remaining lines |
| eParts Order History | The number of months to retain eParts Order history when a purge occurs. The minimum value is 001 with a maximum of 180. | ODH, ODD, ODM, ODUSG |
| Generic Warranty Records | The number of months to retain Generic Warranty Records when a purge occurs. The minimum value is 001 with a maximum of 180.This field is only applicable for a discontinued legacy warranty system with is no longer supported will not be available in IntelliDealer. | WCCC, WCLA, WCLC, WCPA, WCPC, WCPD, WCPE, WCCA |
| Technician Time Off Records | The number of months to retain Technician Time Off records when a purge occurs. The minimum value is 001 with a maximum of 180. | EMPLTO |
| Task Tracker Records | The number of months to retain Task Tracker records when a purge occurs. The minimum value is 001 with a maximum of 180.Records are only removed during the first full database reorganize after the A/R month end process. | IMGPATH, CSD, TSK MEMDES records, TACOM, TAUSR, TAUSRT, TAHIS, TAHDR |
| Delivery Receipts History | The number of months to retain Delivery Receipts history, aka. Traffic. The minimum value is 001 with a maximum of 180. | CGIDR, IMGPATH |
| EFT File | The number of months to retain EFT files in the Integrated File System (IFS). The minimum value is 001 with a maximum of 012. | IFS folder ‘/lansaimgx/eft’ where lansaimg is generally used for onsite servers and lansaimgxxxx is used for dealers on the shared server, with xxxx being replaced by the library number |
| Positive Pay Files | The number of months to retain previously generated Positive Pay files in the Integrated File System (IFS). The minimum value is 001 with a maximum of 012. | IFS folder ‘/lansaimgx/bankrec’ where lansaimg is generally used for onsite servers and lansaimgxxxx is used for dealers on the shared server, with xxxx being replaced by the library number |
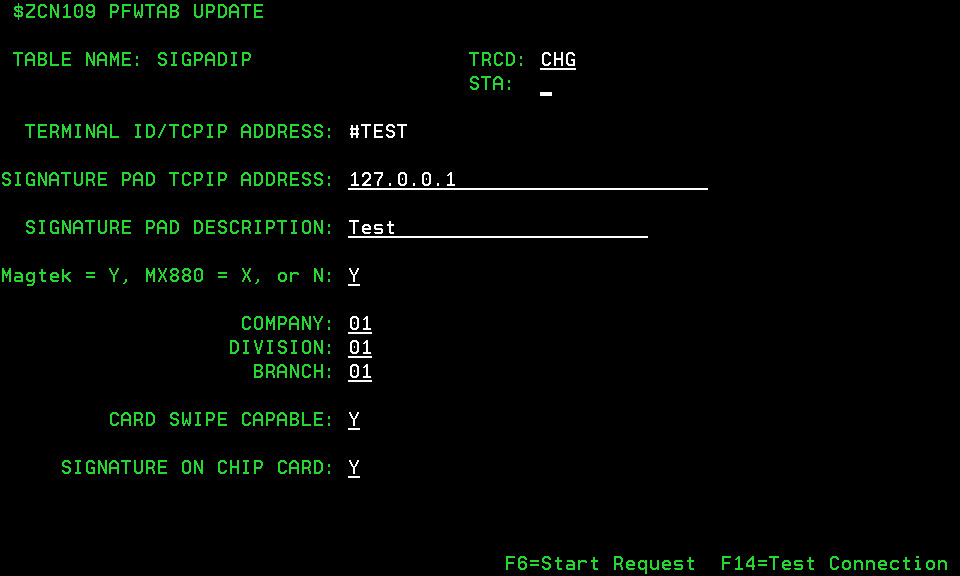
SIGPADIP table
The SIGPADIP table allows you to configure the signature device(s) used at your dealership.
To scroll through the different devices configured at your dealership, press the PgDown button on your keyboard.The following fields appear on the SIGPADIP table:
| Field | Description |
|---|---|
| Terminal ID/ TCPIP Address | The PC IP address or the IntelliDealer user ID of the operator who will be attaining the customer signature. In order to enter a Description and Company/Division/Branch for the selected Terminal ID, the value in this field must start with a #. The following rules will determine in a hyperlink will appear with IntelliDealer:
|
| Point-of-Sale TCPIP Address | The TCP/IP address of the PC to which the point-of-sale device is connected. Once an address has been entered in this field, you can test the connection by pressing F14. |
| Point-of-Sale Description | A description of the location of the point-of-sale device. |
| Magtek, MX880 or N | This field allows you to specify the type of point-of-sale device being used at the selected location; either a Magtek unit (Y), MX880 unit (X), or None (N). |
| Company/ Division/ Branch | The company/division/branch where the selected point-of-sale device is set up. In order to enter values for these fields, the value in the Terminal ID/ TCPIP Address field above must begin with a #. |
| Card Swipe Capable | Denotes whether the selected device can perform card swipe payments. |
| Signature On Chip Card | Denotes whether the user will be prompted for a signature when using a chip card. |
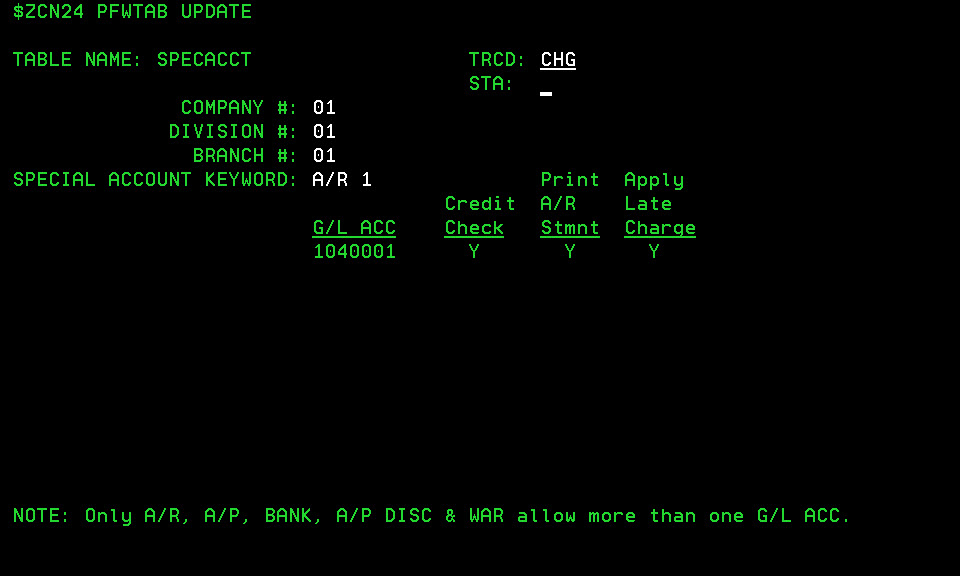
SPECACCT table
The SPECACCT table allows you to define Special General Ledger accounts in the system. These accounts are usually control accounts and therefore ones to which general journal entries would not normally be made. The General Ledger accounts are attached to a special keyword in the table to make identification easier.
SPECACCT definitions can be created at the Company, Division, or Branch level.It is not possible to add new keywords to the table, however you may define new G/L account numbers for a keyword. This is a password protected feature however, so if you want to add new G/L account numbers to the table or change the existing definitions, please contact VitalEdge support.The following fields appear on the SPECACCT table:
| Field | Description |
|---|---|
| Special Account Keyword | Specific account keywords have been programmed into the system at the Company, Division and Branch level. For definitions of each of the keywords defined for each level, see the Special Account Keyword tables below. |
| G/L Account | The general ledger account which corresponds to the selected keyword. This is the general ledger account to which entries of the type listed in the special account keyword field will be posted.For example, if the keyword is RET (Retained Earnings), the Retained Earnings General Ledger account number should be entered in this field. As such, make sure you have each of the appropriate general ledger accounts created in IntelliDealer before you begin to map keywords to accounts. |
The following Special Account Keywords must be defined at the Company level:
| Keyword | Description |
|---|---|
| RET | The retained earnings special account, which will apply to all divisions in the company. The G/L account associated to this keyword should be a Balance Sheet account (1) and an Asset (A) or Liability (L) account (as specified on the Account Profile screen in IntelliDealer). |
| BANK1/ BANK2/ BANK3 | The bank accounts from which Accounts Payable checks are issued and which can apply to any division in the company. The G/L accounts associated to these keywords should be Balance Sheet accounts (1) and an Asset (A) or Liability (L) account (as specified on the Account Profile screen in IntelliDealer). |
The following Special Account Keywords must be defined at the Division level:
| Keyword | Description |
|---|---|
| CLEARING | The system clearing account which is used, for example, for month end procedures and which applies to all branches within the division. The G/L account associated to this keyword should be a Balance Sheet account (1) and a Liability (L) account (as specified on the Account Profile screen in IntelliDealer). |
| PAYR | The bank account from which Payroll checks are issued and which applies to all branches in the division. The G/L account associated to this keyword should be a Balance Sheet account (1) and an Asset (A) account (as specified on the Account Profile screen in IntelliDealer). |
The following Special Account Keywords must be defined at the Branch level:
| Keyword | Description |
|---|---|
| A/P | The general ledger liability account for the selected branch, to which Accounts Payable entries are posted. The G/L account associated to this keyword should be a Balance Sheet account (1) and a Liability (L) account (as specified on the Account Profile screen in IntelliDealer). The Accounts Payable module in IntelliDealer maintains a sub ledger for entries made to this A/P account. |
| A/P DISC | The general ledger revenue account for the selected branch, to which Discounts on Accounts Payable invoices are posted. The G/L account associated to this keyword cannot be a Balance Sheet account (1) (as specified on the Account Profile screen in IntelliDealer). |
| A/R INT | The general ledger revenue account for the selected location, to which Late Charges on overdue Accounts Receivable invoices are posted. For example when late charges are calculated in the A/R Aging or A/R Statement run process. The G/L account associated to this keyword cannot be a Balance Sheet account (1) (as specified on the Account Profile screen), nor can it be an A/R 1, A/R 2 or A/R 3 account. |
| A/R 1, A/R 2, A/R 3 | The general ledger A/R Asset accounts for the selected branch, to which customer charges are posted. Up to ten (10) general ledger accounts can be defined for each of these keywords. These accounts can be used across all branches in the system. The G/L accounts associated to these keywords should be Balance Sheet accounts (1) and an Asset (A) or Liability (L) account (as specified on the Account Profile screen in IntelliDealer). When configuring the A/R 1, A/R 2 and A/R 3 keywords, the following switches are also displayed:Credit Check: If this switch is activated along with the Special A/R Credit Check switch in the CMBR1 table, whenever the selected account is posted to and the credit limit or transaction limit is surpassed, the user will be forced to the A/R Agency tab to authorize the transaction. Print A/R Stmnt: If activated (Y), will include the selected account when printing A/R statements. Apply Late Charges: If activated (Y), will include the selected account when calculating late charges. |
| CASH | The Cash On Hand account or Bank Account to which the offset entries for payments to customers' Account Receivable accounts are posted. The G/L account associated to this keyword should be a Balance Sheet account (1) and an Asset (A) account (as specified on the Account Profile screen in IntelliDealer). |
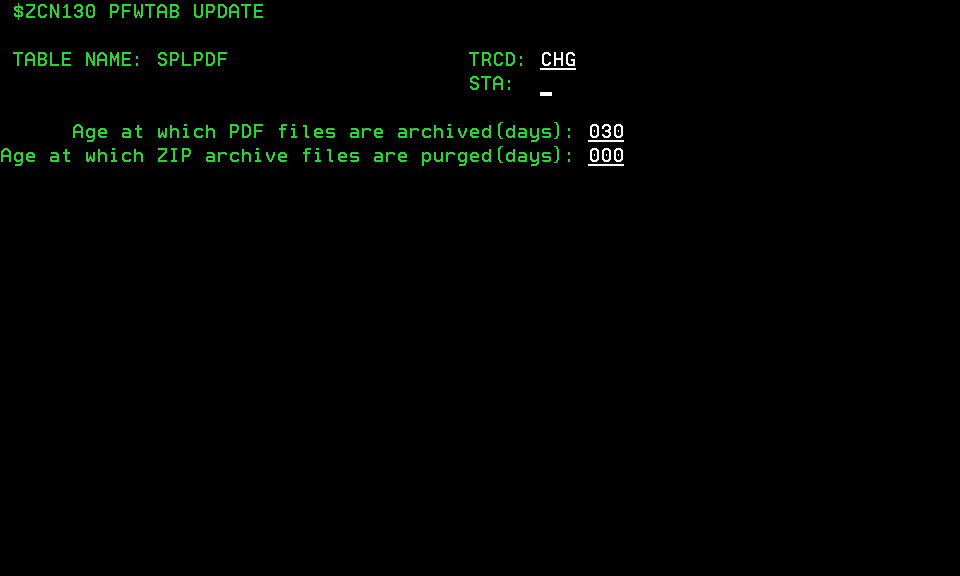
SPLPDF table
The SPLPDF table allows you to configure the retention period for PDF files created in IntelliDealer.
The following fields appear in the SPLPDF table:
| Field | Description |
|---|---|
| Age at which PDF files are archived (days) | The number of days after the creation of a PDF at which time it will be archived into a ZIP file. |
| Age at which ZIP archive files are purged (days) |
The number of days after a PDF file is archived into a ZIP file, at which time it will be purged from the system. Enter 000 in this field if you do not what the purge routine to occur (thereby maintaining the ZIP archive files in your system.) The default value for this field for dealers on the hosted solution is 90 days. The default value for this field for standalone dealers is 0. |
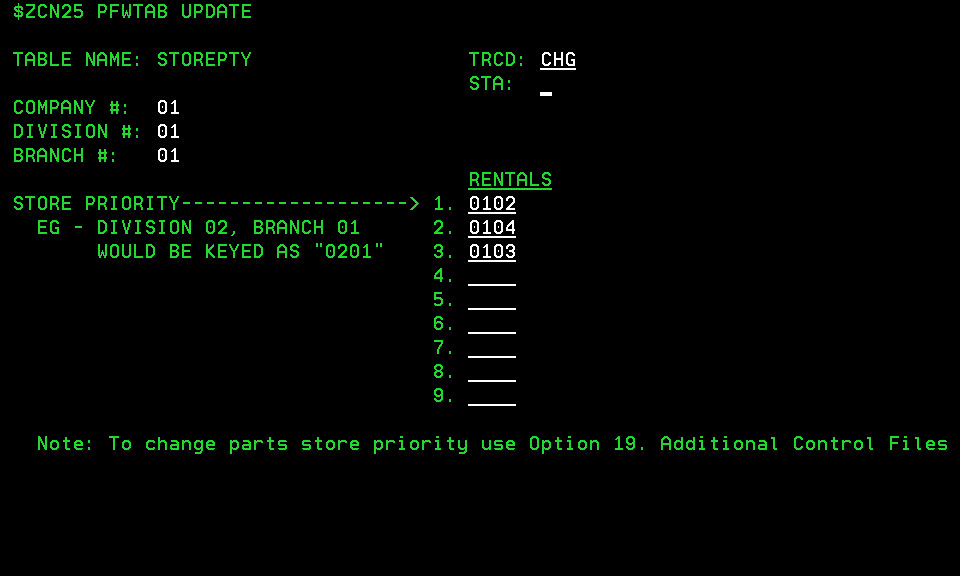
STOREPTY table
The STOREPTY table allows you to configure the order in which the system should search for rental units when the desired unit is not currently available at your branch.
The following fields appear on the STOREPTY table:
| Field | Description |
|---|---|
| Store Priority (1-9) |
The division and branch locations, in order, that the selected branch should check when a rental unit is unavailable. The first digits in this field represent the division, and the last two digits represent the branch. For example, if division 01 Branch 04 should be checked first for rental units and then Division 02 Branch 09, line 1 of this field should be "0104" and line 2 should be "0209". |

TMNTAB table
The TMNTAB table allows you to configure and add the workstation sessions that will be used at your dealership to access IntelliDealer. Only display sessions are defined in this table; printers are not configured here.
Only display sessions, and not display devices, are defined in this table. A display device can have multiple display sessions and each one needs to be entered into this table.To scroll through each session ID individually, press PgDn or PgUp on your keyboard. To locate a specific session ID, press F6 and enter the exact session ID in the Start Request window that appears.Each session ID is associated to a default company, division and branch (CO/DIV/BR). When a user logs into a session, he/she will automatically be working in that CO/DIV/BR. Authorized users can access another company, division or branch in the system by changing their location in IntelliDealer using the My Profile screen.
When a session ID is added to this table, the company, division and branch (CO/DIV/BR) currently on the screen will be the default location for the added session. If at least one session is already configured for the desired CO/DIV/BR combination, locate it first then type ADD in the transaction code field (TRCD) to add the new session. If you want to add a session to a CO/DIV/BR combination that does not already have a session configured for it, contact VitalEdge for a password to access the CO/DIV/BR fields.
When a session is configured on a PC or terminal, this configuration information is relayed to the IBM server. In that case, the IBM server is aware that the session exists, but for the session to be fully operational, it must also be defined in TMNTAB. A user can type “CHKTMN” on any command line and view: a) all session ID codes that are already in TMNTAB, but have not been configured for the IBM server, or b) all sessions configured for the IBM server but not defined in TMNTAB. This helps the user know which session ID codes are available.
There are some session IDs which should not be used. Please refer to the list in the Terminal ID/ User ID field below for complete details.
VitalEdgerecommends using logical session ID codes in order to better keep track of each session. For example, branch 1 can use AA through AZ, branch 2 can use BB through BZ, etc.The following fields appear on the TMNTAB table:
| Field | Description |
|---|---|
| Terminal ID/ User ID | The session ID associated to the terminal or user. The following session IDs should not be used:S1 - may indicate a diskette drive F1 - may indicate a hard drive F2 - may indicate a hard drive T1 - may indicate a tape drive T2 - may indicate a tape drive TC - may indicate a tape drive P* - anything starting with a P should be reserved for printers Q* - should be avoided so as not to be confused with IBM objects V* - anything starting with a V should be reserved for VitalEdge dial in sessions W1 - reserved for the system console $$ or @@ plus must not start with a numeric and cannot contain a blank or any of the following characters: &, *, %, =, +Session IDs containing a period (.) are assigned to each user in IntelliDealer. |
| Company/ Division/ Branch | The company, division and branch the terminal ID will be assigned to. In change mode, these fields are only accessible with a password. Contact VitalEdge support for the password. |
| Point-of-Sale Device Attached (Y/N) | This switch applies to the green screen application only and will not affect IntelliDealer functionality. Is there a Point-of-Sale device attached to this terminal ID? If so, you can save customer signatures by having them sign the point-of-sale device. The Rental Counter module allows for the capture of a signature image that can optionally print on the contract and/or invoice. The print parameters that are stored by a workstation have new values that are used to indicate whether the signature should print on the contract or invoice. The F20 key in the transaction maintenance—used to invoke the signature capture process—will show only if this switch is set to Y. Once an image has been captured for any one particular contract, the F20 key will no longer be available when that contract is maintained. To set up a terminal to view signatures, from the CNFI01 Menu (CNFIGPFW) select Additional Control Files-->Links Setup-->Terminal Maintenance for Multimedia Interface. When in Sales Order Invoice History, press F14 to view the signature file and a description of the signature. When the invoice is sent to an IPDS laser printer, the signature automatically prints. |
| Server Drive Letter | This switch applies to the green screen application only and will not affect IntelliDealer functionality. If you are using the point-of-sale device, key in the IBM server (formerly AS/400) drive letter where the signature files will be stored for this terminal. Usually, the “I” drive on the IBM server is used to store the files. |
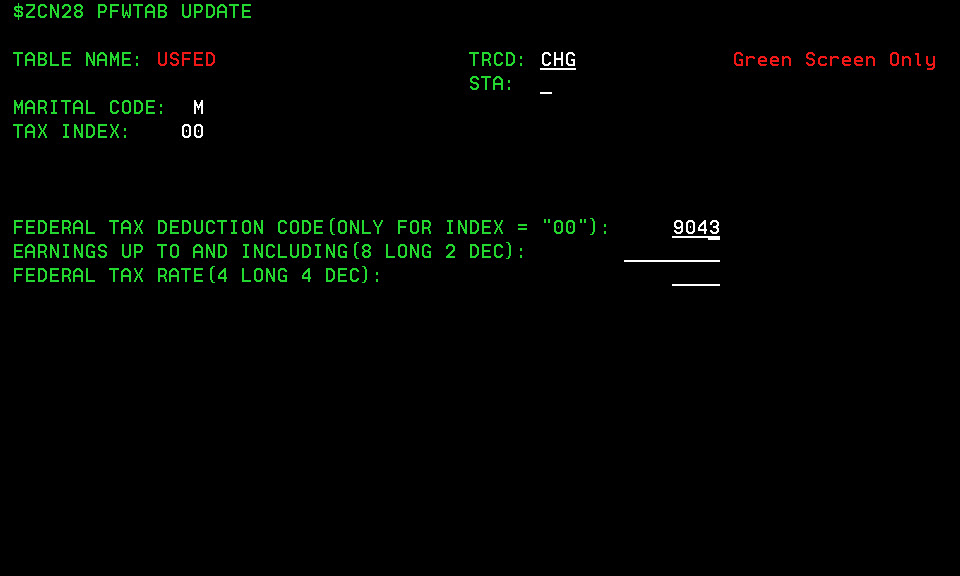
USFED table
The USFED table allows you to configure U.S. federal income taxes. It should be updated annually using the annual payroll period tax tables for single and married employees.
The following fields appear on the USFED table:
| Field | Description |
|---|---|
| Marital Code |
The marital code associated to the selected income tax configurations. Valid marital codes are configured on the Marital Status screen in IntelliDealer. |
| Tax Index |
The tax index that the current record represents. Tax indexes start at 00 and are incremented by one for each subsequent table entry. Tax indexes starting with 00 are required for each marital code that exists in the system. The 00 record must have only the Federal Tax Deduction Code field filled in (the Earnings Up To And Including and Federal Tax Ratefields should be left blank.) Subsequent table records (starting with 01) must have only the Earnings Up To And Including and Federal Tax Rate fields filled in (the Federal Tax Deduction Code field should be left blank.) There must be no gaps between the tax index codes that are used. |
| Federal Tax Deduction Code (Used only for Tax Index "00") |
The EARNDEDN code (as configured in the EARNDEDN table) where the federal tax should be posted. Tax index code 00 is reserved for the EARNDEDN code that represents federal tax. This field should not need to be completed for any other record. |
| Earnings Up To and Including (8 Long 2 Dec) | This field will only be accessible for tax indexes other than 00. All taxable earnings up to and including the amount entered in this field are subject to tax at the rate entered in the following field (Federal Tax Rate). The amount keyed into this field must be higher than the previous table record. For example, if tax index record 01 has 250000 in this field, then tax index record 02 must have an amount greater than 250000. The last table record for the marital status should have an amount of 99999999 so that all remaining earnings will be included. This field is 8 numeric characters long and contains 2 decimals. For example, $25,000.00 would be entered as 02500000. |
| Federal Tax Rate (4 Long 2 Dec) |
Enter the tax rate percentage that applies to the earnings range from the previous field (Earnings Up To And Including). This field is 4 numeric characters long and contains 2 decimals. For example, an amount of 25.65% would be entered as 2565. |
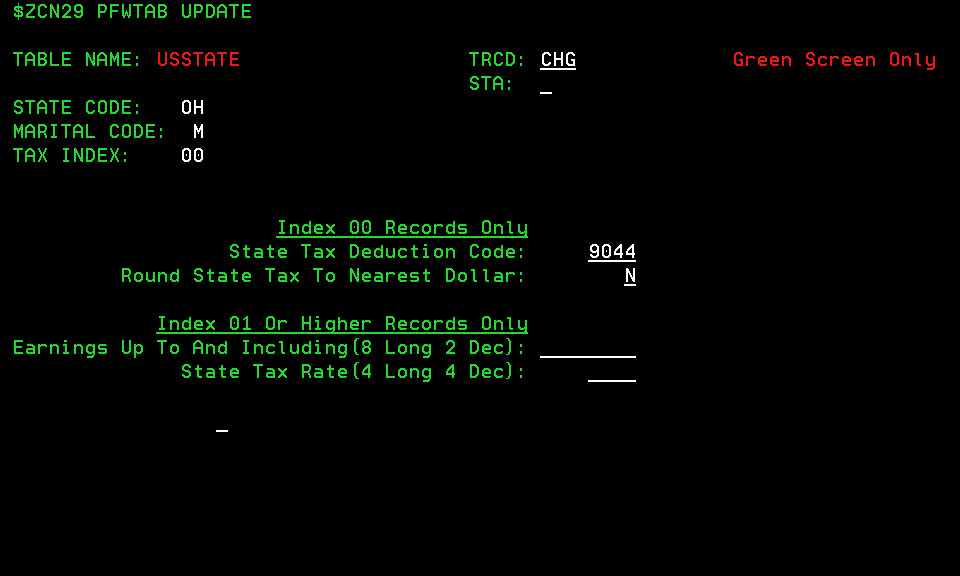
USSTATE
The USSTATE table allows you to configure U.S. state income taxes. It should be updated annually using the payroll period tax tables for single and married employees.
The following fields appear on the USSTATE table:
| Field | Description |
|---|---|
| State Code | The two letter state code that the selected record represents. |
| Marital Code |
The marital code associated to the selected income tax configurations. Valid marital codes are configured on the Marital Status screen in IntelliDealer. |
| Tax Index |
The tax index that the current record represents. Tax indexes start at 00 and are incremented by one for each subsequent table entry. Tax indexes starting with 00 are required for each marital code that exists in the system. The 00 record must have only the State Tax Deduction Code and Round State Tax to the Nearest Dollar fields filled in (the Earnings Up To And Including and State Tax Ratefields should be left blank.) Subsequent table records (starting with 01) must have only the Earnings Up To And Including and State Tax Rate fields filled in (the State Tax Deduction Code field should be left blank.) There must be no gaps between the tax index codes that are used. |
| State Tax Deduction Code |
The EARNDEDN code (as configured in the EARNDEDN table) where the state tax should be posted. Tax index code 00 is reserved for the EARNDEDN code that represents state tax. This field should not need to be completed for any other record. |
| Round State Tax To the Nearest Dollar (Y/N) | If activated (Y), the state tax will be rounded to the nearest dollar. |
| Earnings Up To and Including (8 Long 2 Dec) | This field will only be accessible for tax indexes other than 00. All taxable earnings up to and including the amount entered in this field are subject to tax at the rate entered in the following field (State Tax Rate). The amount keyed into this field must be higher than the previous table record. For example, if tax index record 01 has 250000 in this field, then tax index record 02 must have an amount greater than 250000. The last table record for the marital status should have an amount of 99999999 so that all remaining earnings will be included. This field is 8 numeric characters long and contains 2 decimals. For example, $25,000.00 would be entered as 02500000. |
| State Tax Rate (4 Long 2 Dec) |
Enter the tax rate percentage that applies to the earnings range from the previous field (Earnings Up To And Including). This field is 4 numeric characters long and contains 2 decimals. For example, an amount of 25.65% would be entered as 2565. |
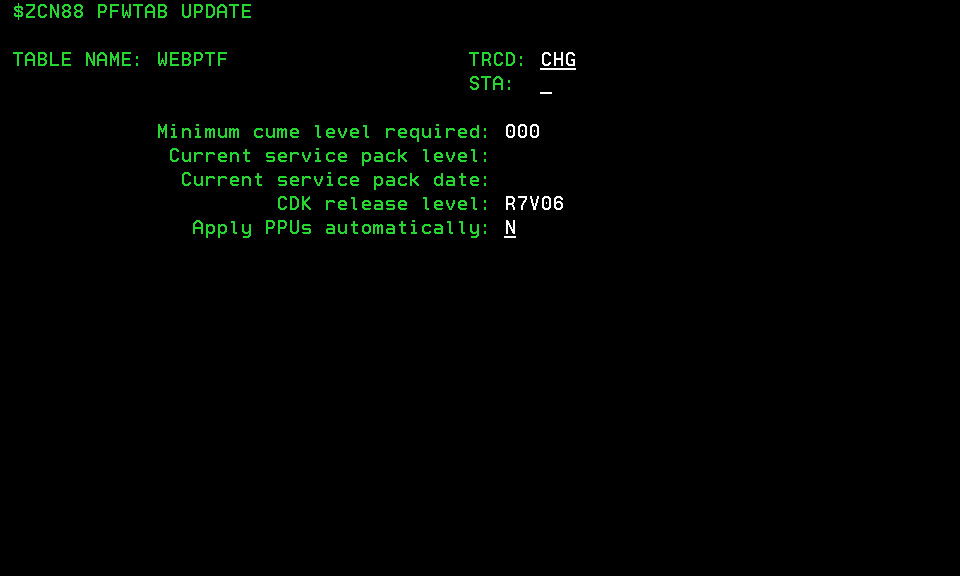
WEBPTF table
The WEBPTF table allows you to check the status of IntelliDealer Product Updates (PPU's) downloaded from the VitalEdge website to your dealership's system. PPU's are produced periodically and if your dealership downloads them through the internet, you will be updated when an update has been released. The updates will then be downloaded and applied during the IntelliDealer Database procedure (depending on the settings).
PPU's are minor improvements and enhancements to the IntelliDealer software and should not be confused with a new release of the software (usually produced yearly).The following fields appear on the WEBPTF table:
| Field | Description |
|---|---|
| Minimum CUME Level Required | There are two ways to load PPUs onto your system: from a CD produced by VitalEdge or by downloading the PPUs from VitalEdge's website. There is some preparation which must be undertaken by VitalEdge before a site can begin to download PPUs from the VitalEdge website. One of the steps that must be in place is to ensure that the dealer has received and installed a minimum level of PPUs already. This field displays the minimum PPU level required before the dealership can begin to download the most recent PPU. This field is updated automatically when a new release of the IntelliDealer software is loaded to your system (usually annually). |
| Current Service Pack Level | Each PPU released byVitalEdge is given an alphabetical code. This field displays the code of the most recent PPU installed on your system and is updated automatically after each new PPU installation. |
| Current Service Pack Date | The date on which the most recent PPU was produced by VitalEdge. This field will be updated automatically after each new PPU installation. |
| IntelliDealer Release Level | The current level of the IntelliDealer currently installed on your system. This field will be updated automatically when a new version of IntelliDealer is loaded to your system (usually annually). |
| Apply PPUs Automatically | This switch is used to specify whether received PPUs are applied automatically during the IntelliDealer Database procedure, or whether a prompt regarding the PPU will appear before the Database is run. By activating this switch, your dealership will be accepting an automatic process. As such, you should confirm testing and implementation requirements. VitalEdge is released from any claims whatsoever. |
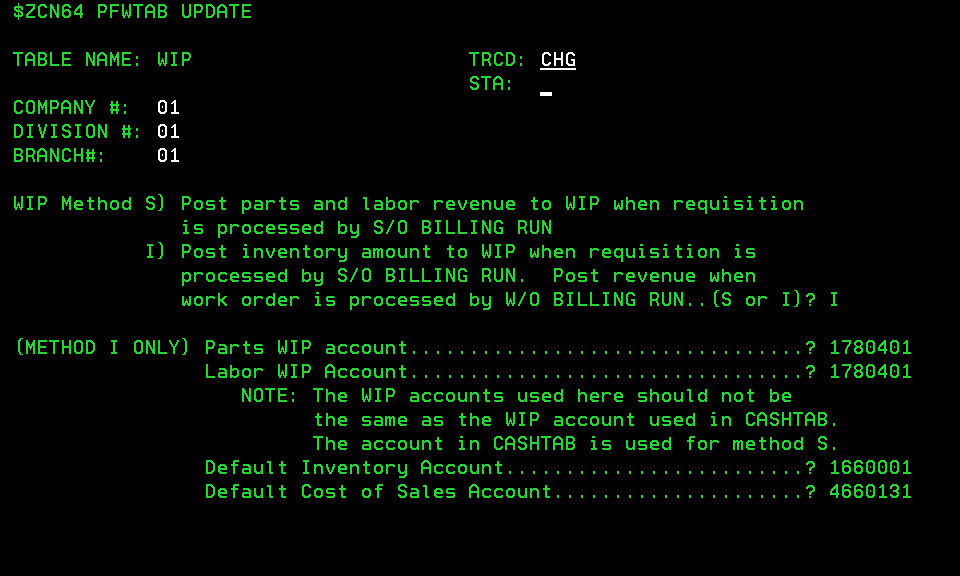
WIP table
The WIP table allows you to configure the Work-In-Process (WIP) method used by your organization. There are two methods. The first method (method S) recognizes revenue on the next billing run after a requisition for parts or labor is opened. The other method (method I) recognizes revenue only when the work order is closed.
For a sample of the General Ledger entries that are made with each WIP method, see the Sample General Ledger Entries section after the following table.The following fields appear on the WIP table:
| Field | Description |
|---|---|
WIP Method (S/I) In IntelliDealer 'I' now designates cost. 'S' now designates selling price. | Allows you to specify the Work-In-Process method to use at your dealership; either S or I:
Although there are only 2 ways to calculate WIP, a third method to analyze WIP (WIP Balancing) is available on the |
| (Method I Only) Parts WIP Account | Enter the general ledger account into which WIP Parts should be posted. This account will be debited when parts are sold to a work order. The WIP account used here should not be the same as the WIP account used in the Work Orders - Work In Process ACCT field in the CASHTAB table. The account in CASHTAB is used for method S or, (when WIP method I is being used) for non-costing entries such as Freight. Non-costing entries for method I are valued at selling price. |
| (Method I Only) Labor WIP Account | Enter the general ledger account into which WIP Labor should be posted. This account will be debited when labor is sold to a work order. The WIP account used here should not be the same as the WIP account used in the Work Orders - Work In Process ACCT field in the CASHTAB table. The account in CASHTAB is used for method S or, (when WIP method I is being used) for non-costing entries such as Freight. Non-costing entries for method I are valued at selling price. |
| Default Inventory Account | The account defined in this field is used if a particular chain of events occur, in the following order:
When the billing run is performed, there is no longer an Inventory account defined on the Sale account. Therefore, the account defined in this field will be used. It will be credited for the value of the part (or labor) posted to the work order. Enter the Inventory G/L account which should be used in the event that one is not available for a part or labor sale account, after that account has already been used to post amounts to a work order. |
| Default Cost of Sales Account | The account defined in this field is used if a particular chain of events occur, in the following order:
When the billing run is performed, there is no longer a Cost of Sales account defined on the Sale account. Therefore, the account defined in this field will be used. It will be debited for the value of the part (or labor) posted to the work order. Enter the Cost of Sales G/L account which should be used in the event that one is not available for a part or labor sale account, after that account has already been used to post amounts to a work order |
Sample General Ledger Entries
Sample Data:
Part Cost: $8.00
Part Sell: $10.00
WIP method S (Revenue recognized when the requisition is processed through a billing run):
- Part requisitioned to work order, billing run performed:
DR WIP $10.00
DR Parts Cost of Sales $8.00
CR Parts Revenue $10.00
CR Parts Inventory $8.00 - Work Order closed, billing run performed:
DR Accounts Receivable $10.00
CR WIP $10.00
WIP method I (Revenue not recognized until the work order is closed):
- Part requisitioned to work order, billing run performed:
DR WIP $8.00
CR Parts Inventory $8.00 - Work order closed, billing run performed:
DR Parts Cost of Sales $8.00
DR Accounts Receivable $8.00
CR WIP $8.00
CR Parts Revenue $10.00
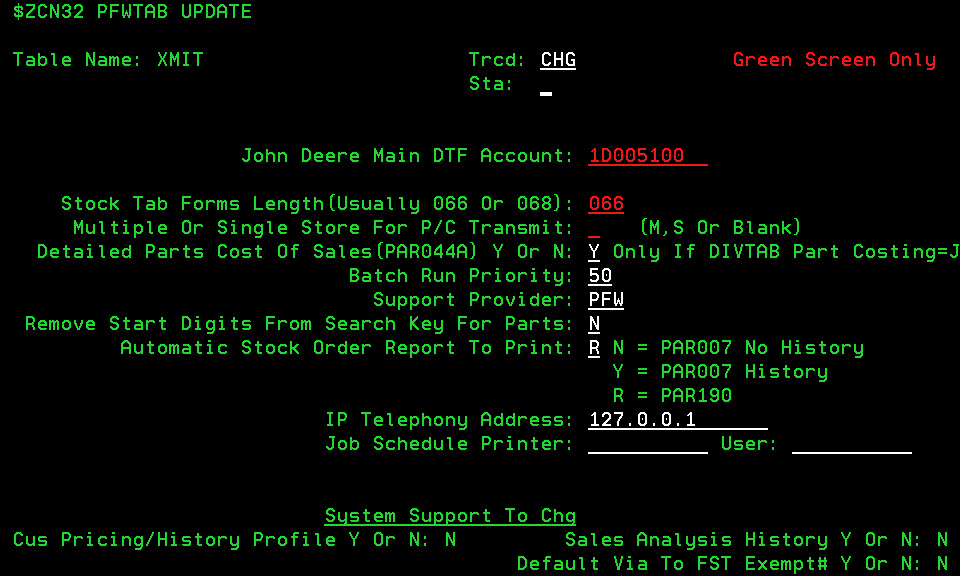
XMIT table
The XMIT table allows you to configure a variety of settings for your system, primarily those involved in the transmission of data between IntelliDealer and John Deere.
The following fields appear on the XMIT table:
| Field | Description |
|---|---|
| John Deere Main DTF Account |
The dealer number assigned to your branch by Deere, which is required to transmit data between Deere and your system. The dealer number in this field should be entered with 00 in positions 3 and 4. For example if Deere provides "010641" as the dealer number, the value in this field should be keyed as 01000641 |
| Stock Tab Forms Length (Usually 066 or 068) | This field is used for the green screen application only and will not affect IntelliDealer functionality. It will also be removed at a future date. Enter the length of your stock tab forms, which will be 66 or 68 lines per page. This value is usually set to 66 lines per page. Forms which are 8 ½ x 11 or 11 x 14 should be set to 66 lines per page. The 68 lines per page is reserved for the lined stock paper less than 11 inches long. |
| Multiple or Single Store for P/C Transmit | This field is for Deere dealers only and will be removed at a future date. This field allows you to specify the number of PCs that will be communicating with Deere; either a Single store (S), or Multiple locations (M). |
| Detailed Parts Cost of Sales (PAR044A) (Y/N) | This field is only used if the Parts Costing - JRNL or Detail (J/D) switch in the DIVTAB table is set to J (in which case the PAR044 report is produced during the parts billing run; if the switch is set to D, the PAR044 report is not generated.) If activated (Y), a detailed version of the Parts Cost of Sales report (PAR044A) will be produced during the parts billing run in addition to PAR044. The PAR044A report includes the branch, invoice number, customer number, part number, sale quantities, etc. VitalEdge recommends that the Parts Costing - JRNL or Detail (J/D) switch in the DIVTAB table is set to D so that the PAR127 report is produced during the parts billing run. The PAR127 report provides full information on part sales, descriptions, G/L account allocations, percentages and invoice information. |
| Batch Run Priority |
This field is used to set the run priority for all batch jobs on the IBM server. The run priority is a method that the IBM server utilizes to rank the jobs being submitted. The lower the number, the higher the priority. The batch jobs on the IntelliDealer system include reports, billing runs, etc. VitalEdge recommends a minimum setting of 25 in this field. This allows the interactive jobs, which have a system-defined priority of 20, to be allotted more processing power than the batch jobs. Most of the daily functions utilized in the VitalEdge system such as invoicing, history inquiries, etc. are interactive jobs. |
| Support Provider | This field indicates who is providing support for IntelliDealer. The value entered in this field will appear in various error messages throughout the system. |
| Remove Start Digits From Search Key for Parts (Y/N) |
A start digit is often placed on parts from a certain vendor when that vendor’s price tape is loaded to the system. This is done to avoid duplicate part numbers in IntelliDealer. This field refers to adding parts from the Master Price file to the Part Master file and whether the search key found on each part will contain the vendor’s start digit. If activated (Y), the start digit will be removed from the part number before the part number's search key is populated (thereby allowing the user to search for the part without entering the start digit.) If deactivated (N), the start digit will not be removed, forcing the user to enter the full part number when searching for the part. If the Parts Search By Part#, Desc or Both field in the CMBR1 table is set to P and this switch is activated, the search key for parts added to the system via a price tape will use the first 10 characters of the part number, after the start digits are removed. |
| Automatic Stock Order Report to Print (Y/N/R) | The value entered in this field will determine the report that is generated whenever an Automatic Stock Order is generated at your dealership; either the PAR007 report with history (Y), the PAR007 report without history (N), or the PAR190 report (R). |
| IP Telephony Address |
This field is where you store the IP address of your VoIP telephone server used in conjunction with feature numbers 6161 (VoIPLink- Cisco), 6167 (VoIPLink- Nortel). If licensed, these ‘Click to Call’ hyperlink functions are activated using the Access Click To Call security switch in security system 995 in IntelliDealer. |
| Job Schedule Printer/ User |
This field is used when generating the following reports from a batch job: PAR128Z, PAR128D, PAR128I, PAR128R, PAR128S, PAR132, AMAX reports, XMITDTRN, and SUBOTH. If a Printer ID is entered, the system will send the reports to the corresponding printer. If a User ID is entered, the reports will be generated under the corresponding User ID. If this field is left blank, the system will send the reports to the default iSeries printer. |
| System Support To Chg | The fields in this section are no longer used and will be removed at a future date. |